


BACKING UP AND RETRIEVING FILES
52
MY CLOUD USER MANUAL
3. Click
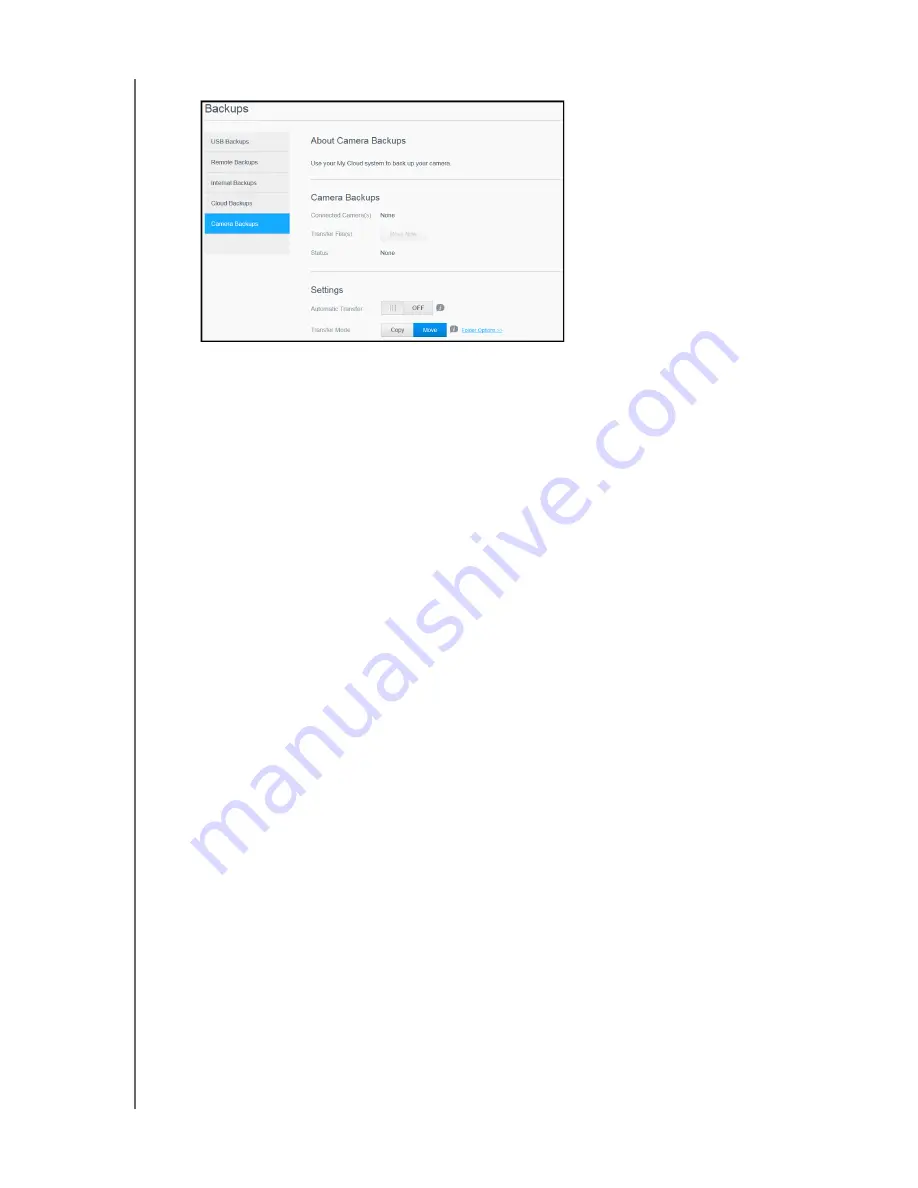
Camera Backups
, if not already selected.
4. Ensure that the Connected Camera(s) area identifies your camera.
5. In the Settings area, enter the following information to backup the data on your camera:
Automatic Transfer
: Click the toggle button to automatically transfer data from a
camera that is connected to the My Cloud device.
Transfer Mode
: Select how you’d like the camera data to be transferred. Options are:
-
Copy
: Duplicates the information from your camera to the My Cloud device. This will leave
the original data on your camera, OR
-
Move
: Transfers the files on your camera to the My Cloud device, deleting the files from your
camera.
Folder Options
: Select this option to identify a destination for the transferred camera
files. On the Camera Folder Options screen:
-
Transfer Folder
: Click
Browse
to enter the location on your device where you’d like to trans-
fer your data, then click
OK
.
-
Folder Name:
Select a Folder Name type from the pull-down menu. If you select Custom
Folder Name, enter a folder name in the Enter Folder Name field.
Click
Save
.
6. In the Transfer File(s) field, click
Copy/Move Now
to begin the file transfer, if Automatic
Transfer is off.
7. Once complete, the Status field indicates that the backup is complete for the connected
device and the day, date, and time of the completed download.


