CMOS SETUP
Most computer systems provide a CMOS setup program that gives
you access to information regarding your system configuration. Refer
to your system manual for CMOS setup instructions.
Note: Each BIOS is different. The information supplied here is not
meant to be followed step-by-step; it is provided as a guideline. Consult
your system manual for details.
Before installing EZ-Drive, go into your CMOS setup and select the
hard drive type option.
The following hard drive types are usually offered in CMOS: auto
config, predefined, and user defined.
Auto Config Drive Type
Western Digital recommends selecting the auto config drive type. The
auto config drive type automatically sets up the Western Digital hard
drive parameters. If you encounter problems using auto config, try
selecting Type 01.
If you select auto config and have a translating BIOS, EZ-Drive will
not install. You can, however, use EZ-Drive to partition and format
your hard drive.
Note: Even if your BIOS correctly detects the parameters, this doesn’t
mean that the BIOS can translate those parameters. If you are in doubt,
we recommend contacting your system or BIOS manufacturer.
Predefined Drive Type
If you do not have the auto config drive type or if you encounter
problems after selecting auto config, select the Type 01 drive type.
Selecting Type 01 ensures that EZ-Drive will install on your hard
drive.
User Defined Drive Type
Select user defined if your CMOS Setup does not offer auto config or
Type 01. If you select user defined, you must enter
1023x16x63
for
your drive parameters.
USING EZ-DRIVE SOFTWARE
Follow these instructions to partition and format the new hard drive.
If your system does not support the full capacity of your hard drive,
EZ-Drive installs special code in the boot sector of the hard drive to
overcome the BIOS limitations.
Note: The steps outlined in this section represent a typical installation.
You installation may vary.
If your system does support the full capacity of your hard drive,
EZ-Drive will only partition and format your hard drive. It will not
install code on your boot sector.
CAUTION: Installing EZ-Drive on any drive that contains software
and data will result in the erasure of all software and data on that
drive.
1. After you complete CMOS setup, insert a bootable DOS disk or
Windows 95 startup disk in drive A.
2. Press
CTRL+ALT+DEL
to reboot your system.
3. Insert the EZ-Drive disk in drive A. At the A: prompt, type
ez
and
press
ENTER
.
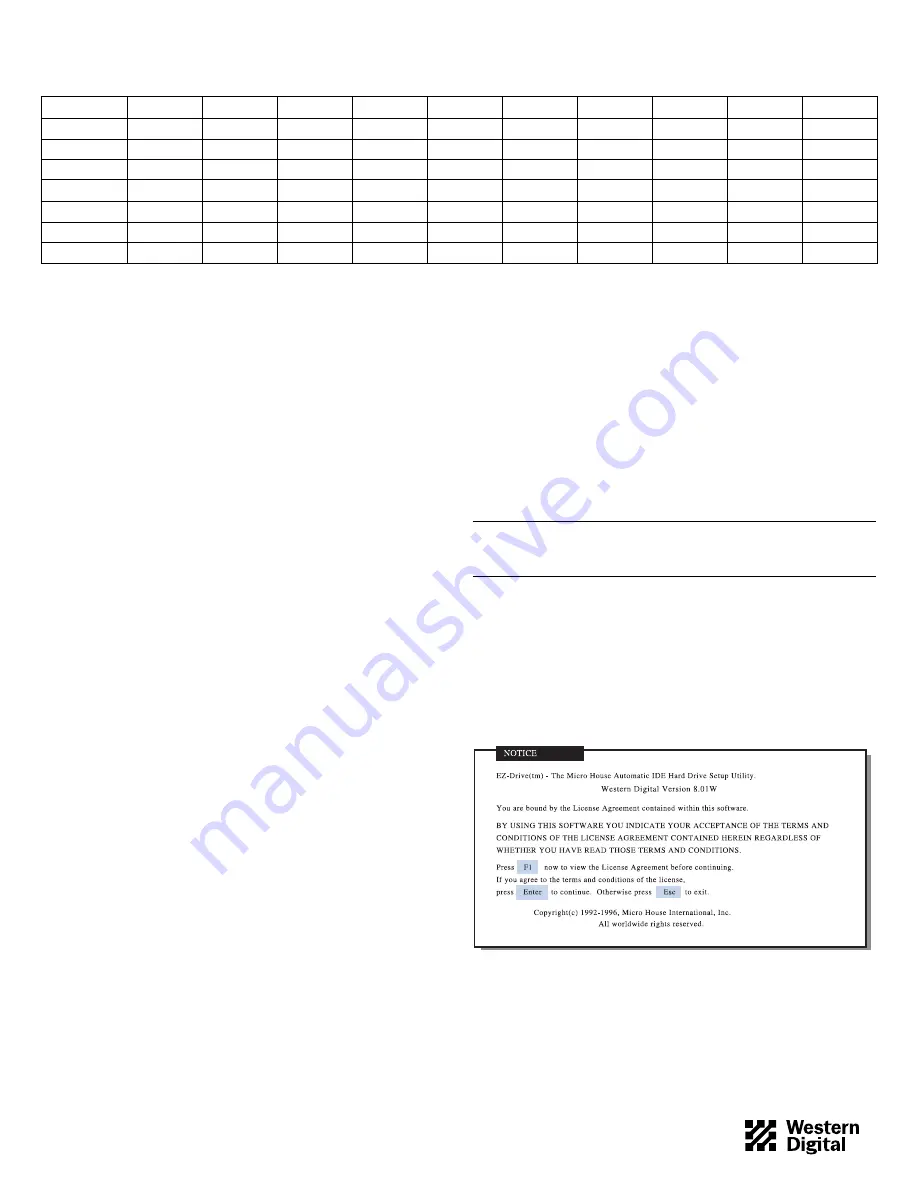
4. The Micro House EZ-Drive license agreement displays.
Press
ENTER
to start the installation.
DRIVE
AC2540
AC2635
AC2700
AC2850
AC21000
AC31000
AC11200
AC21200
AC31200
AC21600
Capacity (MB)
540.8
639.9
730.8
853.6
1083.8
1083.8
1281.9
1281.9
1281.9
1624.6
CMOS (MB)
515
610
696
814
1033
1033
1222
1222
1222
1549
CHKDSK (MB)
540.8
639.9
730.8
853.6
1083.8
1083.8
1281.9
1281.9
1281.9
1624.6
DRIVE
AC31600
AC22000
AC22100
AC32100
AC22500
AC32500
AC33100
AC33200
AC34000
Capacity (MB)
1624.6
2000.3
2111.8
2111.8
2559.8
2559.8
3166.7
3249.3
4000.7
CMOS (MB)
1549
1907
2035
2035
2441
2441
3020
3098
3815
CHKDSK (MB)
1624.6
2000.3
2111.8
2111.8
2559.8
2559.8
3166.7
3249.3
4000.7
Table 1. CMOS and CHKDSK Megabytes
79-850080-000 S0220 3-97
2


