


4
Ma nu ten zio ne
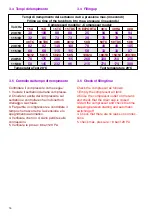
4.1 Manutenzione periodica
I
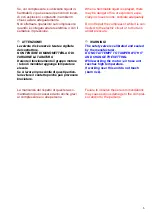
AT TEN ZIO NE!
Tut te le ope ra zio ni che se guo no deb bo no
es se re ese gui te esclu si va men te da per so -
na le spe cia liz za to.
4
Main te nan ce
4.1 Periodic main te nan ce
I
WAR NING!
All fol low ing op era tions, must be done by
a spe cial ised per son nel.
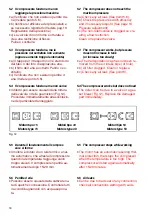
15
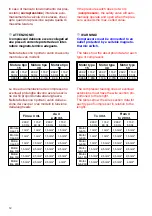
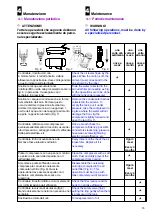
una
vol ta alla
set ti ma na
once a
week
una
vol ta al
mese
once a
month
una
vol ta
all’anno
once a
year
Con trol la re, il li vel lo dell’ olio.
A mo to re fer mo il cor ret to li vel lo, vi si bi le
at tra ver so l’ap po si ta spia, deve cor ri spon de re
a quel lo in di ca to sul la tar ghet ta
Check the oil le vel shown by the
glass. When the mo tor is off, the
oil le vel must cor re spond to the
one shown by the la bel
*
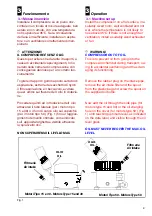
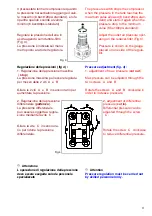
Sca ri ca re l’ac qua ac cu mu la ta nel
ri dut to re/fil tro usci ta aria pro ce den do come in
fig.6 : (ope ra zio ne da ese gui re con il
ser ba toio in pres sio ne)
Drain the wa ter col lected in the
air outlet fil ter pro cee ding as Fig.
6: (the ope ra tions are to be done
with the tank un der pres su re)
*
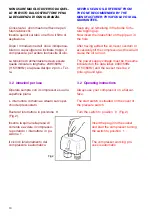
Sca ri ca re l’ ac qua di con den sa che si for ma
nel ser ba toio dell’ aria. Per fare que sto
oc cor re met te re in pres sio ne il ser ba toio,
por ta re il com pres so re in un luo go dove l’
usci ta dell’ ac qua non dan neg gi il pa vi men to,
e apri re l’ ap po si to ru bi net to (Fig. 7).
Re mo ve the con den sa te that has
col lected in the air tank. To
empty the tank, put it un der
pres su re, take the com pres sor to
a pla ce whe re the wa ter will not
da ma ge the flo or, tip the
com pres sor sli ghtly forward and
open the tap (Fig. 7).
*
Con trol la re l’ef fi cien za del com pres so re:
even tua le al len ta men to di rac cor di, usu ra dei
tubi di pres sio ne, ser rag gio del le viti, ef fi cen za
del la par te elet tri ca, etc.
Once a month check the
com pres sor ef fi ciency: pos sib le
con nec tors slac ke ning, pres su re
hose wear, screws tigh te ning,
elec tric cir cuit ef fi cency, etc
*
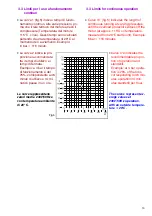
Con trol la re il fil tro di aspi ra zio ne aria.
Nel caso fos se in ta sa to so sti tuir lo.
Eve ry three months check the air
in ta ke fil ter. Re pla ce it if is
ne ces sa ry.
Ogni 3
mesi
Every 3
months
Pulire il compressore con un panno morbido.
La polvere e la sporcizia impediscono il
raffreddamento
Clean the compressor with a soft
cloth. Dust and dirty prevent the
compressor from cooling
*
Smon ta re e pu li re sof fian do con aria
com pres sa la car tuc cia coa le scen te
con te nu ta nel fil tro (Fig. 8). Que sta
ope ra-zio ne deve es se re ese gui ta con il
ser ba toio com ple ta men te sca ri co da
pres sio ne.
Di sas semb le the co e le scing
car trid ge con tai ned in the air
outlet fil ter (Fig. 8). This
ope ra tion must be done with
tank com ple tely out of pres sion
Ogni 6
mesi
Every 6
months
Controllare il riduttore/filtro ed i suoi elementi
per l’ottimizzazione dell’efficienza
Check the filter reducer and its
parts to optimize efficiency
*
Controllare la valvola di sicurezza (fig.9)
tirando dolcemente l’anello con pressione nel
serbatoio.
Check the safety valve (fig.9)
pulling the ring gently when there
is pressure in the tank
*
Sostituzione totale dell’olio
Total replacement of oil
*
Fig. 6
Fig.9
Fig. 7
Fig. 8


