background image

SONG LIST CONTROL SCREEN

next patch on list →

no.of song on list →

previous song on list

You can customize the screen brightness see Global Settings G.

When you change patch, the next sound will be heard immediately but the screen

takes a fraction of a second to catch up.

PROGRAMMING SECTION

8.0 Introduction to Programming

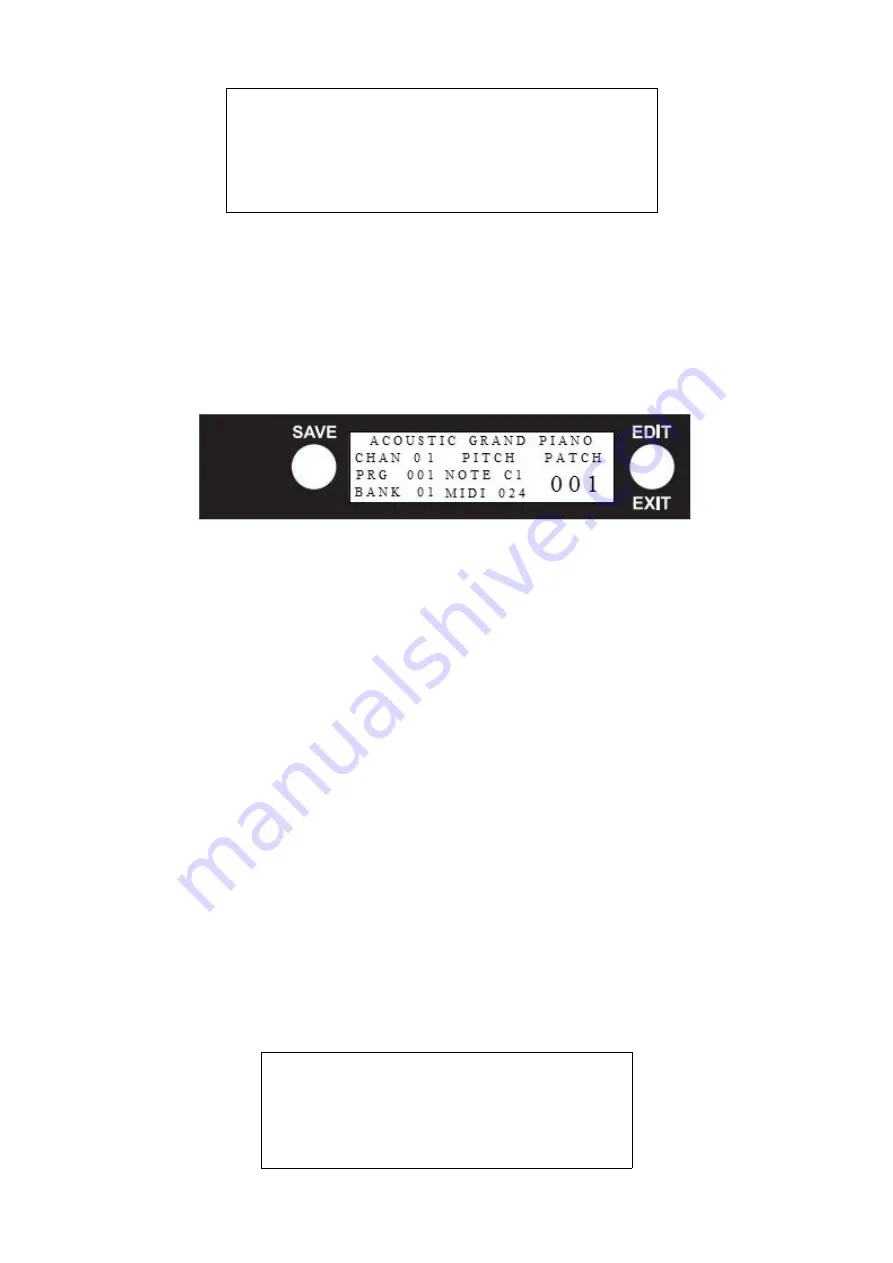
There are 4 main programming/edit screens.


1. Press the EDIT/EXIT button on the right of the display, keep it pressed and it will 

scroll through the 4 options – Global Settings – Song List – Patch Settings – Patch 
Template. If you want to edit Global Settings, release the button when you see 
Global Settings. If you release the button on the wrong list, press the button again 
to exit. The performance screen comes back up and then you can start again. Once
you have chosen your screen:

2. Select the item/s you want to change using the up/down patch buttons. 
3. Select your change/s using the left/right octave shift buttons.
4.

SAVE

 your change/s using the save button to the left of the display.

5.

EXIT 

the edit mode by pressing the Exit/Edit button until it says

 'Performance 

Mode'. Settings may work imperfectly unless you are in Performance Mode.

Press 'Exit' at any time to get out of a screen.

Shortcut – a quick press on the edit button will get you back into the last screen you

were editing.

8.1 Global Settings

The Global Settings influence the instrument as a whole. There are 10 items. A-J that you 
can alter. See 8.0 on how to get into the Global Settings edit screen and on how to choose
options using patch and octave buttons.

Press ◄ for patch settings


Press ► for song list 


7

HARPSICORD

011►

PITCH

PATCH

SONG 01

NOTE  C3

007

◄002

MIDI    048

◄ GLOBAL SETTINGS ►

A. Patch Cntrl

PATCH

B. MIDI Format

1-128

C. Middle C Format

C-4

Summary of Contents for Xylosynth XS7-3

Page 1: ...Hand Built Electronic Percussion XS7 3 Rev 008 1 2a TWYCROSS STREET LEICESTER LE2 0DU ENGLAND TELEPHONE 0116 255 6225 E MAIL info wernick net WEB SITE www wernick net VAT No 834748304 ...

Page 2: ...ol 5 2 Song List Patch Up Down 5 3 Octave Shift 5 4 Sustain 5 5 Types of Pedal 6 0 Analogue Settings 6 6 1 Length of Note 6 2 Sensitivity Knob 7 0 Display 8 0 Introduction to Programming 7 8 1 Global Settings 8 2 Song List 8 8 3 Patch Settings 9 8 4 Patch Template 10 9 0 The Noise Threshold 10 0 Different Ways of Manipulating Your Sound Volume 11 0 Internal Sounds 11 12 0 How to Replace a Key 13 1...

Page 3: ...e caused The instrument needs to be stable while calibrating on power up so always push the USB cable in gently to avoid disturbance if the other end is already connected to the power source 3 If you have internal sounds plug in your headphones or line out to PA and start playing Or using the supplied MIDI lead or USB cable connect to your chosen external sound source the Xylosynth is set to Chann...

Page 4: ... Note Numbers in MIDI and these define the pitch of the sound It s like having a keyboard with 128 keys An easy reference point to remember is Middle C C4 which is MIDI Note Number 60 Tuned A 440 442Hz is MIDI Note Number 69 3 4 MIDI Velocity Number There are 128 levels of velocity in MIDI The Velocity Number defines the amount of expression that can be applied to a MIDI sound For example if you p...

Page 5: ...ur Xylosynth and the patch you are in By pressing the octave shift you can shift up or down an octave 12 notes This can be in latching mode where the shift stays until you press the pedal button again to change it or single shift mode for pedals only where the octave reverts to it s previous range as soon as you release the pedal see Patch Settings K Octave Shift The pedal factory default is singl...

Page 6: ...d to achieve a velocity of 1 In effect the sensitivity control can act as a volume control knob on the fly Starting with the sensitivity knob at its maximum setting and striking a key to the hardest you are likely to play turn the knob anticlockwise When the sound heard starts to drop from your sound source stop turning the sensitivity knob Setting the knob to about a third seems to give most peop...

Page 7: ... Once you have chosen your screen 2 Select the item s you want to change using the up down patch buttons 3 Select your change s using the left right octave shift buttons 4 SAVE your change s using the save button to the left of the display 5 EXIT the edit mode by pressing the Exit Edit button until it says Performance Mode Settings may work imperfectly unless you are in Performance Mode Press Exit...

Page 8: ...he individual key can be adjusted to bring the key s into line Screen 1 shows the key number and original sensitivity Bring your new or waning key sensitivity into line at about 100 A waning or losing sensitivity key will have lost some dynamic after this process but will still play This won t work if the key is broken Press SAVE and the results are now saved and you will be back in Global Setting...

Page 9: ...mme 1 128 or 0 127 Selects programme number B Channel 1 16 or 0 15 Selects Channel Number C Bank 1 16 or 0 15 Selects bank Number D Octave 0 12 24 36 48 60 72 84 96 108 Sets the MIDI Note Number of the first key in steps of 12 E Semitone 000 011 Offsets the MIDI Note Number of the first key in steps of 1 F Min Velocity 001 127 Sets minimum MIDI Velocity for lightest hit G Max Velocity 001 127 Sets...

Page 10: ...list you want to change using the up down patch buttons 2 Select your change using the left right octave shift buttons 3 Press SAVE if you have gone into a second screen such as for jack inputs press exit first to get back to main patch template screen and follow the instructions select ALL to change all 128 patches or select SELECTED and choose patches using up down arrows and left right arrows 4...

Page 11: ...omatic Percussion 9 Celesta 10 Glockenspiel 11 Music Box 12 Vibraphone 13 Marimba 14 Xylophone 15 Tubular Bells 16 Dulcimer Organ 17 Drawbar Organ 18 Percussive Organ 19 Rock Organ 20 Church Organ 21 Reed Organ 22 Accordion 23 Harmonica 24 Tango Accordion Guitar 25 Acoustic Guitar Nylon 26 Acoustic Guitar Steel 27 Electric Guitar Jazz 28 Electric Guitar Clean 29 Electric Guitar Muted 30 Overdrive ...

Page 12: ...choes 104 FX 1 Sci Fi Ethnic 105 Sitar 106 Banjo 107 Shamisen 108 Koto 109 Kalimba 110 Bag pipe 111 Fiddle 112 Shanai Percussive 113 Tinkle Bell 114 Agogo 115 Steel Drums 116 Woodblock 117 Taiko Drum 118 Melodic Tom 119 Synth Drum 120 Reverse Cymbal Sound Effects 121 Guitar Fret Noise 122 Breath Noise 123 Seashore 124 Bird Tweet 125 Telephone Ring 126 Helicopter 127 Applause 128 Gunshot For Channe...

Page 13: ... screws by hand if necessary If using a battery powered drill you will have to stop before the screws bottom out i e slowing down well before then You cannot rely on any torque limiter that comes with the drill Hand tightening means just nipping up the screws Description 1 Find a suitable area to carry out the task You can set up on a fine carpet if the carpet is clean so as not to scratch the woo...

Page 14: ...ill scratch the surfaces The Birch surfaces are coated with a hard polyurethane varnish that should last for years The Bubinga keys can be re varnished using Rustins Danish Oil if necessary It is strongly advisable not to subject the Bubinga keys to sudden changes in temperature If you have to leave your instrument in a large auditorium over night we strongly advise you insulate the keys by placin...

Page 15: ...6 O O O O O O O O O O O O O O O O O O O O O O O O O O O O O O O O O O O Breath Controller Pedal Control Pedal Control Portamento Pedal set within Patch Channel Volume Pedal set within Patch Stereo Balance set within Patch Pan Pedal set within Patch Expression Pedal Effect control 1 Pedal set within Patch Effect Control 2 Pedal set within Patch General Purpose Controller 1 Pedal General Purpose Con...

Reviews: