

Step 6 — Connect
RS-232
To connect using the Connection Wizard:
• Click
Connect
on the menu toolbar, and then select
Connection
Wizard
.
• Select
RS-232
.
• Configure RS-232 settings as required by the application,
and click
Connect
.
• When a connection is established, the green indicator in the
status bar at the bottom right of the screen will be visible:
Important:
The scanner is in
Continuous Read Mode
by
default. For best connection results, be sure that no decodable
symbols are within the scanner’s field of view while attempting
to connect.
Step 7 — Test Read Rate
Read Rate
indicates the number or percentage of successful
decodes per second achieved by the scanner.
1. Click the
Test
button in ESP’s
EZ Mode
to start the Read
Rate test.
Symbol data and read rate percentage information should
appear in the
Symbol Information
table. The Read Rate
LEDs on the side of the
FIS
-
0
870 will indicate the percentage
of successful decodes per second.
2. Click
Stop
to end the Read Rate test.
Note:
Read Rate can also be tested using the
Read Rate
interface in
Utilities
.
Refer to the
),6
-
870 Industrial Raster Scanner User’s
Manual
for information about how to test read rate using serial
commands or the scanner’s EZ button.
Step 6 — Connect (cont.)
Ethernet TCP/IP
To connect using the Connection Wizard:
• Click
Connect
on the menu toolbar, and then select
Connection
Wizard
.
• Select
Ethernet
.
• Configure Ethernet settings as required by the application, and
click
Connect
.
• When a connection is established, the green indicator in the status
bar at the bottom right of the screen will be visible.
Important:
The scanner is in
Continuous Read Mode
by default.
For best connection results, be sure that no decodable symbols are
within the scanner’s field of view while attempting to connect.
Step 8 — Configure the Scanner
Click the
App Mode
button to make configuration changes to the scanner.
The following modes are accessible by clicking the buttons at the top
of the screen:
• Click the
EZ Mode
button to return to EZ Mode.
• Click the
Autoconnect
button to establish communications.
• Click the
Send/Recv
button to send or receive commands.
• Click the
Switch Model
button to open the model menu, or to
return to the previous model.
• Click the
Parameters
button to show the tabbed tree control views.
• Click the
Setup
button to show the tabbed interface views.
• Click the
Terminal
button to display decoded symbol data and to
send serial commands.
• Click the
Utilities
button to access Read Rate, Counters, Device
Control, Differences from Default, Master Database, Digital Bar
Code, and Firmware.
For further details, see
ZHQJORU
ESP
Help
in the dropdown
Help menu.
Step 6 — Connect (cont.)
Ethernet TCP/IP (cont.)
When the
FIS-0
870 is connected, incoming symbol data can be
displayed in the
Terminal
, as shown below.
Step 9 — Save Changes
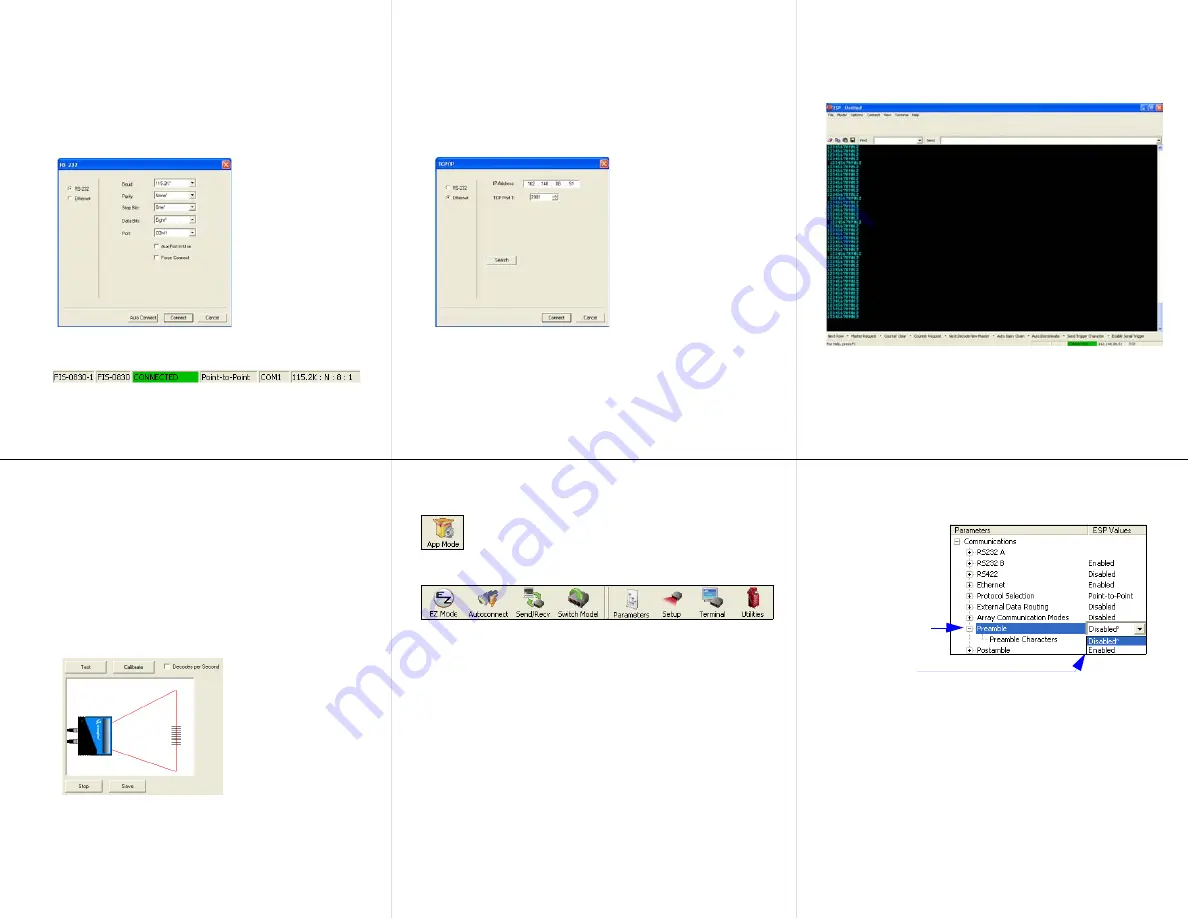
To make changes to configuration settings in the tree controls:
Saving Options
•
Send, No Save
. Changes will be lost when power is re-applied
to the scanner.
•
Send and Save
. This activates all changes in current memory
and
saves to the scanner for power-on.
1.
Left-click
on the
+
to expand the
desired tree.
2.
Double-click
on
the desired
parameter and
click once in the
selection box to
view options.
5.
Right-click
on the
open screen and
select
Save to
Reader
to implement
the command in the
scanner.
4.
Left-click
on the
open screen to
complete your
selection.
3. Place your cursor
in the selection
box, scroll down to
the setting you
want to change,
and
click
once on
the setting.


