Wen DW5084 Instruction Manual Download Page 17

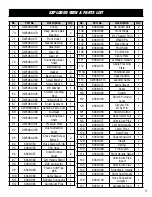
EXPLODED VIEW & PARTS LIST

No.

Part No.

Description

Qty.

69

DW5084-069

Circlip

2

70

DW5084-070

Deep Groove Ball 

Bearing

2

71

DW5084-071

Front Cover

2

72

DW5084-072

Needle Bearing

2

73

DW5084-073

Steel Ball

2

74

DW5084-074

Gear #2

1

75

DW5084-075

Gear #1

1

76

DW5084-076

Connecting Gear 

Shaft

1

77

DW5084-077

Ball Bearing 

2

78

DW5084-078

Gasket

2

80

DW5084-079

Bearing Cover

2

81

DW5084-080

Screw M4x12

10

82

DW5084-081

Screw M6x15

1

83

DW5084-082

Ø6 Washer

1

84

DW5062-003

Circular Sanding 

Pad

1

85

DW5084-085

Output Shaft

1

87

DW5084-087

Brush Segment

1

88

DW5084-088A

Sanding Pad Cover

1

89

DW5084-089

End Gear

1

90

DW5084-090

Connecting Gear 

Shaft

1

91

DW5084-091

Pressign Plate

1

92

DW5084-092

Dust Collection 

Cover

1

93

DW5084-093

Cross Head Screw 

M4x12

2

94

6369-054

Hose Clamp 25-38

1

95

6369-055

350 Hose

1

96

6369-057

Small Rubber 

Cover

2

97

6369-062

Left Handle Stand

1

98

6369-059

Ø28 Connector

1

99

6369-060

Plastic Soft Pipe 

Ø28

1

100

6369-056

Cable Sleeve

1

101

6369-061

Ellipticle Connector

1

102

6369-083

Aluminium Pipe

1

No.

Part No.

Description

Qty.

103

6369-080

Ø5 Clinch Bolt 

2

104

6369-082

Front Hinge 

1

105

6369-081

Ø1.2 Sealed Ring 

1

106

6369-079

Ø5x45 Pin

1

107

6369-078

Back Hinge 

1

108

6369-085

Pin Ø5x30

1

109

6369-086

Pin Ø5x6.8

1

110

6369-066

Cable Plate

2

111

6369-073

Left Main Handle

1

112

6369-075

Cable Pressing 

Plate

1

113A

6369-068

Potentiometer

1

114

6369-070

Speed Button

1

115

DW5084-115

Leading Cable

1

116

6369-072

Cable Sleeve

1

117

6369-071

Cable

1

118

6369-093

Switch

1

119

6369-094

Switch Pushing 

Lever

1

120

6369-097

Circular Pin 

Ø1.5x11.8

1

121

6369-095

Switch Button

1

122

6369-098

Back Screw Nut

2

123

6369-077

Aluminium Pipe

1

124

6369-076

Left Sub-Handle

1

125

6369-090

Latch Pivot

1

126

6369-091

Fixed Plate

1

127

6369-084

Supporting Arm

1

128

6369-087

Sleeve 

2

129

6369-089

Spring

1

130

6369-088

Front Latch

1

131

6369-058

Right Handle Stand

1

132

6369-074

Aluminium Pipe 

Insert

1

133

6369-092

Aluminium Pipe

1

134

6369-099

Right Main Handle

1

135

6369-092

Right Sub-Handle

1

136

6369-100

Hose Connection 

Adapter

1

137

6369-101

Adjustable Ring

1

17

Summary of Contents for DW5084

Page 1: ...rouble free performance Pay close attention to the rules for safe operation warnings and cautions If you use your tool properly and for its intended purpose you will enjoy years of safe reliable service NEED HELP CONTACT US Have product questions Need technical support Please feel free to contact us TECHSUPPORT WENPRODUCTS COM 1 800 232 1195 M F 8AM 5PM CST For replacement parts and the most up to...

Page 2: ...TION MAINTENANCE 12 Operation 12 Maintenance 13 Troubleshooting Guide 14 Exploded View Parts List 15 Warranty Statement 19 To purchase replacement sandpaper for your tool visit WENPRODUCTS COM Round Drywall Sandpaper 10 Pack Model DW60SP DW80SP DW120SP DW150SP DW180SP DW240SP Triangular Drywall Sandpaper 10 Pack Model 6377SP60 6377SP80 6377SP120 6377SP150 6377SP180 6377SP240 15 Feet Dust Hose Part...

Page 3: ...our customer service at 1 800 232 1195 Keep this manual available to all users during the entire life of the tool and review it frequently to maximize safety for both yourself and others Indicates danger warning or caution The safety symbols and the explanations with them deserve your careful attention and understanding Always follow the safety precautions to reduce the risk of fire electric shock...

Page 4: ...hock PERSONAL SAFETY 1 Stay alert watch what you are doing and use com mon sense when operating a power tool Do not use a power tool while you are tired or under the influence of drugs alcohol or medication A moment of inatten tion while operating power tools may result in serious personal injury 2 Use personal protective equipment Always wear eye protection Protective equipment such as a respira ...

Page 5: ...cordance with these instructions taking into ac count the working conditions and the work to be per formed Use of the power tool for operations different from those intended could result in a hazardous situa tion 8 Use clamps to secure your workpiece to a stable surface Holding a workpiece by hand or using your body to support it may lead to loss of control 9 KEEP GUARDS IN PLACE and in working or...

Page 6: ...nvironment and wear a dust masks specially designed to filter out microscopic particles Heavy duty work gloves to protect your hands Safety non slip work boots Safety helmet if any work is being carried out above your head 5 The rated speed of the accessories must be great er than or equal to the tool s maximum speed of 1500 RPM Do not use accessories rated at speeds below the machine s maximum RP...

Page 7: ... The accessory may kickback over your hand 3 Do not position your body in the area where power tool will move if kickback occurs Kickback will propel the tool in the direction opposite to the wheel s move ment at the point of snagging 4 Use special care when working corners sharp edges etc Avoid bouncing and snagging the accessory Cor ners sharp edges or bouncing have a tendency to snag the rotati...

Page 8: ...oss of power and overheating The table below shows the correct size to be used according to cord length and ampere rating When in doubt use a heavier cord The smaller the gauge number the heavier the cord DOUBLE INSULATED TOOLS The tool s electrical system is double insulated where two systems of insulation are provided This eliminates the need for the usual three wire grounded power cord Double i...

Page 9: ... broken please contact customer service at 1 800 232 1195 M F 8 5 CST or email techsupport wenproducts com KNOW YOUR DRYWALL SANDER Motor Power Switch 5mm Hex Wrench Dust Hose Dust Port Connector 47mm Adapter Shoulder Strap Round Sanding Discs 6 60 Grit 1 80 Grit 1 120 Grit 1 150 Grit 1 180 Grit 1 240 Grit 1 Round Hook Loop Base Pad Locking Clasp Variable Speed Adjustment Wheel Extension Locking N...

Page 10: ...nder head Press the base pad to secure it onto the drywall sander 4 Pull the knob Fig 3 1 on the side of the head and slide it upward to secure the base pad in place Check to make sure the base pad is securely aligned and attached 5 Attach the sanding disc Fig 4 1 of your choice to the face of the hook and loop base pad Fig 4 2 Ensure the holes are aligned on the bottom of the pad WARNING To preve...

Page 11: ...tension is securely at tached 6 If you would like to use a dust collection device insert the hose connection port Fig 6 1 into the end of the additional handle extension or directly into the end of the main drywall sander assembly if you choose not to use the handle extension NOTE A dust collection device is recommended to cut down on mess and the potentially harmful particulates in the air produc...

Page 12: ...tely lessen the applied pres sure The quality of the results are mainly determined by choosing the right abrasive material for the job WARNING This tool is for indoor use only DO NOT expose to rain or use in damp locations 6 Once the sanding task has been completed turn off the machine Wait for the pad to stop rotating before setting down the machine VARIABLE SPEED CONTROL Use the variable speed a...

Page 13: ...fied electrician Only a qualified technician should change the carbon brushes REPLACING THE SANDING PAD 1 Detach the sanding disc from the sanding pad For the triangular sanding pad 2 Unscrew the three screws Fig 8 1 located on the outer corners of the sanding pad and the three screws Fig 8 2 on the flange Replace the pad with an identi cal part suited for this particular model of drywall sander A...

Page 14: ...red 3 Use less pressure during sanding operations Motor gets hot 1 Foreign substances have gotten inside the motor 2 Too high of load has been applied 1 Have the foreign substances removed 2 Use less pressure during sanding operations Frequent sparks occur on the commutator 1 There is a short circuit in the motor armature 2 Carbon brushes are worn out or jammed 1 Have the armature replaced 2 Have ...

Page 15: ...EXPLODED VIEW PARTS LIST NOTE Not all parts may be available for purchase Parts and accessories that wear down over the course of normal use are not covered under the warranty 15 143 144 145 142 ...

Page 16: ...rbon Brush 2 33 DW5084 033 Screw ST3x10 2 34 DW5084 034 Coil Spring 2 35 DW5084 035 Pressing Block On Motor Housing 1 No Part No Description Qty 36 DW5084 036 Screw ST4x12 2 37 DW5084 037 Screw ST4x14 40 38 DW5084 038 Back Cover 1 39 DW5084 039 Vibration Damping 2 40 DW5084 040 Rubber Sleeve 2 41 DW5084 041 Screw Pin 2 42 DW5084 042 Flexible Sleeve 1 43 DW5084 043 Cross Screw M4x8 3 44 6377 070 Tr...

Page 17: ... 056 Cable Sleeve 1 101 6369 061 Ellipticle Connector 1 102 6369 083 Aluminium Pipe 1 No Part No Description Qty 103 6369 080 Ø5 Clinch Bolt 2 104 6369 082 Front Hinge 1 105 6369 081 Ø1 2 Sealed Ring 1 106 6369 079 Ø5x45 Pin 1 107 6369 078 Back Hinge 1 108 6369 085 Pin Ø5x30 1 109 6369 086 Pin Ø5x6 8 1 110 6369 066 Cable Plate 2 111 6369 073 Left Main Handle 1 112 6369 075 Cable Pressing Plate 1 1...

Page 18: ...dapter 1 142 DW5062 108 Hex Wrench S5 1 No Part No Description Qty 143 DW5062 104 Shoulder Strap with hook 1 144 DW5062 105 Hook Seat 1 145 DW5062 106 Nut M5 1 146 DW5062 107 Bolt M5 18 1 NOTE Not all parts may be available for purchase Parts and accessories that wear down over the course of normal use are not covered under the warranty 18 ...

Page 19: ...parts and products may need to be sent to WEN before the replacements can be shipped out turning a product for warranty service the shipping charges must be prepaid by the purchaser The product must be shipped in its original container or an equivalent properly packed to withstand the hazards of shipment The product must be fully insured with a copy of the proof of purchase enclosed There must als...

Page 20: ...THANKS FOR REMEMBERING V 2022 09 13 ...

Reviews: