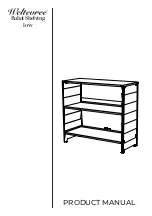
Weltevree Rabat Shelving low Product Manual Download Page 3

DIMENSIONS & 

SPECIFICATIONS

Rabat Shelving

Ontwerper / 

Designer

 / Designer

Lex Pott

Materiaal / 

Material 

/ Material

Thermo vuren, verzinkt & 

gepoedercoat staal / 

Thermo pine, zinc plated & powder-

coated steel 

Thermo-Fichte, verzinkter & 

pulverbeschichteter Stahl

Afmetingen / 

Dimensions 

/ Größe

Length 40 cm / 15.75 inch

Width  98,5 cm / 38.75 inch

Height 88,5 cm / 34.9 inch

Gewicht / 

Weight 

/ Gewicht

28 kg / 57 lbs


Levering / 

Delivery 

/ Lieferung

In dozen / 

In boxes 

/ Verpackt

Onderhoud / 

Maintenance

 / Wartung

Om de levensduur van de Rabat Shelving te verlengen is een behandeling met 

houtolie voor de houten onderdelen aan te raden. Gebruik de olie vooraf om 

het hout te conserveren en het vergrijzen te vertragen. Bovendien zorgt het 

ervoor dat het hout makkelijker te reinigen is.

Reinig de Rabat Shelving twee keer per jaar met een zachte doek of een 

borstel die niet schuurt. Gebruik lauw water of een milde zeep-oplossing. Spoel 

de Rabat Shelving af met schoon water.

To prolong the life of the Rabat Shelving, a treatment with wood oil is 

recommended. Use the oil before usage of the product to protect the wood, 

making it easier to clean and slowing down the aging process.

Clean the Rabat Shelving twice a year with a soft cloth or a nonabrasive brush. 

Use lukewarm water or a mild soap solution. Rinse the Rabat Shelving with 

clean water.

Um die Lebensdauer Ihres Rabat Shelving zu verlängern, wird eine Behandlung 

mit Holzöl emphohlen. Tragen Sie das Öl vor der ersten Verwenung auf, um das 

Holz zu schützen, die Reinigung zu erleichtern und den Alterungsprozess zu 

verlangsamen.

Reinigen sie des Rabat Shelving zweimal jährlich mit einem weichen Tuch 

oder einer Bürste, die nicht reibt. Verwenden sie lauwarmes Wasser oder eine 

milde Seifenlösung. Spülen sie das Rabat Shelving mit sauberem Wasser ab.

 40 cm / 15,75 inch 

 98,5 cm / 38,75 inch 

 88,5 cm / 34,9 inch 

Summary of Contents for Rabat Shelving low

Page 1: ...PRODUCT MANUAL RabatShelving low...

Page 2: ...s warranty and mainte nance The inspiration for the Rabat Shelving comes from the iconic over lapping wood of sheds and houses in Sweden This architectural technique is turned around creating a functi...

Page 3: ...of een borstel die niet schuurt Gebruik lauw water of een milde zeep oplossing Spoel de Rabat Shelving af met schoon water To prolong the life of the Rabat Shelving a treatment with wood oil is recomm...

Page 4: ...ANUAL PRODUCT MANUAL RabatShelving low 10 Benodigdheden 2 Personen steeksleutel 10 Handleiding Necessities 2 Persons open ended spanner 10 Manual Voraussetzungen 2 Personen 10er Maulschl ssel Anleitun...

Page 5: ...gbolkopflensschroef Hexagon socket button head screw with flange Innensechskantschrauben 4x M6 x 20 mm Laagbolkopflensschroef Hexagon socket button head screw with flange Innensechskantschrauben Onder...

Page 6: ...Linke Seitenwand 1x Achterplaat Back panel R ckwand 1x Rechter zijpaneel right side panel Rechte Seitenwand 1x Bovenkant Top Oberseite des Schranks 1x Onderste plank Bottom shelf Unterer Regalboden 1...

Page 7: ...ten aan voor en achterzijde Shelf with holes on the front and back Regalboden mit L chern vorne und hinten Stap 1 Om de levensduur van de Rabat Shelving te verlengen is een behandeling met houtolie vo...

Page 8: ...fasten it together with the sleeve nuts and the M6 x 20 mm bolts Schritt 4 Legen Sie die Oberseite des Schranks ber die Seitenw nde Legen Sie den Montagestreifen auf die Innenseite der Seitenw ndeund...

Page 9: ...t behulp van de M6 x 12 mm bouten en de borgmoeren Step 5 Further secure the top and bottom shelf at the front using the M6 x 12mm bolts and the lock nuts Schritt 5 Befestigen Sie den obere und un ter...

Page 10: ...tlijnen draai dan de andere boutjes weer iets los zodat er meer speling ontstaat Step 6 Place the back panel on the back of the cabinet and secure it with the M6 x 12mm bolts and locknuts If the holes...

Page 11: ...e poten Step 8 Fix the cabinet to the wall using the holes in the back of the cabinet or fix it to the floor through the holes at the bottom of the legs Schritt 8 Befestigen Sie den Schrank mit den L...

Page 12: ...aan het product wanneer a de schade een gevolg is van normale slijtage b de schade een gevolg is van onjuist gebruik c er geen of onjuist onderhoud is uitgevoerd d er wijzigingen of reparaties door d...

Reviews: