During Power Off
When power is off, press and hold
M
available
Then press M to scroll through
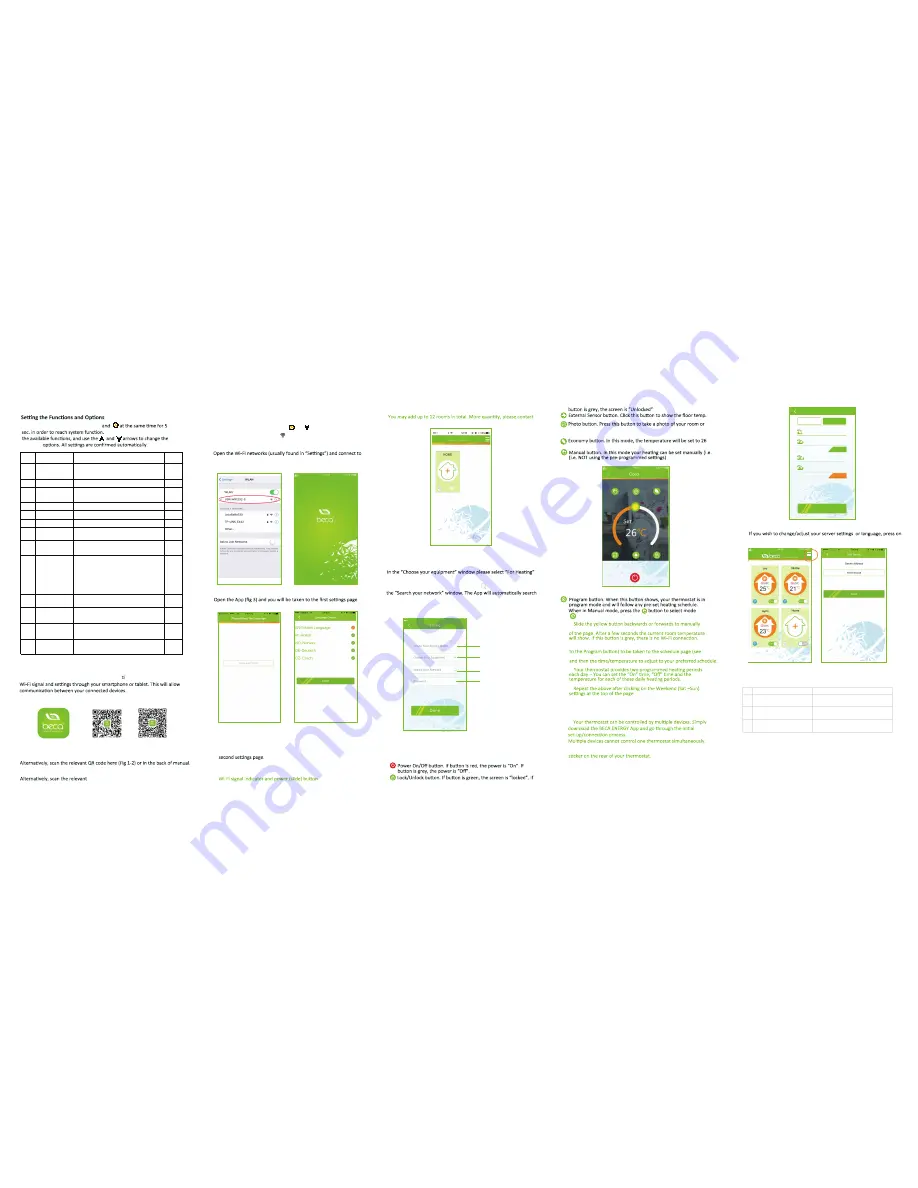
WI-FI CONNECTION
Before using your Wi-Fi thermostat for the first me, you must configure the
Step 1 Download your APP (Fig 1-1)
Fig 1-1
For ANDROID devices, search for BECA ENERGY in Google Play and download.
Fig 1-2 IOS
Fig 1-3 Android
QR code here (Fig 1-3)or in the back of manual.
For IOS devices, search for BECA ENERGY in Apple Store and download.
Step 2 Connect your Wi-Fi signal
On your thermostat
With power on, press and hold the and arrows simultaneously
for eight (8) seconds. The icon will flash.
Then, on your smartphone/tablet
SSID USR-WIFI232-S signal being broadcast by your thermostat (see
Fig 2)
(Fig 2)
(see Fig 4-1 & 4-2)
(Fig 3)
(Fig 4-1)
(Fig 4-2)
Press the “
+
” icon to add your room. You will be taken to the
Click Language Choice and select the one you need. Then press
Then press DONE. You will then be taken to the home page. (Fig 5)
Note 1:
The room details will show: set temp., room temp., room name,
(Fig 5)
Click in the first window to name your room (Emma’s bedroom,
Lounge, Kitchen etc.)
in the drop-down list.
Connect the wireless signal by touching the image to the right of
for and list any available wireless routers. Select your router,
enter the password for your router in the window below and click
“Done”. This may typically take up to 5~90 seconds to complete.
(Fig 6)
Your room name
Fan Coil system
or Heating System
The account of your
wireless router
The password of your
wireless router
Note 2:
with us.
Note 1:
Click on your room from the home screen and begin programming
your thermostat (Fig 7)
choose an image from your photo library as a background image
for your room.
degrees C. This temperature cannot be changed or adjusted.
(Fig 7)
and vice-versa.
*
adjust the temperature, the temperature will show in the centre
*
When in Program mode, click on the schedule logo (next
fig 8) where you can simply click on the working days (Mon-Fri)
*
*
(Fig 8)
Weekend
Working Days
0 8
:
3 0
1 2
:
0 0
1 3
:
3 0
1 8
:
0 0
15℃
25℃
Save
Schedule Setting
*
Once your schedule has been set, click on SAVE and the App
will send your schedule to your thermostat and confirm the
schedule has been saved.
*
*
The unique ID number of your thermostat is displayed on a
7.
the menu logo in the top right of the home page (see Figs 9 & 10 & 4-2).
(Fig 9)
(Fig 10)
Code
Function
Setting and options
Default
1
Te
m
per
a
t
u
re
co
m
pens
a
tion
-9
to +
9
℃
(
for intern
al
sensor
)
-2
2
3
B
u
tton
l
oc
k
in
g
00: All bu
ttons
a
re
l
oc
k
e
d
e
x
cept power
bu
tton
.
01
:
All bu
ttons
a
re
l
oc
k
e
d.
01
4
5
Min
. S
et Te
m
p
.
5-15
℃
10
6
M
ax. S
et Te
m
p
.
5-45
℃
35
7
12
/
24
ho
u
rs
00:12
ho
u
rs
01:24
ho
u
rs
01
8
D
isp
lay
Mo
d
e
00
:
D
isp
lay b
oth set te
m
p
. a
n
d
roo
m
te
m
p
.
01
:
D
isp
lay
set te
m
p
.
on
ly
00
9
S
ensor t
y
pes
I
n
:
I
ntern
al S
ensor
(
to contro
l
or
l
i
m
it the te
m
p
.
)
Ex
:
Ex
tern
al S
ensor
(
to contro
l
or
l
i
m
it the te
m
p
.
)
AL
:
I
ntern
al
/
Ex
tern
al S
ensor
(
I
ntern
al
sensor to
contro
l
the te
m
p
.,
e
x
tern
al
sensor to
l
i
m
it the
te
m
p
.
)
AL
10
S
t
a
n
dby
Bri
g
htness
1-255
10
11
Hi
g
h te
m
per
a
t
u
re
protection settin
g.
25-70
℃
45
12
D
e
ad
zone
Te
m
per
a
t
u
re
1 ~ 5
℃
1
13
L
ow te
m
per
a
t
u
re
protection settin
g.
0-15
℃
(
J
u
st for w
a
ter he
a
tin
g a
n
d b
oi
l
er he
a
tin
g)
0
SIMPLE EXCEPTION HANDLING
N
o
.
P
heno
m
enons
H
a
n
dl
in
g
1
P
ower is on
bu
t witho
u
t
d
isp
lay.
*
C
hec
k
if the ter
m
in
al
s
b
etween
LCD
p
a
ne
l a
n
d
P
ower
U
nit Bo
x
is
l
oosen
.
2
Witho
u
t o
u
tp
u
t
bu
t
d
isp
lay
wor
k
s
.
*
U
se
a
new
LCD
p
a
ne
l
or new
P
ower
U
nit Bo
x
to
rep
la
ce the o
ld
one
.
3
R
oo
m
Te
m
p
. I
s
a l
itt
l
e
d
ifferent fro
m
the
a
ct
ual.
*
D
o te
m
per
a
t
u
re c
al
i
b
r
a
tion in ite
m 1
of hi
g
h
senior options
SERVICE
Your thermostat carries an 18 month warranty from date
of purchase. Service outwith the warranty period may
incur a charge. More detail please contact with us directly.


