background image

6

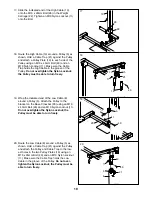
3. Attach an Upright (1) to each Base (7) using four

Joint Plates (12), eight M10 x 80mm Bolts (41),
and eight M10 Nylon Locknuts (11). Make sure
the Uprights are oriented exactly as shown. 

Do

not tighten the Nylon Locknuts yet.

3

1

1

41

12

12

7

7

12

12

11

41

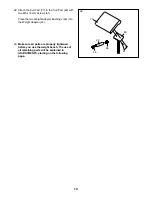
4. Insert a Weight Guide (18) into the indicated hole

in each Base (7). Attach the Weight Guides to the
Bases using two M10 x 75mm Bolts (39), four
M10 Small Washers (6), and two M10 Nylon
Locknuts (11). 

Do not tighten the Nylon

Locknuts yet.

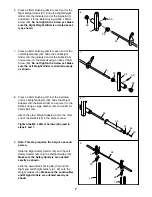
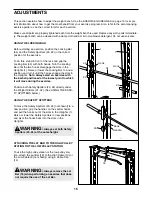
5. Press a 25mm Bushing (48) into each end of the

Locking Bar (34). Slide the Barbell (35) into the
Locking Bar.

4

18

18

39

39

6

11

7

7

11

6

6

6

5

34

35

48

48

Summary of Contents for PRO 375

Page 1: ...NE The trained techni cians on our customer hot line will provide immediate assis tance free of charge to you CUSTOMER HOT LINE 1 800 999 3756 Mon Fri 6 a m 6 p m MST Model No WEBE29320 Serial No Writ...

Page 2: ...WEIDER is a registered trademark of ICON Health Fitness Inc The decal shown at the right has been placed on the weight bench in the indicated locations If the decal is missing or illegible please call...

Page 3: ...of 300 pounds Do not place more than 300 pounds including the barbell on the weight gliders or safety spot ters Do not place more than 150 pounds on the weight carriage or the leg lever Note The weig...

Page 4: ...d strength or a healthier cardiovascular system the weight bench will help you achieve the specific results you want For your benefit read this manual carefully before using the weight bench If you ha...

Page 5: ...this manual is designed to ensure that the weight bench can be assembled suc cessfully by anyone However it is important to realize that the versatile weight bench has many parts and that the assembly...

Page 6: ...yet 3 1 1 41 12 12 7 7 12 12 11 41 4 Insert a Weight Guide 18 into the indicated hole in each Base 7 Attach the Weight Guides to the Bases using two M10 x 75mm Bolts 39 four M10 Small Washers 6 and tw...

Page 7: ...x 20mm Screws 50 used in steps 6 and 7 6 7 35 35 32 29 29 50 29 29 31 50 9 Note This step requires the help of a second person Slide the Right Safety Spotter 23 and the Left Safety Spotter 24 onto the...

Page 8: ...e 22 Slide the Weight Carriage 22 onto the Rear Upright 2 as shown Make sure that the Weight Carriage and the Rear Upright are ori ented as shown 9 38 38 55 55 11 1 1 18 18 41 41 12 12 11 6 6 10 12 Re...

Page 9: ...reely 16 Route the High Cable 13 up through the Pulley Bar 59 around another Pulley 5 and back down through the Pulley Bar as shown Attach the Pulley inside the slot in the Pulley Bar using an M10 x 6...

Page 10: ...19 Wrap the indicated end of the Low Cable 8 around a Pulley 5 Attach the Pulley to the bracket on the Base Crossbar 20 using an M10 x 45mm Bolt 40 and an M10 Nylon Locknut 11 Do not overtighten the...

Page 11: ...64 and two M10 Nylon Locknuts 11 Do not tighten the Nylon Locknuts yet Note The indents around the holes in the Stabilizer 87 should be on the bottom and the decal should be in the indicated location...

Page 12: ...Caps 79 into the ends of the Backrest Frames 78 Attach the Backrest Bracket 53 to the Backrest Frames 78 with four M10 x 45mm Bolts 40 four M10 Small Washers 6 and four M10 Nylon Locknuts 11 Do not t...

Page 13: ...Nylon Locknut 11 Do not overtighten the Nylon Locknut the Backrest must be able to pivot freely Pull the Bench Knob 80 out as far as it will go Slide the Backrest Bracket 53 into the indicated slot on...

Page 14: ...ight bench The use of all remaining parts will be explained in ADJUSTMENTS starting on the following page 32 Attach the Curl Pad 77 to the Curl Post 83 with two M6 x 16mm Screws 61 Press the two Weigh...

Page 15: ...nd turn it until the hooks engage the slots in the Uprights Note Always start an exercise with the barbell positioned at the lowest point to which it will move during the exercise Position both Safety...

Page 16: ...the cables are properly tightened Do not overtighten the Nylon Locknut the Pulley must turn freely 51 22 35 Weights WARNING Do not place more than 300 pounds on the Barbell 35 Do not place more than...

Page 17: ...to one of the holes in the Backrest Bracket 53 before put ting any weight on the Backrest 69 ATTACHING THE CURL PAD For some exercises the Curl Pad 77 must be attached to the weight bench Insert the C...

Page 18: ...velop your heart and lungs PERSONALIZING YOUR EXERCISE PROGRAM Determining the exact length of time for each workout as well as the number of repetitions or sets complet ed is an individual matter It...

Page 19: ...a record of each workout List the date the exercises performed the weight used and the numbers of sets and repetitions completed Record your weight and key body measurements at the end of every month...

Page 20: ...a product caused by or attributable to freight damage abuse mis use improper or abnormal usage or repairs not provided by an ICON authorized service center products used for commercial or rental purpo...

Page 21: ...x 70mm Bolt 85 M6 Washer 81 M8 Flat Washer 67 M10 x 60mm Carriage Bolt 64 M6 x 16mm Bolt 61 M6 x 36mm Bolt 62 M8 x 20mm Screw 50 Refer to the drawings below to identify small parts used in assembly T...

Page 22: ...lt 39 2 M10 x 75mm Bolt 40 7 M10 x 45mm Bolt 41 24 M10 x 80mm Bolt 42 1 Weight Adapter 43 4 M10 x 25mm Bolt 44 2 Large Washer 45 4 Weight Clip Cover 46 2 Weight Adapter Bushing 47 2 50mm Bushing 48 2...

Page 23: ...55 6 57 59 51 45 51 45 17 16 17 43 44 47 33 49 29 29 31 49 43 37 11 49 35 34 49 29 29 32 49 49 36 11 24 49 23 50 50 48 48 43 33 47 44 43 79 81 62 78 81 62 40 53 11 79 69 68 77 83 61 80 6 76 86 65 66 8...

Reviews: