background image

8

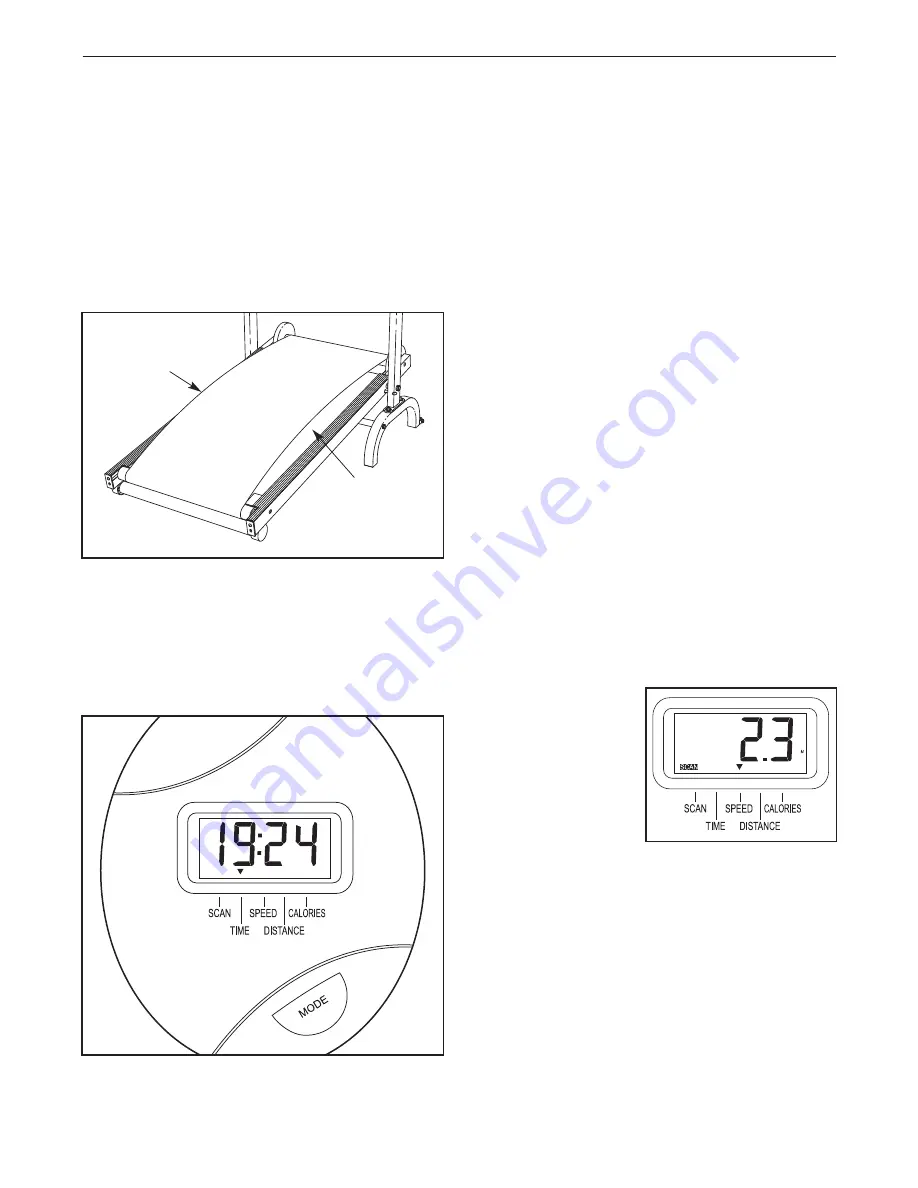
LUBRICATING THE WALKING PLATFORM

Before the treadmill is used, the walking platform
should be lubricated. 

Open the included lubricant

packet. Reach under one side of the walking belt as
far as you can, and apply half of the lubricant to the
walking platform. Then, reach under the other side of
the walking belt and apply the remaining lubricant.

After you have applied the lubricant, walk on the
treadmill for a few minutes to spread the lubricant.

STEP-BY-STEP CONSOLE OPERATION

Before the console can be operated, a battery must be
inserted (see assembly step 5 on page 6). If there is a
sheet of clear plastic on the console, peel off the
plastic.

The console features five modes:

• Scan—This mode displays the Time, Speed,

Distance, and Calories modes.

• Time—This mode displays the elapsed time. 

• Speed—This mode displays your speed, in miles

per hour. 

• Distance—This mode displays the number of miles

you have walked.

• Calories—This mode displays the approximate

number of calories you have burned.

Note: The console can display speed and distance in
either miles or kilometers. An “M” for miles or a “K” for
kilometers will appear in the right side of the display
while the Speed or Distance mode is displayed. Press
the Mode button for about six seconds to change the
unit of measurement if desired. 

Follow the steps below to operate the console.

1. Turn on the console.

To turn on the console, press the Mode button or
begin walking. Note: If a battery was just installed,
the console will already be on.

2. Track your progress with the five modes.

When the power is
turned on, the
Scan mode will be
selected and the
word SCAN will
appear in the dis-
play. The console
will display the
Time, Speed,
Distance, and
Calories modes, for several seconds each, in a
repeating cycle. 

To select only the Time, Speed, Distance, or
Calories mode, press the Mode button until only the
Time, Speed, Distance, or Calories arrow appears
in the display. Make sure that the word SCAN does
not appear.

To reset all modes, press the Mode button for about
three seconds.

TREADMILL OPERATION

Apply

lubricant

here

Apply

lubricant

here

Summary of Contents for Cardio Pacer 2.0 Treadmill

Page 1: ...DEPARTMENT DIRECTLY CALL TOLL FREE 1 866 699 3756 Mon Fri 6 a m 6 p m MST ON THE WEB www wesloservice com Model No WLTL01806 0 Serial No USER S MANUAL Serial Number Decal Visit our website at www wes...

Page 2: ...all times 8 The treadmill should not be used by persons weighing over 250 pounds Never allow more than one person on the treadmill at a time 9 Wear appropriate clothes while using the treadmill Do no...

Page 3: ...carefully before using the treadmill If you have questions after read ing this manual please see the front cover of this manual To help us assist you note the product model number and serial number be...

Page 4: ...ware used during assembly Note If a part is not in the parts bag check to see if it has been preattached to one of the parts to be assembled To avoid damaging plastic parts do not use power tools for...

Page 5: ...the Nuts yet Attach the Right Upright 9 to the right Upright Base 16 in the same way Do not tighten the Nuts yet 18 18 14 14 13 14 13 14 16 3 46 16 13 14 9 13 14 2 3 Slide the ends of the Handrail 5 i...

Page 6: ...s recommended Remove the battery cover not shown and insert a battery make sure that the negative end of the battery is touching the spring in the Console Then reattach the battery cover Slide the Con...

Page 7: ...l parts are properly tightened before you use the treadmill To protect the floor or carpet place a mat under the treadmill 7 Insert the Frame Pin 45 through the Right Upright 9 into the hole in the Fr...

Page 8: ...approximate number of calories you have burned Note The console can display speed and distance in either miles or kilometers An M for miles or a K for kilometers will appear in the right side of the...

Page 9: ...he hole in the frame To protect the floor or carpet from damage place a mat under the treadmill Keep the tread mill out of direct sunlight Do not leave the treadmill in the stor age position in temper...

Page 10: ...tion see HOW TO FOLD THE TREADMILL FOR STOR AGE on page 9 Next locate the two Rear Feet 39 To decrease the incline of the treadmill remove the Rear Feet and tighten them into the round tube on the Fra...

Page 11: ...2 to 3 inches Walk on the tread mill for a few minutes Repeat until the walking belt is properly tightened Be careful to keep the walking belt centered 3 SYMPTOM THE WALKING BELT SLIPS OR IS OFF CENT...

Page 12: ...eases the demand on the heart to pump blood to the muscles and on the lungs to oxygenate the blood For effective aerobic exercise adjust the intensity of your exercise until your heart rate is near th...

Page 13: ...les Stretch With one leg in front of the other reach forward and place your hands against a wall Keep your back leg straight and your back foot flat on the floor Bend your front leg lean forward and m...

Page 14: ...Walking Platform 29 1 Front Roller Assembly 30 1 Right Foot Grip 31 2 Platform Bolt 32 1 Bumper 33 4 Roller Guard Screw 34 2 Roller Guard 35 2 Round Endcap 36 2 Rear Roller Adjustment Bolt 37 1 Hex K...

Page 15: ...6 17 18 19 22 21 26 31 22 33 34 26 28 35 36 20 40 36 20 35 22 31 30 25 29 26 25 15 14 24 23 21 22 18 19 14 13 8 16 26 33 34 39 39 41 20 20 20 20 38 38 42 42 43 43 43 43 48 46 47 47 10 49 48 46 48 32 5...

Page 16: ...ight damage abuse mis use improper or abnormal usage or repairs not provided by an ICON authorized service center products used for commercial or rental purposes or products used as store display mode...

Reviews: