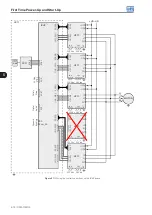
First Time Power-Up and Start-Up
CFW-11M G2 | 5-1
5
5 FIRST TIME POWER-UP AND START-UP
This chapter explains:
Check and prepare the inverter before power-up.
Power-up the inverter and check the result.
Set the inverter for the operation in the V/f mode based on the power supply and motor information by using
the Oriented Start-up routine and the Basic Application group.
NOTE!
For a detailed description of the VVW or Vector control modes and for other available functions,
please refer to the CFW-11 programming manual.
5.1 PREPARE FOR START-UP
The inverter must have already been installed according to
Chapter 3 INSTALLATION AND CONNECTION on
. If the drive project is different from the typical drives suggested, the steps below may also be followed.
DANGER!
Always disconnect the main power supply before performing any inverter connection.
DANGER!
Débranchez toujours l'alimentation principale avant d'effectuer une connexion sur le variateur.
1. Configure DIP switch S1 located on the ICUP board, according to the rated voltage of the UP11 G2 used on
the drive,
.
2. Configure the number of UP11 G2 connected in parallel through the DIP switch S2 located on the ICUP board,
according to
3. Check if the power, grounding and control connections are correct and firm.
4. Remove all the material rests from the inverter or panel interior.
5. Verify the motor connections and if the motor voltage and current are within the inverter rated value.
6. Energize the control (24 Vdc).
7. Close the panel doors.
8. The HMI must indicate undervoltage with the electronics energized and the power units de-energized. Parameter
P0004 (Voltage on the DC Link) will indicate approximately 15 Vdc.
9. Measure the line voltage making sure it is inside the permitted range according to
.
10. Verify if the automatic hardware identification recognized the current of the CFW-11M G2 inverter properly,
parameter P0295. The inverter current must be compatible with the number of power units installed.
11. Set parameter P0296 according to the rated voltage of the input line.


