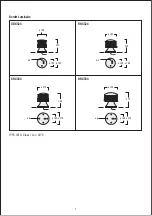
4
Installation Procedure
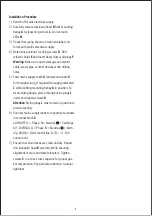
1) Switch off mains electrical supply.
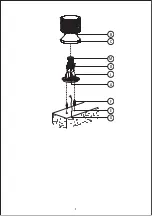
2) Carefully remove luminaire head
B
from mounting
ƃDQJH
A
by loosening screws
C
. Do not touch
LEDs
M
.
3) Check that rating shown on luminaire label con-
forms with mains electrical supply.
'HWHUPLQHSRVLWLRQVIRUƂ[LQJVFUHZV
D
. Drill
relevant holes
E
and insert heavy duty wall plugs
F
.
Warning
: Make sure not to damage any electric
cable, water pipe or other devices while drilling
holes.
5) Feed mains supply cable
G
(and second cable
H
for through wiring, if required) through grommet(s)
I
ZKLOHVHWWLQJPRXQWLQJƃDQJH
A
in position. To
Ƃ[PRXQWLQJƃDQJHSLHUFHWKURXJKQ\ORQSOXJV
J
,
insert and tighten screws
D
.
Attention
: Nylon plugs
J
must remain in position to
provide sealing.
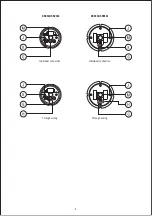
6) Connect mains supply leads to respective terminals
in terminal block
K
:
a) ON/OFF (L = Phase, N = Neutral, = Earthing).
b) 1-10V/DALI (L = Phase, N = Neutral, = Earth-
ing, DA/DA = DALI control line, D-/D+ = 1-10V
control line).
7) Ensure that all surfaces are clean and dry. Reposi-
tion luminaire head
B
carefully, while ensuring
alignment of male and female locators. Tighten
screws
C
in a criss-cross sequence for proper gas-
ket compression. Pay particular attention to equal
tightness.
Summary of Contents for XRX300 Series
Page 6: ...5 B C D I M A F E...


