background image


4. Battery 

Caution: The GPS navigator adopts removable Li-polymer battery. To avoid battery rupture, explosion, release of hazardous 
substance or burn, do not unpack, pierce, strike on or discard the battery in fire or water. 
The navigator has a working temperature of 0~50°C and storage temperature -10~60°C. Do not expose the device in 
excessive heat or hot areas, for example in the car under strong sunlight. To avoid damaging the device, keep it away from 
direct sunlight. 
Follow local regulations while disposing the battery. 

5. Install the Car Cradle and Bracket 

Caution: Do not place the GPS navigator in positions obstructing the driver’s vision, for example at the steering wheel, 
pedal or gear lever. Do not place it without fixing it, or in the place of air bag or the area after the air bag is inflated. 
While using the mounting  kit, follow local regulations. WAYTEQ will have no responsibility for any  penalty or damage 
resulting from traffic violation. 

6. Using T-Flash Card 

Caution: Do not take out the T-Flash card while an navigation program is being run or a media file is being played. 
To avoid drop or crash of the T-Flash card, do not exert heavy pressure on it or bend it. 
Mind the direction while inserting the T-Flash card to avoid damaging the slot or the card. 

7. Restarting the system 

When the system does not response, press the reset key on the right side of the GPS navigator to restart the system. 
Caution: Restarting the  system by pressing the reset  key  will result in loss of unsaved  data. Please  backup  your data 
regularly. 

Main Functions Introduction


1. Starting Up and Power Off


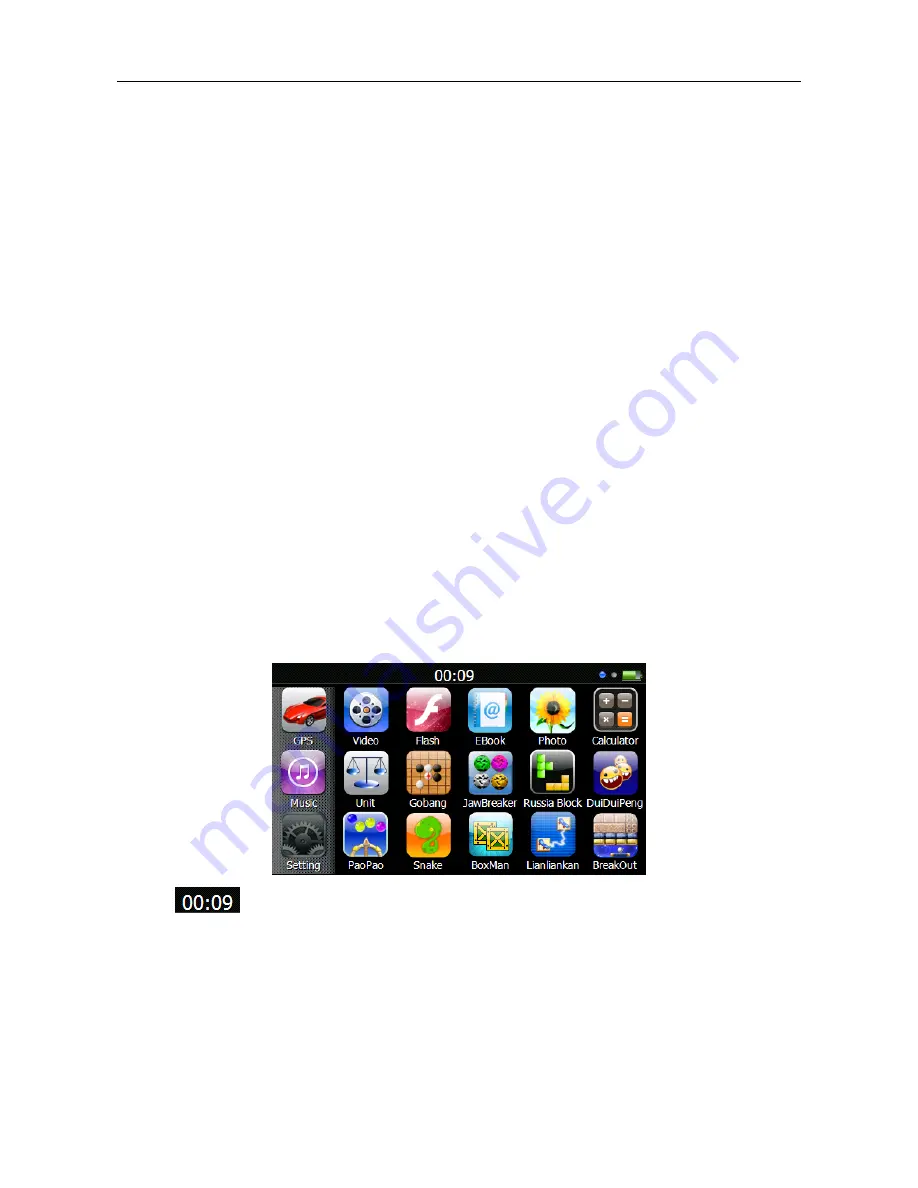
Long press the “Power” button to power the equipment on and you can see the main interface as below : 


Tap the “ 

  ” to Set the system date and time. 

Long press the “Power” button again to enter into the below interface :   

Summary of Contents for X950

Page 1: ...WayteQ GPS Navigation X950BT User Manual English Version 1 0...

Page 2: ...ill invalidate warranty and might endanger personnel safety for which WAYTEQ assumes no responsibility Data of navigation electronic maps might be inconsistent with actual traffic signals due to trans...

Page 3: ...longer and more stable operation Data transmission with computers via Mini USB Quality reception for accurate positioning and satisfactory navigation service Leisure partner with audio video amusemen...

Page 4: ...ter Caution The charging indicator light is red during charging Do not unplug the charge until the battery is fully charged and the indicator light turns green Please charge the GPS navigator when the...

Page 5: ...ted While using the mounting kit follow local regulations WAYTEQ will have no responsibility for any penalty or damage resulting from traffic violation 6 Using T Flash Card Caution Do not take out the...

Page 6: ...to the screen 2 GPS Navigation Double tap the GPS icon to start navigation program Caution Please refer to navigation software instructions for details 3 Music Tap the icon to enter into the followin...

Page 7: ...lect all tap the icon for single delete tap the icon to delete all 4 Photo Tap the icon then tap the icon to select photo files double tap the photo file to see the following interface A Return to the...

Page 8: ...B Volume C Select video file D Stop E Next F Pause play G Previous H Speed bar Tips Double tap the screen it will display in full screen double tap the screen again it will return to original playing...

Page 9: ...files double tap the file and enter into the following interface A Return to the Main menu B Bookmark list C Bookmark D Setting to set theme font E Next page F Previous page G Select EBook files 8 Set...

Page 10: ...nto the following interface Choose Music files to be background sound when unit is power on Tips after make any changes of setting tap to save the change 2 Backlight Tap the icon and enter into the fo...

Page 11: ...d choose the language 4 Date and Time Tap the icon and enter into the following interface to set date time and time zone 5 Calibration Tap the icon and enter into the following interface Tap the icon...

Page 12: ...icon there will be one prompt as below to ask if go into WINCE mode choose OK to enter and Cancel to exit 7 Sys Info Tap the icon and the system information will be shown 8 USB Tap the icon to set the...

Page 13: ...uto Run Navigation next time when tapping the GPS icon in the main menu the device will run the selected Navigation software automatically 10 Default Tap the icon and enter into the following interfac...

Page 14: ...f the memory SD card and flash or tap to clear the memory 13 Theme Tap icon to enter the Theme interface as below to set a style and theme for the system interfaces To rearrange icons at will tap on a...

Page 15: ...ges can be deleted To delete images select an added image from the Wallpaper interface and then tap 15 FM Settings Tap the icon and enter into the following display interface Tap or icon to increase o...

Page 16: ...playing 16 Snake Tap icon to enter into the game interface and start playing 17 BoxMan Tap icon to enter into the game interface and start playing 18 Lianliankan Tap icon to enter into the game inter...

Page 17: ...p the to delete pair info If paired mobile phone is not in the device list please tap the icon and enter into searching interface and pair with the mobile phone mobile phone s Bluetooth should be swit...

Page 18: ...18 In case of incoming call the interface will look as below Receive the call and interface will look as below...

Page 19: ...as below Name display name of the device in the process of the Bluetooth transmission Pin Tap the icon and enter into the pin code interface This document is for guidance only and does not form part...

Reviews: