Congratulation on your new EV charger.Read this manual carefully before use and keep it for future reference.
9.6kW AC EV Charger
User Manual
Model US10
Page 1: ...Congratulation on your new EV charger Read this manual carefully before use and keep it for future reference 9 6kW AC EV Charger User Manual Model US10...
Page 2: ...ew 5 4 NEMA Plug in Outlet 6 5 Installation 6 5 1 Charging Station Installation 6 5 2 Connector Holster Installation 9 6 Charging Operation 10 6 1 Plug and Charge Mode Default 10 6 2 RFID Mode 11 7 Tr...
Page 3: ...ation Protection Leakage Current and Ground Fault Protection Lightning Protection Overvoltage Protection Undervoltage Protection Overcurrent Protection Overtemperature Protection Ground Fault Detectio...
Page 4: ...ing List R F I D CARD Charging Station with Connector Connector Holster Wall Anchor 7 pcs Type B Screw M4 x 30 mm 7 pcs RFID Card 2 pcs Product Quick Guide User Manual Wall Dock Type A Screw M4 x 12 m...
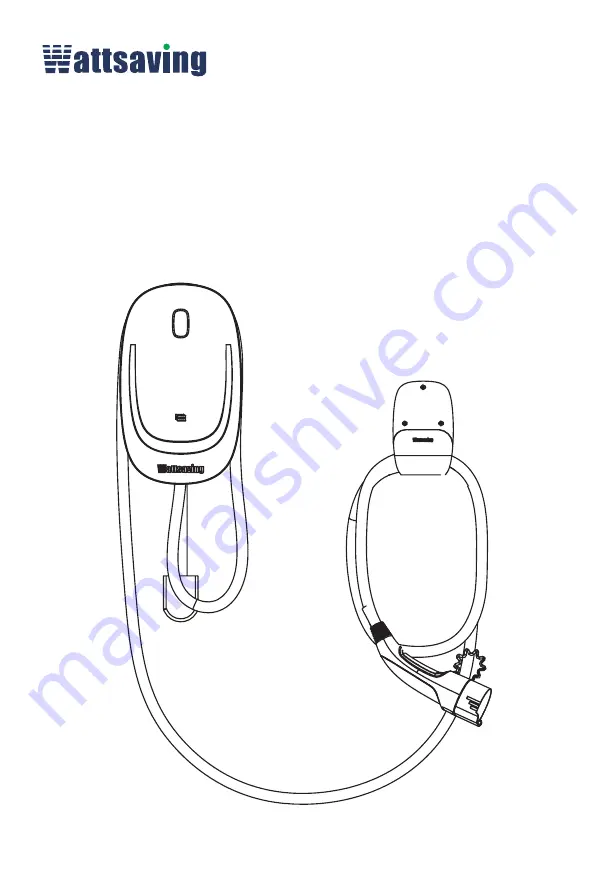
Page 5: ...5 3 Product Overview Led Indicator RESET BUTTON J1772 Connector RFID Reader Interrogator Connector Holster...
Page 6: ...facing up as shown per the diagram Ensure you have the correct permits for this electrical installation The power supply cable length is limited to 11 8 30 cm WARNING IMPORTANT NEMA 14 50P NEMA 6 50P...
Page 7: ...M4 M4 M4 Find the wall stud nearest to the NEMA outlet and draw a vertical line Plug the NEMA cable into the outlet and position the charger centered on the vertical line Ensure that the NEMA cable h...
Page 8: ...of the charger into the wall dock mounting holes C Slide the charger downwards 5 1 2 Drill 4 holes and insert wall anchors into the mounting holes Attach the wall dock to the mounting location by scr...
Page 9: ...eep it level and mark the 3 mounting holes M4 then remove the holster wall dock wall 5 2 Connector Holster Installation M4 M4 M4 5 1 4 Screw the Type A Screw M4 x 12 mm into the hole at the side of th...
Page 10: ...ill be solid green unplug the connector and place it back into the holster 6 Charging Operation 6 1 Plug and Charge Mode Default If you need an emergency stop while charging please press the RESET BUT...
Page 11: ...nnector and place it back into the holster 6 2 1 How to the Enable the RFID Cards 6 2 RFID Mode A When the charging station is on standby press the RESET button and hold till the LED turns orange from...
Page 12: ...wer on the device again If the fault persists contact us The red light flashes slowly twice and quickly twice alternately cycle Output Overcur rent 1 Immediately turn off the leakage over current prot...
Page 13: ...the leakage over current protection switches in the power distribution box 2 Check whether the charger output line is damaged or has low impedance to the ground or short circuit 3 After the fault is r...
Page 14: ...e materials chemicals or vapors Please do not use the product if the enclosure or the EV connector is frayed broken otherwise damaged or fails to operate Please do not operate this product at a temper...
Page 15: ...l either 1 replace the product or 2 exchange the product with a product that is of equal value A replacement product assumes the remaining warranty of the original product or 180 days from the date of...
Page 16: ...support wattsaving com www wattsaving com SHENZHEN WATTSAVING ELECTRICAL TECHNOLOGY CO LTD Made in China...