10
❑
5)
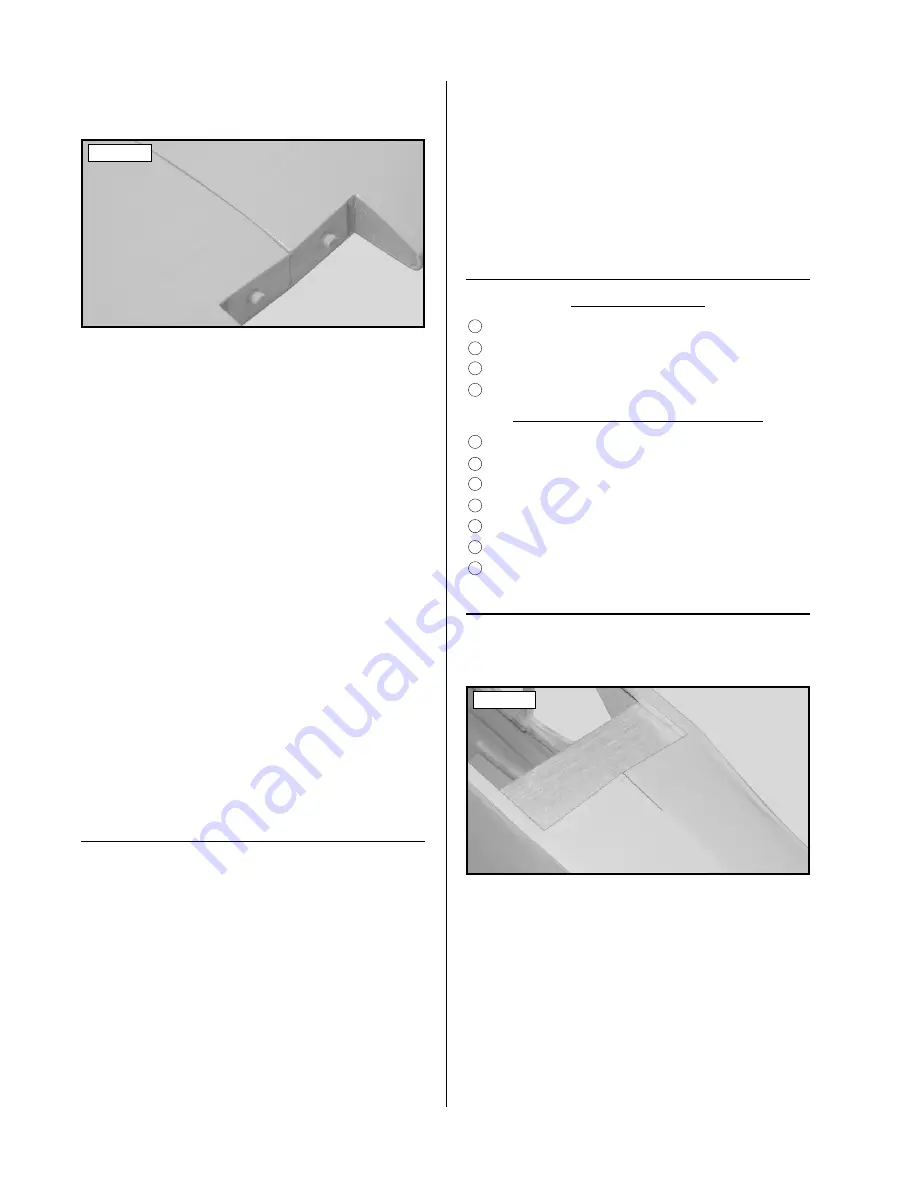
Look carefully at the center section joint: the
wing halves should fit together tight with little or no gaps
in the joint. See photo # 6 below.
Photo # 6
❑
6)
If the center section joint is not tight, remove the
wing halves and the dihedral brace, and lightly sand the
edges and tips of the brace. Test fit the wing halves to-
gether with the dihedral brace installed again and repeat
until you are satisfied with the fit. Once you are satisfied
with the fit, remove the wing halves and the dihedral brace.
☛
It is important that the wing halves fit together prop-
erly. The better the fit, the stronger the center section
joint will be.
❑
7)
Following the instructions on the packaging, mix
a generous amount of Kwik Bond 5 Minute Epoxy. Mix
the epoxy for about 1 minute. This will ensure that both
parts are thoroughly incorporated.
❑
8)
Working with only one wing half for now, apply
a thin layer of epoxy inside the dihedral brace box and to
only half of the dihedral brace. Make sure to cover the
top and bottom, as well as the sides, and use enough
epoxy to fill any gaps.
❑
9)
Slide the dihedral brace into the wing half up to
its centerline. Remove any excess epoxy before it dries
using a paper towel and rubbing alcohol. Allow the ep-
oxy to fully cure before proceeding.
❑
10)
Once the epoxy has fully cured, trial fit both
wing halves together again to double check that the wing
halves still fit together properly.
❑
11)
Mix a generous amount of Kwik Bond 5 Minute
Epoxy. Apply a thin layer of epoxy to the exposed half of
the dihedral brace, the inside of the second wing half, and
the entire surface of both root ribs. Make sure to use
enough epoxy to fill any gaps.
❑
12)
Slide the two wing halves together and care-
fully align them at both the leading and trailing edges.
Wipe away any excess epoxy using a paper towel and rub-
bing alcohol and use several pieces of masking tape to
JOINING THE WING HALVES
hold the two wing halves aligned until the epoxy fully
cures - about 1 hour.
❑
13) Once the epoxy has fully cured, double-check
the center section joint. If any gaps are present, mix a
small amount of Kwik Bond 5 Minute Epoxy and care-
fully fill any remaining gaps. Remove any excess epoxy
using a paper towel and rubbing alcohol, and allow the
epoxy to fully cure.
WING MOUNTING
TOOLS AND SUPPLIES REQUIRED
❑
Kwik Bond Thin C/A
❑
# 1 Phillips Head Screwdriver
❑
Electric or Hand Drill
❑
1/8" Drill Bit
❑
Straight Edge Ruler
❑
Pen or Pencil
❑
Masking Tape
1
5
10
ALIGNING THE WING
13
ITEMS REQUIRED
❑
{1} Fuselage w/Pushrod Housings
❑
{2} 3mm x 25mm Machine Screws
❑
{2} 3mm Flat Washers
❑
{2} 3mm Nylon Insert Nuts
1
21
22
16
17
23
❑
1)
Using a ruler and a pen, locate the centerline of
the fuselage, at the back edge of the wing saddle, and
draw a mark. See photo # 7 below.
Photo # 7
❑
2)
Set the fuselage on your work table and place
the wing into the wing saddle. Align the two hardwood
dowels in the leading edge of the wing with the two pre-
drilled holes in the fuselage's forward bulkhead.
❑
3)
Carefully slide the wing forward, making sure
that the two hardwood dowels fully engage the two pre-
drilled holes in the forward bulkhead.
❑
4)
The joint where the two wing halves were glued
together is the centerline of the wing. Align the center-
line of the wing with the centerline you drew on the top of
the fuselage.
19


