5
6. SYSTEM REQUIREMENTS
Operating systems Windows
®
2000, XP, Vista, Windows
®
7, 8 and 10, Mac OS X (versions 10.X or
higher). The appliance does not require any driver.
7. HARDWARE INSTALLATION
7.1 Inserting the batteries
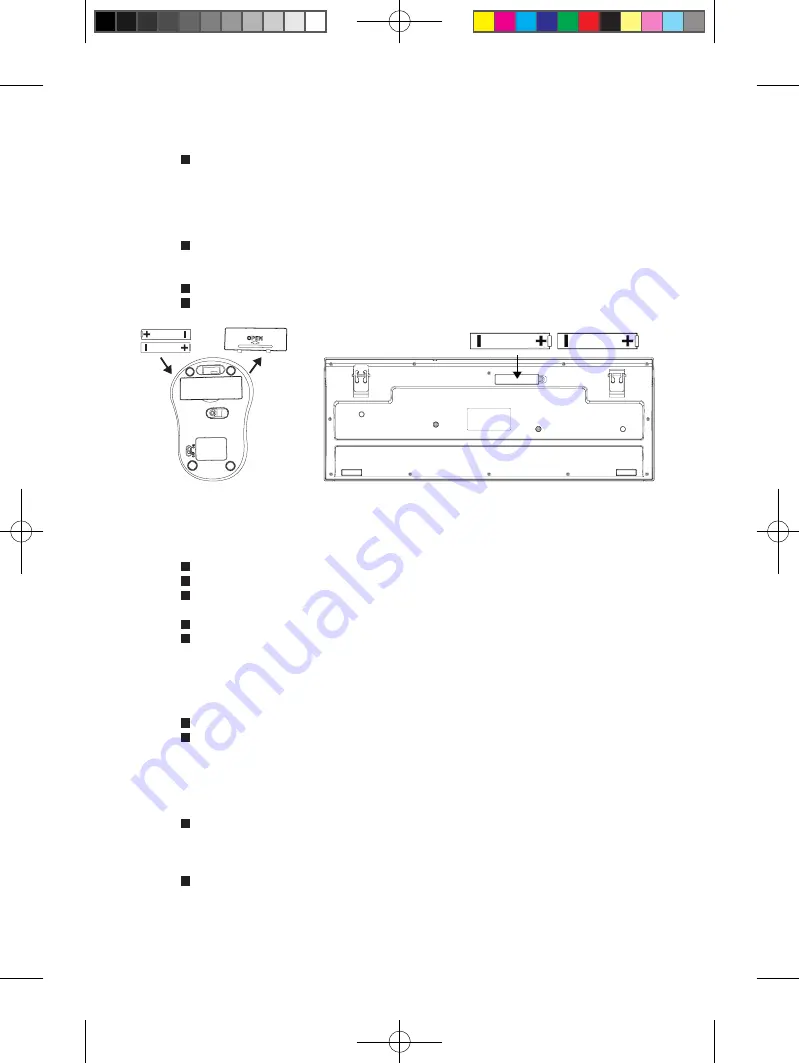
Remove the battery compartment cover (7, 12) from the mouse and from the keyboard and insert
into each 2 x 1.5V AAA batteries (included) according to the polarity markings inside the battery
compartments of mouse and keyboard.
Insert both battery compartment covers (7, 12).
Mouse and keyboard are ready for use.
CAUTION!
Risk of explosion if the batteries are replaced by incorrect types. Dispose of used batteries according to the
regulations.
7.2 Connecting USB receiver
Pull the USB receiver (5) out of its compartment (6) underneath the mouse.
Connect the USB receiver (5) with a free USB port of your computer.
The USB receiver (5) will be recognised by operating system and all drivers will be installed
automatically.
Mouse and keyboard automatically connect with the receiver (5) and are ready for use.
The mouse can be switched on and off with the
ON/OFF
switch (8).
8. PAIRING MODE
The first time the equipment is switched on, it immediately goes into pairing mode. After it is successfully paired with the
receiver (5), it can be used. Should either the mouse or keyboard not work, reactivate the pairing mode:
Re-plug the USB receiver (5) into the USB port of your computer.
The mouse and keyboard will automatically be paired again.
9. DPI FUNCTION
The wireless mouse features a 800, 1200 and 1600 switchable dpi resolution, ensuring higher
precision and sensitivity. It will work best if used on a structured surface. The mouse will not work on
surfaces without a structure (e.g. glass) or reflecting surfaces, e.g. mirrors or polished surfaces. On
surfaces with repeating patterns, the mouse might not recognize all movements correctly.
Press the
DPI
button (4) on the top of the mouse to toggle the dpi resolution.


