Hot
Cold
Filter system
Inlet
Outlet
Step 4
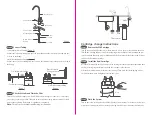
Connect Tubing
1. Install the Inlet Water Tubing
(Figure 5)
Connect the inlet water tubing from the feed water adapter to the inlet water port and pop the
lock clip on the fitting;
2.Install the Outlet Water Tubing
(Figure 6)
Connect the outlet water tubing from the faucet to the outlet water port and pop the lock clip on
the fitting;
Step 5
Check the Leaks and Flush the Filter
Turn on the cold water supply valve. Check if there’s water leakage at connectors, components,
valve or any connecting position. Then turn on the new faucet. It may dispense muddy or black
water at the beginning. Please flush for 10 minutes continuously.
Note:
The water is not drinkable until flushing for 10 minutes.
Cartridge change instructions
Step 1
Remove the Old Cartridge
Turn off the water supply to the system. Open faucet to release the pressure and drain the water.
Take off the cartridge and unscrew the fastening ring using the filter wrench included with your
system. Hold the filter head with one hand and pull off the cartridge with another hand. Remove
and discard the old filter cartridge.
Step 2
Install the New Cartridge
Hold the filter head with one hand and insert the cartridge into the head with another hand until
two black sealing rings are fully inserted and the cartridge reaches the end.
Press the filter head downwards hard into the cartridge. Then screw the fastening ring counter-
clockwise with a wrench. Hang the bracket on the screws.
Step 3
Flush the System
Turn on the cold water supply valve and check if there’s water leakage. Then turn on the faucet. It
may dispense muddy or black water at the beginning. Please flush for 10 minutes continuously.
Quick-connect
fitting on faucet
3/8’’ Outlet water tubing
Figure 6
Figure 4
Faucet Body
Mounting Washer
Nut
Countertop
Faucet Spout
Quick-Connect
fitting
Faucet Stem
Lock clip
Lock clip
Close
Feed water adapter
3/8’’ Inlet water tubing
Figure 5


