background image


10 


4.  Changing the camera settings   
4.1. Configuration changes from the Web browser 


(WAT-933 System configuration) 


The  network  settings  of  the  WAT-933  can  be  changed  in  the  setting  change  by  the  Web 

browser.  The  Web  browser  must  correspond  to  html5  and  recommended  web  browser  is 

Internet Explorer 11. 


4.1.1.  WAT-933 System Configuration: Overview (top page) 

Open your web browser and go to following address page. 


http://”WAT-933 IP Address”/ 


(Example: http://192.168.1.250/) 


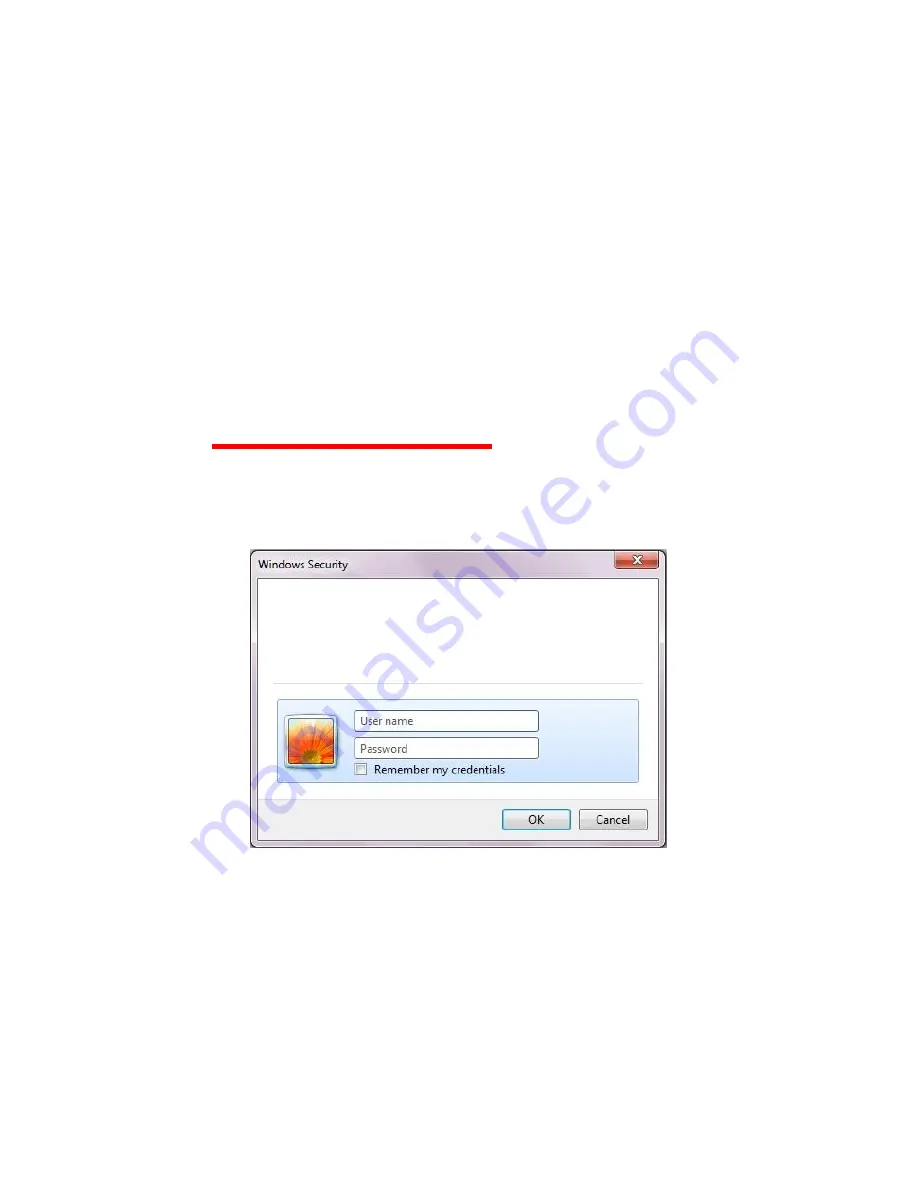
At the first time connection, the authentication window will open such as shown in the below 

figure. 


User name: root 

Password: 1234   


Enter the above and click the ”OK” button. 


The server 192.168.1.250 is asking for your user name and 
password. The server reports that it is from admin. 

Warning: Your user name and password will be sent using 
basic authentication on a connection that isn’t secure. 

Summary of Contents for WAT-933

Page 1: ...WAT 933 WAT 2400S User s Manual Rev 1 03 Watec Co Ltd 2018 6 11...

Page 2: ...2 Revision Record Rev Date Changes Remarks 1 00 November 15 2017 1 01 January 25 2018 New function added 1 02 April 10 2018 Specification changed 1 03 June 11 2018 New function added...

Page 3: ...4 1 Configuration changes from the Web browser 10 4 1 1 WAT 933 System Configuration Overview top page 10 5 Setting file Retrieve Load 13 5 1 Retrieve Settings 13 5 2 Load Settings 13 6 SD Card Infor...

Page 4: ...ple of the power supply by PoE hub In addition you need to have the power individually to the router and the PoE hub Connect the LAN cable of camera side to a PoE port of the PoE hub and connect the L...

Page 5: ...he network default setting of the WAT 933 is as follows IP Address 192 168 1 250 static Netmask 255 255 255 0 Gateway 192 168 1 1 The network settings of the WAT 933 can be changed in the setting chan...

Page 6: ...order to accommodate WAT 933 s requirement PC network settings for a local area connection in Windows7 as follows Control Panel Network and Internet Network and Sharing Center Local Area Connection Pr...

Page 7: ...e below figure And if the network setting of the camera is in default configuration IP Address 192 168 1 250 static go through the following steps to set up the PC network settings Input the values as...

Page 8: ...ropriate VLC which meets your PC from VideoLAN official download page https www videolan org vlc index html and install Open the VLC media player when the installation is complete Click on Media Open...

Page 9: ...work property video starts to stream Please check again the network settings if it does not start The screen might become grey during the viewing in that case please click the stop button in the lowe...

Page 10: ...iguration Overview top page Open your web browser and go to following address page http WAT 933 IP Address Example http 192 168 1 250 At the first time connection the authentication window will open s...

Page 11: ...11 WAT 933 MENU will be displayed as shown in the below figure This page is the top page...

Page 12: ...ion will be displayed as shown in the below figure At this page you can change the following network settings Switching of AUTO IP DHCP and STATIC IP Advanced settings for STATIC IP Enter the each ite...

Page 13: ...downloaded setting file on your setting by uploading 5 1 Retrieve Settings Click on the download link to download the file setting w933 5 2 Load Settings Click the Brows button to display the file se...

Page 14: ...cording function can be arbitrarily turned ON OFF Video Snapshot Files described later can be used only when Continuous Recording is off 6 2 Format Format the SD card 6 3 Video Snapshot Files You can...

Page 15: ...Zilla Download the appropriate Installer which meets your PC from FileZilla official download page https filezilla project org and install it Open the FileZilla when the installation is completed Ente...

Page 16: ...16 8 Selection of Streaming to Record You can select video streaming to be recorded on the SD card Switch the h264 Main Sub with the red line Select Recording shown below Main Settings Sub Settings...

Page 17: ...17 9 Display hide timestamp You can choose to show hide the timestamp of the image Toggle display non display on Timestamp Display in the figure below...

Page 18: ...18 10 Selection of Audio Input You can select audio input Select from INTERNAL MICROPHONE EXTERNAL AUDIO or MIX BOTH with the red line Select Audio shown below...

Page 19: ...nager Download the appropriate Installer which meets your PC from ONVIF Device Manager official download page https sourceforge net p onvifdm wiki Home and install it Open the ONVIF Device Manager whe...

Page 20: ...11 4 Stream switching Although it is streaming H264 Main in the initial state you can switch to H264 Sub and MJPEG Click the red line part Profiles in the figure below to display the Profiles setting...

Reviews: