68
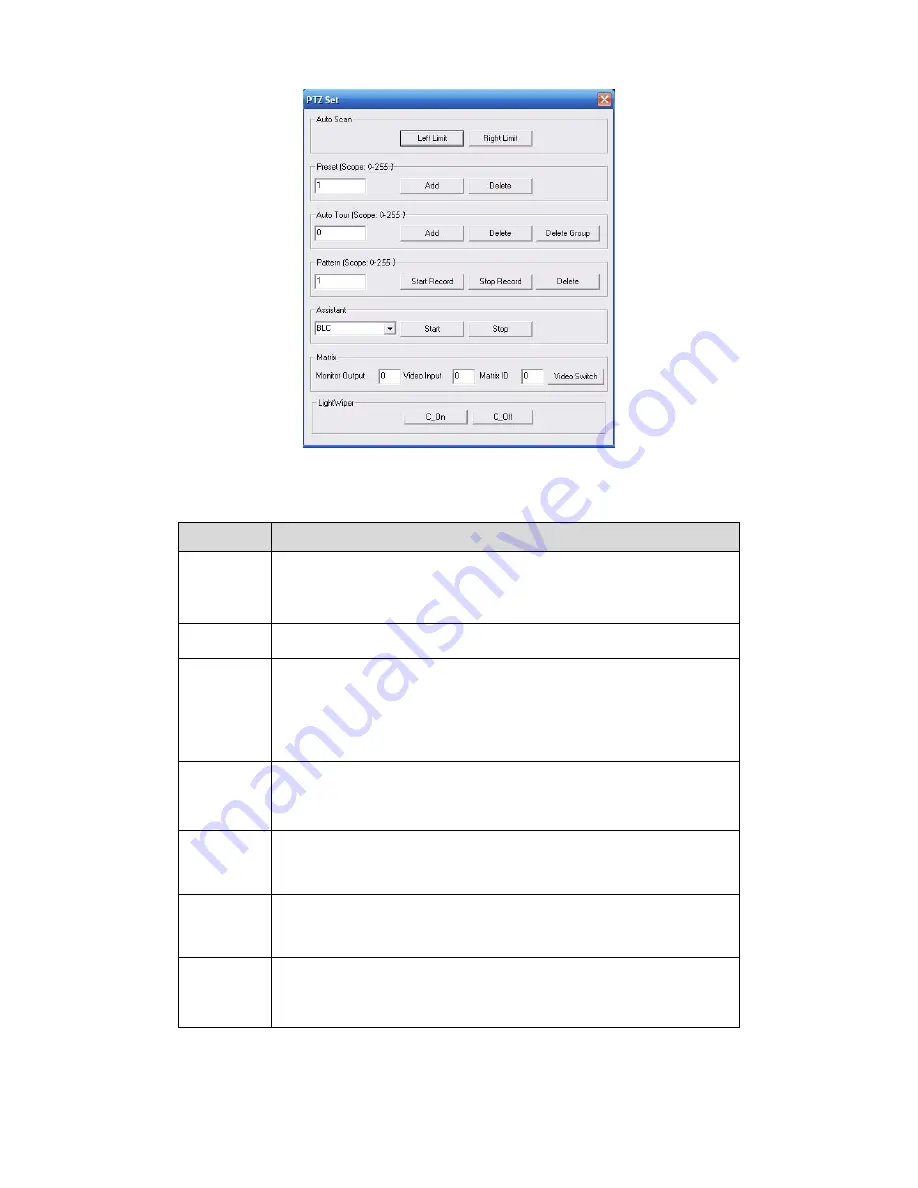
Figure 5-11 PTZ Setup
Please refer to the following sheet for PTZ setup information.
Parameter
Function
Scan
Move the camera to you desired location and then click left limit
button.
Then move the camera again and then click right limit button to
set a right limit.
Preset
Use direction keys to move the camera to your desired location and
then input preset value. Click add button, you have set one preset.
Tour
Input auto tour value and preset value. Click add button, you
have added one preset in the tour.
Repeat the above procedures you can add more presets in one
tour.
Or you can click delete button to remove one preset from the
tour.
Pattern
You can input pattern value and then click start record button to
begin PTZ movement. Please go back to Figure 7-10 to implement
camera operation. Then you can click stop record button in Figure 7-
11. Now you have set one pattern.
Assistant
The assistant items include: BLC, Digital zoom, night vision, camera
brightness, flip.
You can select one option and then click start or stop button.
Matrix
Please select matrix x and then input corresponding monitor output
channel number, video input channel number. Then you can click
video switch button.
Light/wiper You can control the light and wiper of the peripheral device. Please
note the peripheral device shall support this function.
5.2.6 Color and More Setup
Color and other setup interface are shown as in Figure 5-12.


