
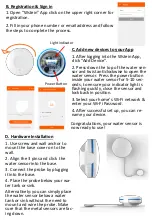
B. Registration & Sign in
1. Open
“
Wstein
”
App click on the upper right corner for
registration.
2. Fill in your phone number or email address and follow
the steps to complete the process.
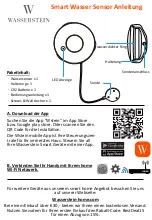
C. Add new devices to your App
1. After logging into the Wstein App,
click
“
Add Device
”.
2. Press down the top of the water sen-
sor and twist anticlockwise to open the
water sensor. Press the power button
inside your water sensor for 5
-
10 sec-
onds, to ensure your indicator light is
flashing quickly, close the sensor and
lock back in position.
3. Select your home
’
s Wi
-
Fi network &
enter your Wi
-
Fi Password.
4. After successful set up, you can re
-
name your device.
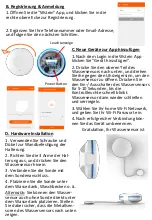
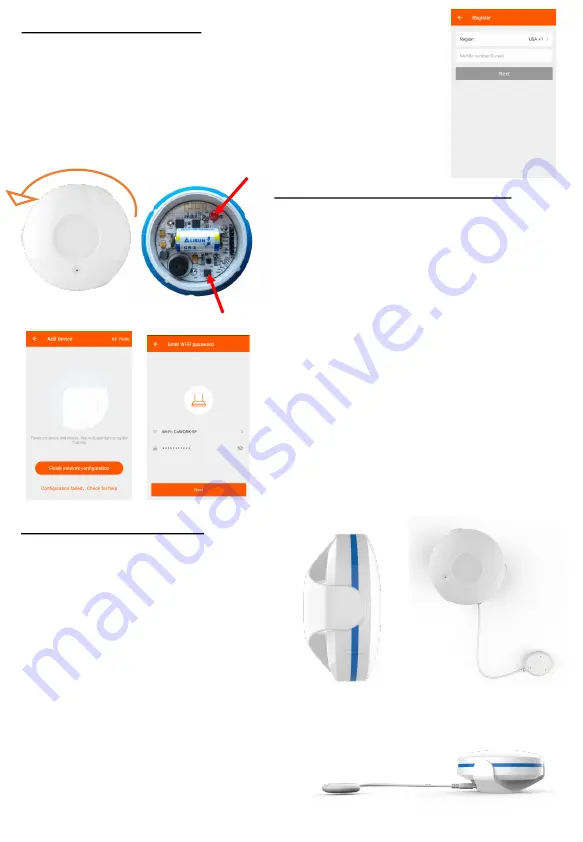
D. Hardware Installation
1. Use screw and wall anchor to
mount the base cover on to the
wall.
2. Align the 3 pins and click the
water sensor into the base.
3. Connect the probe by plugging
it into the base.
4. Place the probe below your wa-
ter tank or sink.
Alternatively: you can simply place
the water sensor below a water
tank or sink without the need to
mount and wire the probe. Make
sure that the metal sensors are fac-
ing down.
Congratulations, your water sensor is
now ready to use!
Light indicator
Power Button