background image

 3  Safety guidelines

Configuring and operating this equipment requires 

precise knowledge

 and 

observance


of the instructions in this 

user manual

. The equipment is designed only for its intended 

application.

WARNING:


Servicing and repairs should be carried out only by authorised specialists.

Disconnect the power plug before starting any maintenance work.

Make sure that the equipment is connected to the correct power source.

The safety valve on the pressure vessel opens automatically if the operating 

pressure exceeds 7 bar.

The pressure is switched on only after the door is fully closed, thanks to a safety 

contact and an orange monitor light.

Dry-run protection switches off at 112°C (brown knob, left side of unit)

Warning:

  Scalding risk with hot polymerisation.

Open the lid slowly!

5

Summary of Contents for Polyquick

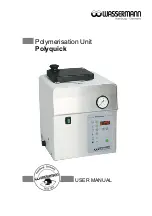
Page 1: ...Polymerisation Unit Polyquick USER MANUAL...

Page 2: ...he applying laws to prevent accidents as well as the precautions given in this user manual We are not liable for any damages which occur due to inappropriate usage or faulty operation of this device M...

Page 3: ...sion table C F 9 8 3 Filling and Switching On 11 8 4 Programming 11 8 5 Operation 12 8 5 1 Automatic Operation 12 8 5 2 Manual Operation 13 8 6 Draining the Water 14 9 Troubleshooting 14 10 Care and M...

Page 4: ...tch which releases the compressed air only when the door is fully closed even polymerisation of up to 3 flasks in the flask holder or 2 cast resin flasks or bottom feed mount and or 6 settings fast em...

Page 5: ...sconnect the power plug before starting any maintenance work Make sure that the equipment is connected to the correct power source The safety valve on the pressure vessel opens automatically if the op...

Page 6: ...s of Wassermann Dental Maschinen GmbH are not extended by these instructions 5 Application The Polyquick is a pressure polymerisation unit for the hot and cold polymerisation of plastics It can be set...

Page 7: ...account Do not install the unit outdoors or in places without proper ventilation Before start up be sure the device reaches room temperature 6 3 Storage The unit location is very important when it com...

Page 8: ...ssure To do so 1 Turn on the main switch green rocker switch 2 Close the cover and check the door contact 6 control light is on 3 Turn off the heater switch 1 the red LED in the switch will go out 4 S...

Page 9: ...g the unit whether in verbal or written form are based on our own experience and experimentation and can only be regarded as guidelines 8 2 Conversion table C F TF 32 1 8 100 C 212 F 95 C 203 F 90 C 1...

Page 10: ...ously set temperature When the set temperature button 8 is pressed the heater temperature is overridden and the unit increases to the last set temperature Before starting the timer allow a warm up per...

Page 11: ...rogramming Time Press Time 3 and Set 8 Keep Time 3 pressed and set the value using Set 8 and Default 9 Temperature 1 Press Temperature 4 and Set 8 Keep Temperature 4 pressed and set the value using Se...

Page 12: ...For pressure polymerisation press Pressure 2 After the unit has reached the selected temperature press Start Stop 10 to start the program When the program has finished you will hear a 10 second tone t...

Page 13: ...opened when the pressure gauge reads 0 Warning Scalding risk with hot polymerisation Open the lid slowly If the pressure in the compressed air supply line drops during the process a non return valve...

Page 14: ...e does not increase in chamber Lid seal O ring faulty Check O ring and replace if necessary Pressure regulator set to 0 pressure gauge Check pressure and adjust if necessary Door not fully closed Clos...

Page 15: ...equires only normal cleaning sponge damp cloth mild detergent and no further chemical additives 10 2 Maintenance Check the door seal Item no 380032 regularly for damage To do so remove the ring red si...

Page 16: ...320026 PVC hose 6 x 3 1 4 textile per meter 320038 10 7 Warranty The warranty period for our equipment is 12 months If faults occur within the warranty period contact your dental depot or get in touch...

Page 17: ...consumption 4 2 A Output 1000 W W x H x D 340 x 435 x 355 mm Weight 21 1 kg Compressed air connection min 4 bar Operating pressure max 6 bar Pressure chamber 150 mm D 285 mm Other voltages on request...

Page 18: ...tect the environment prevent environmental pollution and improve the recycling of raw materials the European Commission adopted a directive that requires the manufacturer to accept the return of elect...

Page 19: ...ustimmung ver ndert wird This is to confirm that the above mentioned machine complies with the described EU guidelines This declaration becomes invalid if the machine is modified without our approval...

Page 20: ......

Reviews: