Steps for setting up the
WPL305
1. Unpack
Remove the WPL305 from the box and
place it on a stable, flat surface. The two
halves of the case are taped together and
padded to prevent damage. Remove all
tape and padding. Open the plastic bags
containing parts for the printer. You will
have:
Power cord and adapter
Empty paper core
2 plastic ribbon spindles
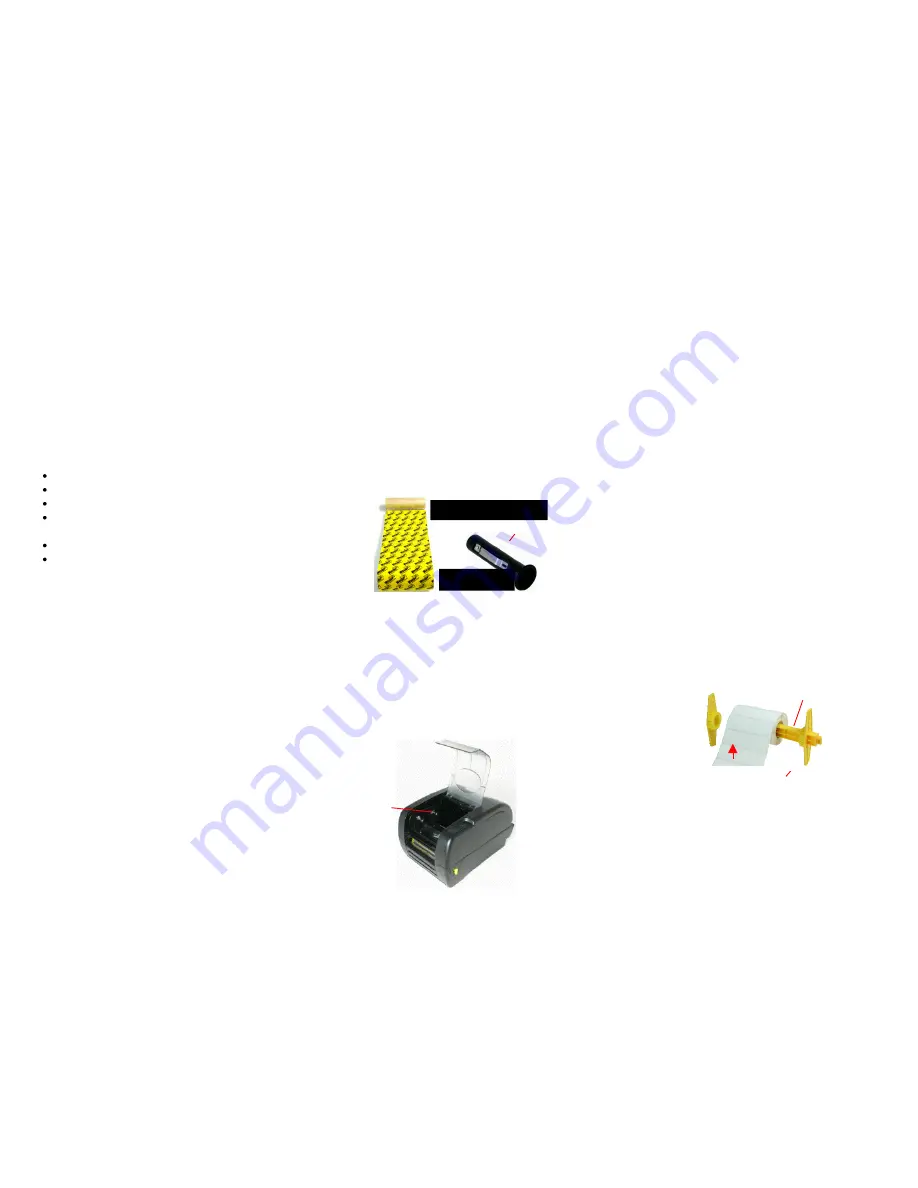
1” Label spindle, 2 centering tabs, 2 1.5”
core adapters
Centronics / Parallel cable
CD with printer drivers and printable
documentation
2. Connect to Your Computer
Connect the Centronics end of the printer
cable to the back of the printer and the
other end to the parallel port of your
computer.
If you are connecting this printer using
USB, there is a printable USB connection
guide on the included CD.
3. Connect the Power
Plug the power cord into the power adapter
and then to the printer. Plug the wall plug into
a grounded and surge protected outlet or
power strip.
4. Load a Ribbon
The printer automatically detects if a
ribbon is installed after powering on and
will switch between thermal transfer and
direct thermal printing mode. If you are
using direct thermal labels do not load a
ribbon.
1. Push down on the ribbon access
window to unlock and open the cover.
2. Wasp Ribbons come with the
cardboard rewind core already
attached to the ribbon for ease of
accurate installation. Arrange the
ribbon and core as seen in the picture
below so that the ribbon is rolled out
about 4 inches and the dull side of the
printer ribbon is facing away from you.
On Wasp Ribbons, the Wasp logo on
the leader should face you.
3. Put the two spindles into the two cores
from the right. Make sure the right side
of the spindle is flush with the core
after insertion.
4. Pull the cover access lever and open
the printer.
5. Hold the ribbon with the wide end of
the spindle on the right and lower the
rewind core through the back of the
ribbon compartment.
6. Attach the ribbon spindle to the Back
Hub by placing the left side of the
spindle against the knob with the
spring on it and compressing with the
ribbon spindle. Slide the right side
down over the other knob. The ribbon
spindle should not be able to be
removed without re-compressing the
spring. You may have to turn the
ribbon until the grooves on the spindle
align and it clicks into place.
7. Reach between the two halves of the
printer and gently pull the rewind
spindle and core under and around the
print head and mount it on the Front
Hub as in step 6.
8. Rotate the ribbon rewind core away
from you until the black ribbon is on
the rewind core.
9. Close the ribbon access window and
press down to lock it.
5. Load Labels
1. Insert the 1” label spindle into the label
roll. If your paper core is 1 inch, you can
remove the 1.5” core adapters from the
fixed tab. If the label width is 4 inches
wide, the two fixing tabs are not required.
Center the labels on the Spindle.
2. Open the printer’s top cover by pulling
the yellow cover open levers located on
each side of the printer and lifting the top
cover. A top cover support arm at the rear
of the printer will hold the printer top cover
open.
Front Hub
Back
Hub
1” Label Spindle
Printing Side
Face Up
1.5” Core Adapter
Centering Tab
Ribbon Core
Spindle
Rewind Core


