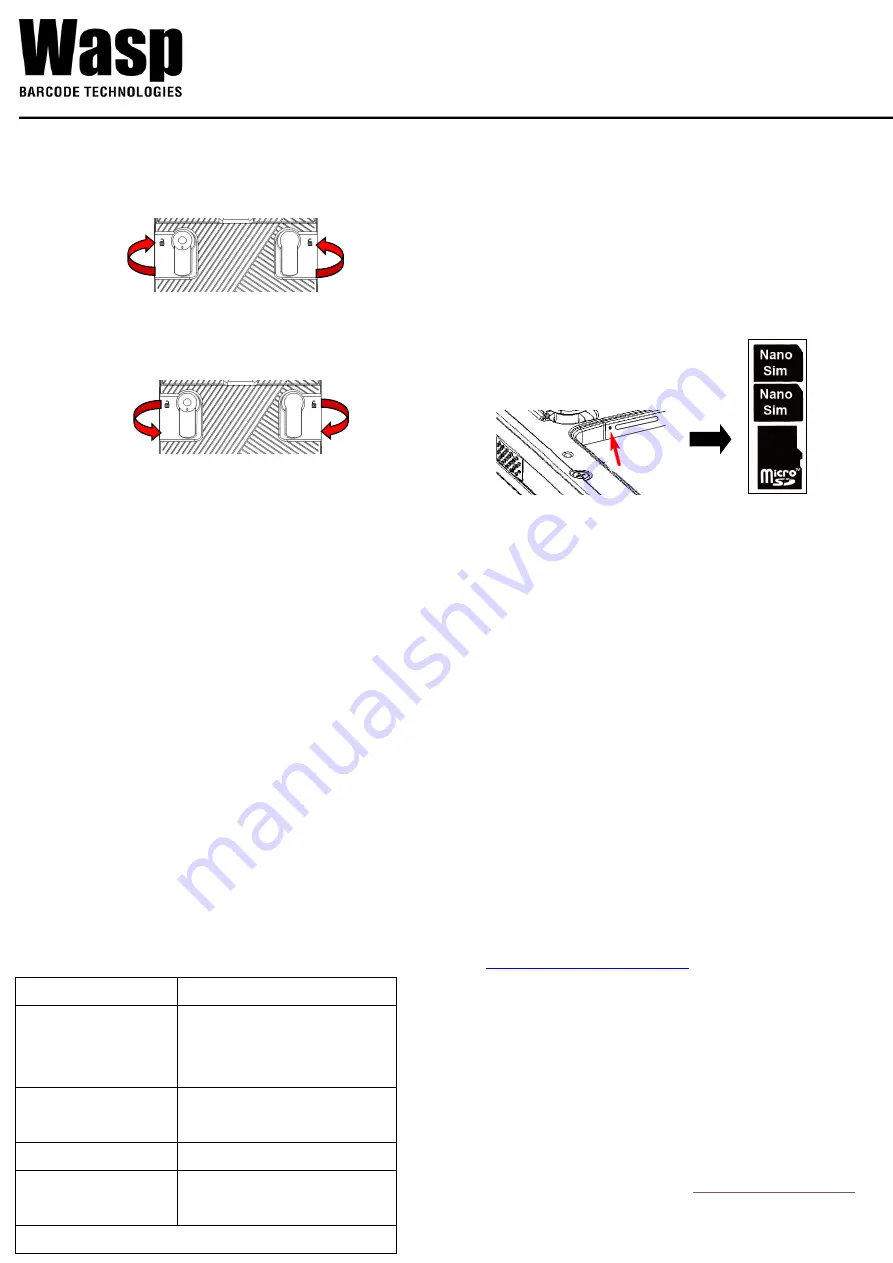
Installing the Battery
1.
To unlock the battery, turn up the two knobs and pull the
battery up to remove it.
1.
To lock the battery, turn down the two knobs.
Ensure the battery is securely closed, or you may be unable
to turn on the terminal.
Using the Micro SD/Nano SIM Card
The DR5 has 1 x micro SD and 2 x nano SIM card slots inside the
battery compartment.
1.
To unlock the battery, turn up the two knobs on the side and
pull the battery cover up to remove it.
2.
Insert either the tip of the tray ejector tool that came with the
package or a small bent paperclip into the eject hole.
Then pull the tray out.
3.
Lock the two knobs on the battery.
Turning on the Terminal for the First Time
We recommend fully charging the DR5 before first use.
Once fully charged, start your device to set up the
languages, WiFi setting, and date/time.
•
To ensure the unit is working properly, please keep all connectors
away from contaminants such as dust, grease, mud, and water.
Such negligence may cause the unit to lose communication, short
circuit, or overheat.
•
If the connector is damaged, ensure the connector is fully repaired
before using the unit to avoid causing the device to short circuit.
https://www.waspbarcode.com
Copyright 2020 Wasp Barcode Technologies. All rights reserved.
Checking the LED Status
LED
Description
Red Light
■
Battery Charging
■
Twinkling to indicate battery low
status (less than 15%)
Green Light
■
Battery Fully charged
■
Barcode scan good read
Blue Light
Message
All of LEDs can be controlled
by software API
If the scanner app is running, LED
control by scanner app.
No LED (Red and Green) display when battery is out (even AC IN)
Charging the Battery
If the battery has been discharged for several days, you may need
to charge it for several minutes before powering it on.
When the battery power is too low, use the power adapter or put
the device in the charging cradle to charge (strongly
recommended) and not the USB type C cable connection with your
computer. Use only the adapter, the USB type C cable and the
cradle that came from Wasp.
For additional product documentation, visit
https://www.waspbarcode.com
CAUTION!


