8
TIPS AND INSTRUCTIONS
MICROPHONE PLACEMENT & SPACING
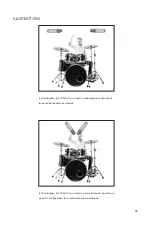
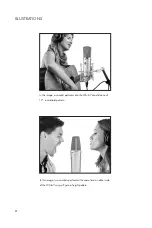
When it comes to choosing the distance to position a microphone from its sound source, one may think of this process
as choosing a desired ratio of dry original sound source to reflections and acoustic space. The closer the mic is to
the source, the less space and ambience will be captured. In some cases this is fully desirable; as ambience is often
added later at mixdown in modern production workflows. In other cases, natural acoustics are critical to getting a
realistic or expected result. A great illustration of this is the recording of a gunshot or cannon fire: at very close range,
the sound is surprisingly thin; but at a distance the sound becomes more full and explosive. This is a great reference to
keep in mind; as this phenomenon holds true with anywhere natural acoustics are an important part of the sound of
the instrument you’re recording, most notably with percussion.
A BRIEF WORD ON ROOM TREATMENT
Room acoustics can be just as important as the microphone you choose when recording, as even the best microphone
on the planet won’t sound great in a poorly-treated room: unwanted reflections can smear or add comb-filtering to
the sound you’re recording, turning a great take into something that’s unusable in the final mix. Though a proper walk-
in vocal booth is hardly necessary for most situations, a good quality ‘vocal shield’ type of product can make the
difference between demo quality and professional quality recordings when tracking vocals. Likewise, when recording
combo amps and other instruments using gobos or other acoustic isolation products can be hugely beneficial -
correcting excessive amounts of room ambience is nearly impossible to do in the best scenarios, and that’s why it is
hyper-important to take the time to set your recording scenario up properly the first time.


