background image

5

INSTRUCTIONS FOR USE

  1.   Before using your Waring

®

 Commercial Waffle Maker for the 

first time, remove any dust from shipping by wiping the plates 

with a damp cloth. Remove all protective paper and wrapping.

  2.  Plug cord into wall outlet.
  3.   Switch the toggle switch to the ON position. The RED light will 

illuminate to signal power. 

  4.   Preheat your Waring

®

 Commercial Waffle Maker on setting #4 

or preferred setting. It will now begin the preheating process. 

This should take about 4 minutes. The machine will sound 6 

beeps and the GREEN indicator light will go on to signal the 

unit is ready for baking. Season the waffle grids by spraying 

with cooking spray or brushing with a flavorless oil.


 For initial use

, it is important that the waffle maker is 

preheated before seasoning with cooking spray or oil. 

NOTE:

 The first time you use your waffle maker, it may have a slight 

odor and may smoke a bit. This is normal, and common to heating 

appliances.
 5.  

Choose a setting on the browning control dial. For golden 

brown waffles, we recommend using setting #4. When the 

waffle is completely baked, the waffle maker will sound 3 

beeps. Baking time is determined by browning level chosen. 

 6. 


Fill measuring scoop with batter to fill line. Pour batter evenly 

into the center of the waffle grid. Use a heat-proof spatula to 

spread the batter evenly over the grid. Close the lid and rotate 

the unit 180°.

  7.   Once the waffle is ready and the waffle maker has beeped 

3 times, rotate the waffle maker 180°, open the lid and remove 

waffle by gently loosening the edges with a heat-proof plastic 

spatula. Never use metal utensils, as they may damage the 

nonstick coating.

  8.   For WW200/WWD200, one waffle or two waffles can be 

baked at one time. For one waffle, simply follow previous 

instructions. For two waffles at once, pour batter into top 

waffle compartment, then rotate 180˚. You will now be able  

to open the other waffle compartment. Pour the batter in  

the grids and rotate another 180˚ in the other direction.  

Both waffles will now cook. There are individual green “ready” 

lights that will illuminate when each waffle is ready, and when 

an empty compartment is ready to bake another waffle.

Summary of Contents for WW180

Page 1: ...fin que votre appareil vous procure en toute s curit beaucoup de satisfaction lire attentivement le mode d emploi avant de l utiliser SINGLE AND DOUBLE BELGIAN WAFFLE CLASSIC WAFFLE MAKERS GOFRERA WAF...

Page 2: ...rate any appliance with a damaged cord or plug or after the appliance malfunctions or has been damaged in any manner Return appliance to the nearest Waring Authorized Service Facility for examination...

Page 3: ...g and should be used in combination with a properly connected grounding type outlet as shown in the figure SPECIAL CORD SET INSTRUCTIONS A short power supply cord is provided to reduce the risks resul...

Page 4: ...different batters and personal preference 3 Power Indicator Light Lights red when waffle maker is on and heating up 4 Ready Indicator Light only 1 of 2 shown on WW200 WWD200 Lights green when waffle m...

Page 5: ...control dial For golden brown waffles we recommend using setting 4 When the waffle is completely baked the waffle maker will sound 3 beeps Baking time is determined by browning level chosen 6 Fill me...

Page 6: ...ds to cool before cleaning Never take your waffle maker apart for cleaning Simply brush crumbs from grooves and absorb any excess cooking oil by wiping with a dry cloth or paper towel You may clean th...

Page 7: ...mination is defective in materials or workmanship provided the product is delivered prepaid to the Waring Service Center at 314 Ella T Grasso Ave Torrington CT 06790 or any Factory Approved Service Ce...

Page 8: ...te aparato Aseg rese de que los ni os no jueguen con este aparato 6 No utilice este aparato si el cable o la clavija estuviesen da ados despu s de que hubiese funcionado mal o se hubiese ca do o si es...

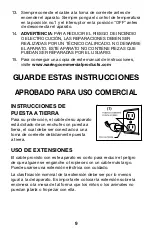
Page 9: ...ringcommercialproducts com GUARDE ESTAS INSTRUCCIONES APROBADO PARA USO COMERCIAL INSTRUCCIONES DE PUESTA A TIERRA Para su protecci n el cable de su aparato est dotado de un enchufe con puesta a tierr...

Page 10: ...2 Temperatura variable Ajuste la temperatura seg n la mezcla o al gusto 3 Luz de encendido roja Indica que la gofrera waflera est calentando 4 Luz de listo verde luces independientes sobre los modelos...

Page 11: ...deseado Le aconsejamos que utilice el nivel 4 para preparar gofres bien dorados Cuando el gofre est listo la gofrera waflera emitir 3 pitidos El ajuste de temperatura elegido determinar el tiempo de c...

Page 12: ...ita que se enfr en antes de limpiarlas Nunca desarme el aparato para limpiarlo Elimine los residuos de las placas con una brocha y absorba el aceite con un papel absorbente o un pa o seco Limpie las p...

Page 13: ...as estar inspeccionada por nuestro servicio posventa demuestre defectos de materiales o fabricaci n siempre que el producto se entregue con franqueo pagado a 314 Ella T Grasso Ave Torrington CT 06790...

Page 14: ...afin de s assurer qu ils ne jouent pas avec l appareil 6 Ne pas utiliser l appareil si le cordon d alimentation ou la fiche sont endommag s s il ne fonctionne pas correctement s il est tomb ou s il e...

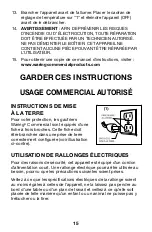
Page 15: ...UCTIONS DE MISE LA TERRE Pour votre protection les gaufriers Waring Commercial sont quip s d une fiche trois broches Cette fiche doit tre branch e dans une prise de terre correctement configur e voir...

Page 16: ...glage de temp rature Variable selon le type de p te et les go ts personnels 3 Voyant d alimentation rouge Indique que le gaufrier chauffe 4 Voyant de pr chauffage vert voyants ind pendants sur les mod...

Page 17: ...normal 5 Pr chauffer le gaufrier au r glage de temp rature d sir Pour des gaufres bien dor es nous vous conseillons d utiliser le r glage no 4 Lorsque la gaufre sera cuite le gaufrier sonnera 3 fois R...

Page 18: ...es laisser refroidir avant de les nettoyer Ne jamais d monter le gaufrier pour le nettoyer liminer les miettes l aide d un pinceau p tisserie et essuyer les plaques avec une serviette en papier ou un...

Page 19: ...r un vice de mati re ou de fabrication Pour un service au titre de cette garantie envoyez l appareil port pay au service apr s vente ci dessous ou amenez le un centre de r paration agr 314 Ella T Gras...

Page 20: ...ring Commercial 314 Ella T Grasso Ave Torrington CT 06790 www waringcommercialproducts com 1 800 4 WARING Printed in China Impreso en la China Imprim en Chine WW180 WW200 WWD180 WWD200 IB 13WC140645 I...

Reviews: