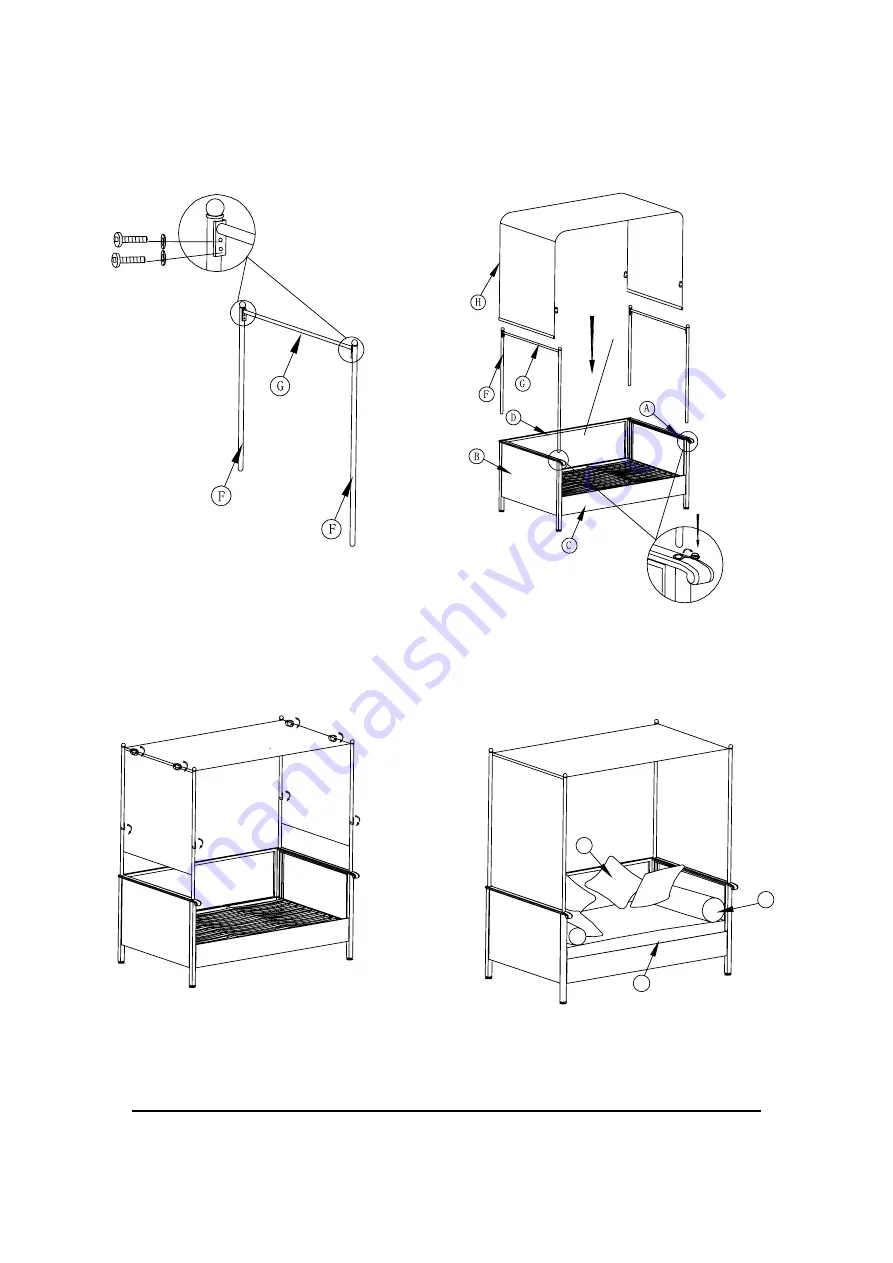
Step 3: Connect the two poles-2 (G) with pole-1
(F). Line up the bolt holes on the pole-1 (F) with
the corresponding bolt holes on the pole-2 (G).
Insert M6x18 bolts (AA) with M6 washers (DD).
Loosely tighten the bolts with the allen wrench
(FF). Repeat this step for the left panel (A) and
back panel (C). Please see Fig. 3.
Step 5: Tie up the canopy velcro on the Pole-2
(G) and pole-1 (F). Please see Fig. 5.
Step 4: Fully tighten all bolts completely. Insert the
poles-1 into the corresponding bolt holes on the left
panel (A) and right panel (B). Then place the canopy
(H) onto the pole-2 (G). Please see Fig. 4.
Fig. 4
Fig. 3
Fig. 5
Fig. 6
Step 6: Ensure all connections are secure before
use. Place the seat cushions (I), long pillows (J) and
pillows (K) on the daybed. Please see Fig. 6.
AA DD
AA DD
J
I
K
Questions, problems, missing parts? Before returning to your retailer, call our customer service department
at
,8:30 a.m. – 5:00 p.m. PST /11:30 a.m.- 8:00 p.m., EST, Monday- Friday.
(866) 905-4107
Stock# BH15-092-099-20 / BH15-092-099-21
NOTE: Do not completely tighten bolts until all steps are completed.
Providence Daybed Green/Red
Wal-mart.Com Assembly Instruction


