BXC34
Cart Chipper
Service and Maintenance
33
01196
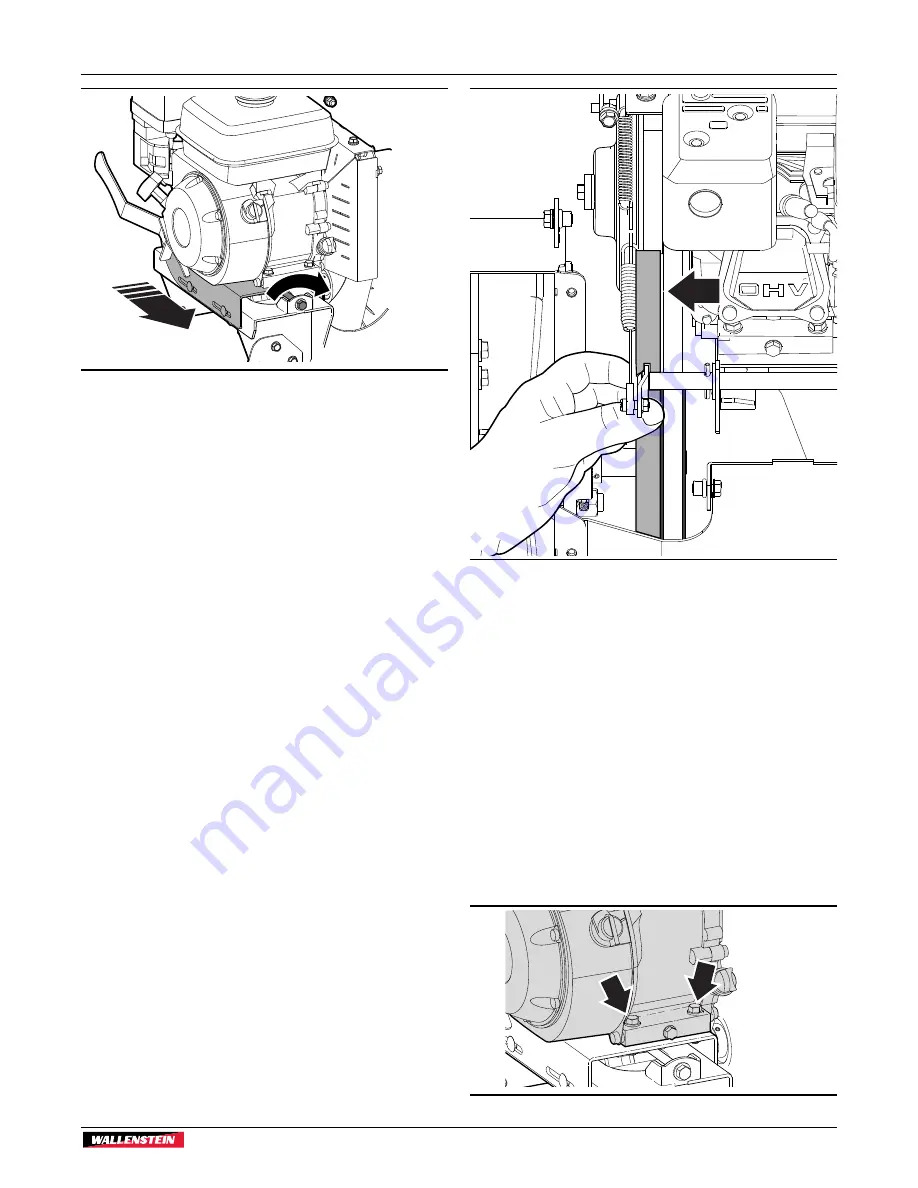
Fig. 33 –
Drive belt Tension Adjustment
3.
Pull the engine back to snug up the belt, then tighten the
bolts on the opposite side from the belt.
4.
Turn the belt tension adjuster bolt clockwise to tighten the
belt. Turn it counterclockwise to loosen the belt. Check and
adjust belt tension accordingly. Be aware of belt alignment
when adjusting belt tension. See
Drive Belt Alignment
to
follow.
5.
Recheck belt tension. Once set correctly, tighten up all four
engine mount bolts. Re-install the belt shield.
6.
Recheck belt tension after 10 hours of operation.
7.5.2 Drive Belt Alignment
Observe drive belt alignment every 8 hours of operation.
For accurate measurement use a laser alignment tool. If one is
not available, the following method can be used.
The maximum misalignment is 1/32" (1 mm).
Place a straight edge along the back face of the rotor sheave
and compare the gap along the belt. The gap between the drive
belt along the length of the straight edge must be equal. Adjust
accordingly.
01197
Fig. 34 –
Sheave Alignment
If the gap is not even along the length of the belt, determine
whether the engine is square to the chipper frame. It may also
be that the rotor sheave has moved in or out on the shaft. Belt
misalignment can be corrected two different ways:
-
Engine mount alignment
-
Rotor sheave alignment
Engine Mount Alignment
After changing the drive belt, the angle of the engine mount
could shift resulting in poor belt alignment.
1.
First, make sure the bolts fastening the engine to the mount
are tight. Make sure the engine is square to the base and
the bolts are properly torqued.
01198
Fig. 35 –
Engine Mount Bolts


