background image

Getting Started

English

   - 2 -

Notifications & Features & Accessories

Environmental Information

This television is designed to consume less energy 

to help save the environment. To reduce energy 

consumption, you should take the following steps:
If you set the Power Save Mode as 

Eco

, the TV will 

switch to energy-saving mode. Note that some picture 

settings will be unavailable to be changed. 
If 

Picture Off

 is selected, “Screen will be off in 

3 seconds.” message will be displayed. Select 

PROCEED

 and press 

OK

 to continue. The screen 

will be off immediately.
When the TV is not in use, please switch off or 

disconnect the TV from the mains plug. This will also 

reduce energy consumption. 

Standby Notifications

1. 

If the TV does not receive any input signal (e.g.  

from an aerial or HDMI source) for 5 minutes, the 

TV will go into standby. When you next switch-

on, the following message will be displayed: 

“Standby Cause No Signal” 

Press 

OK

 to 

continue.

2. 

If the TV has been left on and not been operated 

for a while, the TV will go into standby. When 

you next switch-on, the following message will 

be displayed. 

“Standby Cause No Operation” 

Press 

OK

 to continue.

Features

• 

Remote controlled colour TV.

• 

Fully integrated digital/cable TV (DVB-T/C)

• 

HDMI inputs are for connecting a device that has 

a HDMI socket.

• 

USB input.

• 

OSD menu system.

• 

Scart socket for external devices (such as DVD 

Players,  PVR, video games, etc.)

• 

Stereo sound system.

• 

Teletext.

• 

Headphone connection.

• 

Automatic programming system.

• 

Manual tuning.

• 

Automatic power down after up to six hours.

• 

Sleep timer.

• 

Child lock.

• 

Automatic sound mute when no transmission.

• 

NTSC playback.

• 

AVL (Automatic Volume Limiting).

• 

PLL (Frequency Search).

• 

PC input.

• Plug&Play for Windows 98, ME, 2000, XP, Vista, 

Windows 7.

• 

Game Mode (Optional).

Accessories Included

• 

Remote Control

• 

Batteries: 2 x AAA

• 

Instruction Book

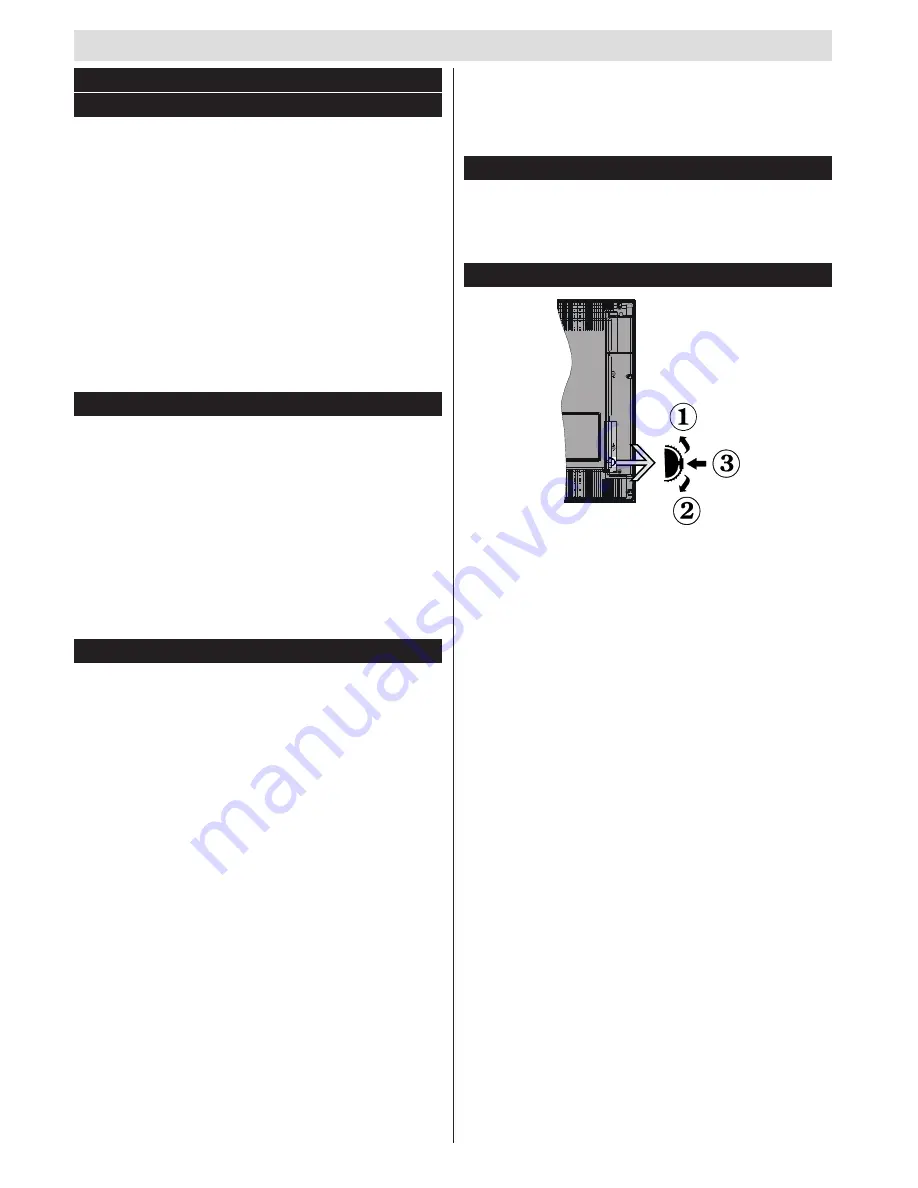
TV Control Switch & Operation

1. 

Up direction

2.

 Down direction

3.

 Programme/Volume / AV / Standby-On selection 

switch

The Control button allows you to control the Volume/ 

Programme/ Source and Standby-On functions of 

the TV.

To change volume

: Increase the volume by pushing 

the button up.  Decrease the volume by pushing the 

button down.

To change channel

: Press the middle of the button, 

the channel information banner  will appear on screen. 

Scroll through the stored channels by pushing the 

button up or down

To change source

: Press the middle of the button 

twice, the source list will appear on screen.  Scroll 

through the available sources by pushing the button 

up or down.

To turn the TV off

: Press the middle of the button 

down and hold it down for a few seconds, the TV will 

turn into standby mode.

Getting Started

Summary of Contents for WP19LED

Page 1: ...COLOUR TELEVISION WITH REMOTE CONTROL OPERATING INSTRUCTIONS WP3214LEDVD BE WALKER WISE logon to www walker ie APPROVED...

Page 2: ...r electric shock Never make a knot in the power cord or tie it with other cords When damaged it must be replaced this should only be done by qualified personnel Do not use this TV in a humid or damp p...

Page 3: ...TV DVB T C HDMI inputs are for connecting a device that has a HDMI socket USB input OSD menu system Scart socket for external devices such as DVD Players PVR video games etc Stereo sound system Telete...

Page 4: ...timedia Interface are trademarks or registered trademarks of HDMI Licensing LLC Information for Users on Disposal of Old Equipment and Batteries European Union only These symbols indicate that equipme...

Page 5: ...Numeric buttons 8 Channel list 9 Navigation buttons 10 OK Select 11 Menu on off 12 Back button Index page in TXT mode 13 No function 14 Media browser 15 Electronic Programme Guide 16 Teletext 17 Volu...

Page 6: ...e available via the scart socket When using the wall mounting kit optional we recommend that you plug all your cables into the back of the TV before mounting on the wall Insert or remove the CI module...

Page 7: ...n accordance with a recognizable channel sequence if available Cable Installation If you select CABLE option and press OK button on the remote control To continue please select YES and press OK To can...

Page 8: ...rom the list if previously recorded Press the OK button to view the Play Options Select an option then press OK button Note Viewing main menu and menu items will not be available during the playback P...

Page 9: ...Only available in Scart mode with SCART PIN8 high voltage low voltage switching Film Mode Films are recorded at a different number of frames per second to normal television programmes Turn this featur...

Page 10: ...ime Sources Enables or disables selected source options Other Settings Displays other setting options of the TV set Menu Timeout Changes timeout duration for menu screens Scan Encrypted Channels When...

Page 11: ...Parental Settings To prohibit viewing of certain programmes channels and menus can be locked by using the parental control system To display parental lock menu options the PIN number should be entered...

Page 12: ...oaded successfully the next time the TV powers up it will have the new software version Note If the TV fails to come on after the upgrade unplug the TV for 2 minutes and plug in again Troubleshooting...

Page 13: ...O NTSC 60 O RGB 50 O RGB 60 O Side AV PAL 50 60 O NTSC 60 O PC YPbPr 480I 480P 60Hz O 576I 576P 50Hz O 720P 50Hz 60Hz O 1080I 50Hz 60Hz O 1080P 50Hz 60Hz O HDMI1 HDMI2 480I 60Hz O 480P 60Hz O 576I 57...

Page 14: ...sunlight as the temperature can rise quickly and damage the disc After playing store the disc in its case On cleaning Before playing clean the disc with a cleaning cloth Wipe the disc from the center...

Page 15: ...remote control While playing a file you should press STOP button three times to eject 1 Standby 2 Play 3 No function 4 Language selection Set language 5 Zoom 6 Repeat 7 Numeric buttons 8 Navigation b...

Page 16: ...ent angles if available Changes slide effect depends on the content X MY BUTTON1 Displays time Views main setup menu INFO Time counter mode selection during playback Press repeatedly to switch between...

Page 17: ...rded on the disc only the available language on the disc will be heard 10 Some DVDs may not contain root and or title menus 11 Reverse stepping is not available 12 For your convenience If you attempt...

Page 18: ...MP3 is recorded as a Digital Signal with better audio quality less distortion and less deterioration of audio quality over time PICTURE CD Video still picture 12 cm It depends on JPEG quality JPEG is...

Page 19: ...reen or green and yellow The wire which is coloured blue or black must be connected to the terminal which is marked with the letter N or coloured Black The wire which is coloured brown or red must be...

Page 20: ...P3214LEDVD Energy efficiency class A Visible screen size diagonal approx inch cm 32 inches 81 cm On mode average power consumption Watt 41 Annual energy consumption kWh annum 59 Standby power consumpt...

Page 21: ...50264746 Executive House Red Cow Naas Road Dublin 22 Rebuplic of Ireland WALKER...

Reviews: