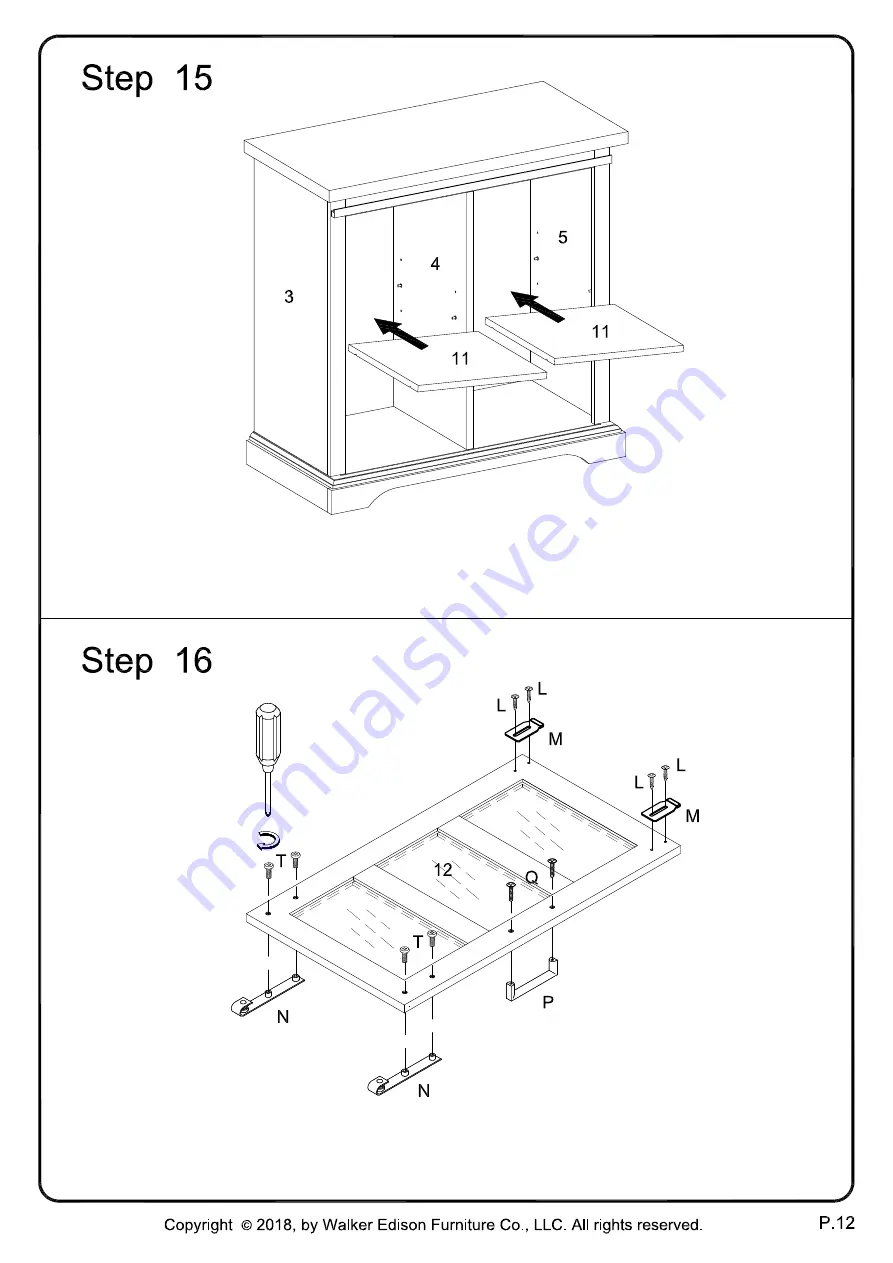
Place shelf (11) on top of support pin.
Attach pulley (N) using bolt (T), and
door guide
(M) using screw (L) to part (
12
) with screwdriver.
Page 1: ...embly Instructions Please visit our website forthe most current instructions assembly tips report damage or request parts www walkeredison com Revised 04 10 2018 c pyright 2018 by Walker Edison Furnit...
Page 2: ......
Page 3: ......
Page 4: ...pc pcs L M N P Q 20 pcs Wooden dowel pcs pcs R S pcs T pcs Cam lock Cam bolt 16 16 6 Shoulder Screw Screw 8 8 Shelf support pin 2 Handle Bolt 7 1 Screw Handle 1 Plastic wedge 8 16 Sticker pc M 4 Hex K...
Page 5: ...Attach cam bolt B to part 6 7 1 with screwdriver Insert wooden dowel A into part 3 4 5 8...
Page 6: ...Attach part 5 3 to part 7 6 then insert and secure cam lock C to part 5 3 to lock it Attach part 3 6 5 7 to part 8 then insert and secure cam lock C to part 8 to lock...
Page 7: ...Attach part 2 to part 3 4 5 using screw G with hex key H Note Groove for back panel should be aligned Slide back panel 10 into grooves as per diagram...
Page 8: ...Attach part 1 to part 3 4 5 then insert and secure cam lock C in part 3 4 5 8 to lock it Attach plastic wedge J to part 13 14 9 using screw F with Hex key H...
Page 9: ...Attach plastic wedge J to part 9 using bolt F with Hex key H Attach plastic wedge J to part 9 using bolt F with Hex key H...
Page 10: ...Attach part 9 14 13 to part 2 using plastic wedge J bolt F with hex key H Attach plastic wedge S to part 10 using screw R with screwdriver...
Page 11: ...Place sticker D over holes as per diagram Insert shelf support pin K into part 3 4 5...
Page 12: ...Place shelf 11 on top of support pin Attach pulley N using bolt T and door guide M using screw L to part 12 with screwdriver...
Page 13: ...Place door guide M on door into groove Hang pulley N to part 8 then press down to hold the door...
Page 14: ...Use Screwdriver to secure Screw L to the L Shape Bracket E attach to the Part 12 Insert Nut W into the wall...
Page 15: ...Using screwdriver to secure screw L with the plastic strap U Secure product to wall with screw V through Plastic strap U by using screwdriver...
Page 16: ......