background image

25

24

7.2  Switching the device on and off

The lamps can be switched on and off through the On/Off rocker switch (5) on 

the operation panel. 
1.  Switching on the device. 

Set the On/Off rocker switch to I. The fan will start running. 

2.  Switching off the device  

Set the On/Off rocker switch to 0. The fan will stop 

7.3  Adjust output

Adjust the required output with the output controller. 

8. 

Transporting, storing the device

1. Switch off device. (See Switch on and off of device, 7.2)
2. Let the device come to a complete stillstand. 
3. Plug out the power cord from the device.
4. Demount wind machine from lamp tripod. 
5. Clean the device if necessary. (See Maintenance and cleaning, 10.2)
6.  Put the device and all demounted elements in one carton and carry and store 

them according to the requirements in the technical specifications. 


See Technical specifications.

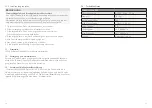
9. Troubleshooting

Problem 

Possible reason

Remedy

Device is switched on 

but shows no function

Power cord is not  

plugged in correctly

Plug in the power cord 

correctly

Micro-fuse is broken

Change micro-fuse, see 

Change micro-fuse. 

(10.3)

10.  Maintenance and cleaning

10.1  Continuous inspections

What you should do

Before every operation

With every change

Check all cables and 

plugs for damage 

X

 WARNING

Danger of electric shock and fire through short-circuit. If cables, plugs or 


sockets are faulty, do not use the device!

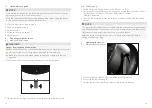
10.2 Cleaning

Wind Machine 500

Cleaning

Housing

Use a microfiber cloth to remove 


light and stubborn dirt

Output controller

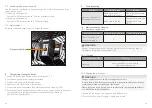
10.3  Change the micro-fuse

 WARNING

Danger of electric shock and fire through short-circuit
A micro-fuse, which is not conform with the required specifications, doesn´t 

protect against the overloading of the device.

Please just use a micro-fuse, which is conform with the required specificati

-

ons. See Technical Specifications.

1. Switch off the device. See Switch on and off of device.
2. Disconnect from power supply: Unplug power cord.
 

Summary of Contents for Wind Machine 500

Page 1: ...WINDMASCHINE 500 WIND MACHINE 500 WALSER GmbH Co KG Senefelderstrasse 23 86368 Gersthofen Germany info walser de www walser de Made in China 08 2020 Originalbetriebsanleitung Original Manual...

Page 2: ...fications 26 Inhaltsverzeichis 1 Hinweise zum Verst ndnis dieser Betriebsanleitung 5 1 1 Kennzeichen und Symbole am Ger t 5 1 2 Symbole zu Sicherheitshinweisen in dieser Betriebsanleitung 5 2 Wichtige...

Page 3: ...eine gef hrliche Situation hin die zu gering f gigen oder mittelschweren Verletzungen f hren kann wenn das Risiko nicht vermieden wird Betriebsanleitung Wir danken Ihnen f r Ihr Vertrauen und w nschen...

Page 4: ...n entsprechen Siehe Technische Daten Entfernen Sie leicht entflammbare Materialien aus der N he des Ger ts Entfernen Sie leichte Materialien und Gegenst nde um das Ger t die eingezogen werden k nnen 2...

Page 5: ...EIS Falls die Lieferung unvollst ndig ist wenden Sie sich bitte per E Mail an info walser de Im Rahmen von Produktverbesserungen behalten wir uns das Recht auf techni sche und optische nderungen vor A...

Page 6: ...em montierten Ger t gerade und sicher steht 1 Stecken Sie das Ger t mit dem Halteb gel auf das Lampenstativ 2 Drehen Sie die beiden Feststellschrauben kr ftig zu damit das Ger t fest und sicher auf de...

Page 7: ...e demontierten Elemente in einen Karton legen und entsprechend den Vorgaben in den Technischen Daten transportieren oder lagern Siehe Technische Daten 9 Probleme beheben Problem M gliche Ursache Abhil...

Page 8: ...Halterung schieben 7 Sicherungshalter vorsichtig bis zum Anschlag einstecken 11 Ersatzteile 12914 Walimex Netzkabel 4m mit Kaltger testecker 12 Entsorgung und Umweltschutz Entsorgen Sie das Ger t bei...

Page 9: ...ur trust in our brand We wish you much pleasure and success with your new device With the Walimex pro Wind Machine 500 you can bring a fresh breeze into your pictures It helps you to work more profess...

Page 10: ...ld lead to severe injuries on fingers and hands Risk of head injury Position the device with a distance of approx 1 5 m to your model Make sure that no hairs come in touch with the device Danger of el...

Page 11: ...vice during operation Please only use accessories and spare parts which are conform to the required specifications See Technical Specifications Remove easily inflammable materials which are in close d...

Page 12: ...mounting bracket onto the lamp tripod 2 Tighten the two fixing screw firmly so that the device is fixed securely 6 2 Power supply 1 Switch off device See Switch on and off of device 7 2 2 Compare the...

Page 13: ...ting Problem Possible reason Remedy Device is switched on but shows no function Power cord is not plugged in correctly Plug in the power cord correctly Micro fuse is broken Change micro fuse see Chang...

Page 14: ...chnical specifications Wind Machine 500 Power supply AC 220 230 V 50 Hz Weight 10 7 kg Rotateable on spigot 360 Dimensions tunnel diameter L 28 cm 48 cm Micro fuse 3 A Air Flow approx 2 880 qm h Fan R...

Reviews:

Related manuals for Wind Machine 500