a
n1
n2
n1
o
d
3
2
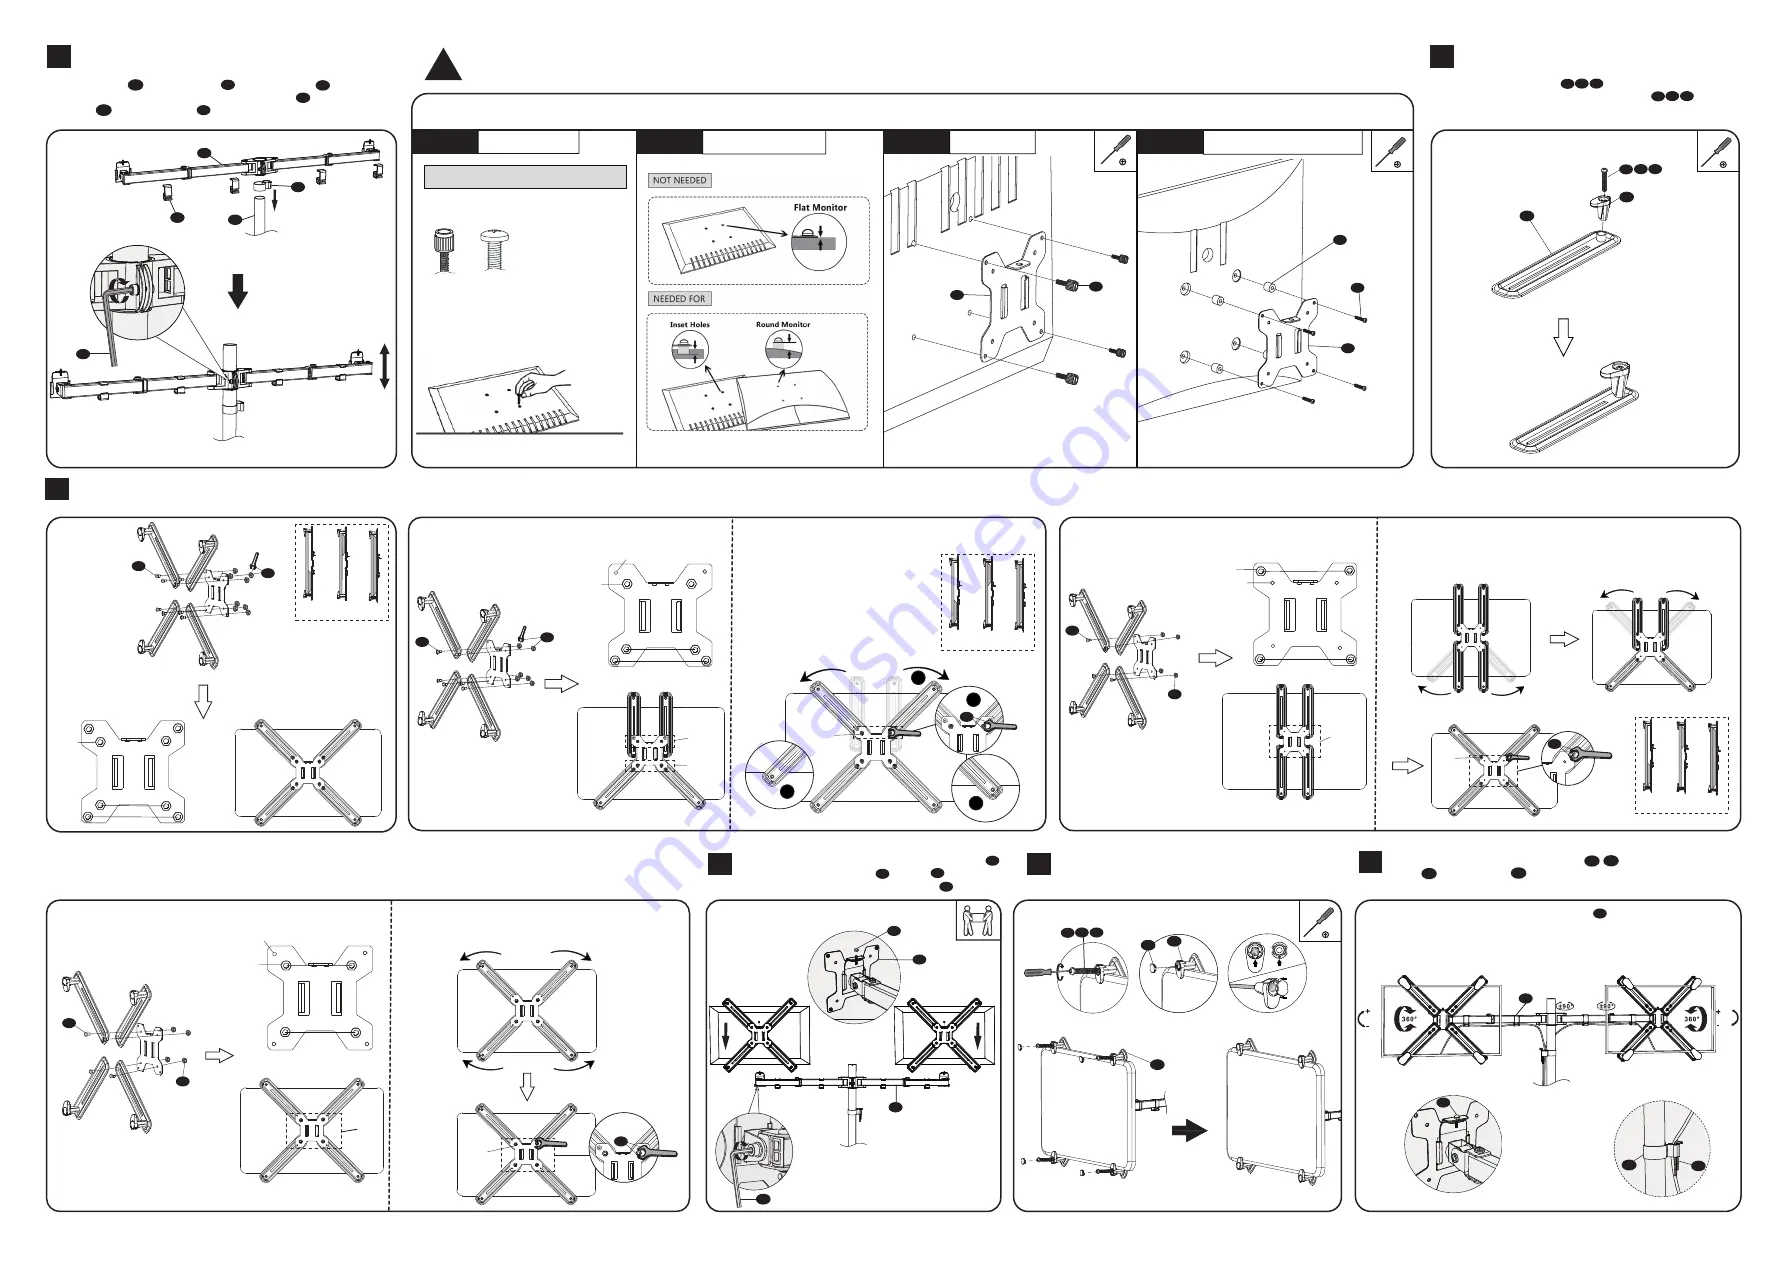
Put the Wire Clip n1 and Swivel Arm d through the Pole a , adjust
the preferred height and tighten using Allen Key 6mm o . Attach the
Wire Clips n to the Swivel Arm d .
d
d
n2
n1
a
o
Select bolts and spacers (if needed) according to your TV/Monitor. Attach the VESA Plate to the Monitor and tighten with a screwdriver. (Screwdriver not included).
Optional:
For Monitors with VESA Mounting Holes on the Back.
Please skip this step if your monitors do not have mounting holes on the back.
Step 1
Select Monitor Screws
Step 3a
Flat Back Monitor
Step 3b
Curved or Recessed Back Monitor
e
e
r
s
A B C
q
M4x12
M4x30
Only one screw size fits your Monitor
Step 2
Select Spacers ( if needed )
Hand thread screws into the
threaded inserts on the back
of your Monitor to determine
which screw (M4x12 or M4x30)
to use.
Select the right size of bolt ( A B C ) according to the thickness
of your monitor. Attach the Connector and bolt ( A B C ) to the
Bracket. Please do not over tighten.
A B C
A B C
①
②
!
Put the assembled TV/Monitor onto the Swivel Arm d
and tighten the VESA Plate e with Nut h for stability.
Adjust the tilt angle using Allen Key 5mm n .
Option C :
For 27
’’
monitor
5
7
6
Tighten the Bolt to fix the connector.
Nut
tighen
1.
do not
tighen
100mmx100mm
100mmx100mm
Nut not
needed
Nut
Option A :
For 23
’’
monitor
Option B :
For 24
’’
monitor
4
100mmx100mm
75mmx75mm
Nut
√
√
√
√
√
√
√
√
√
do not
tighen
tighen
100mmx100mm
75mmx75mm
Nut not needed
Nut
2.
Please make sure the bottom brackets hold the monitor firmly.
Slide the upper bracket to the side until it is fixed.
Finally tighten the Nut for stability.
1.
2.
Slide the bottom bracket to the side until it is fixed. Slide the upper
bracket to the side until it is fixed. Please make sure the brackets hold
the monitor firmly. Finally tighten the Nut for stability.
Option D :
Less than 23
’’
monitor
do not
tighen
1.
Nut not needed
Nut
75mmx75mm
75mmx75mm
E
D
2.
Slide the brackets until it is fixed. Please make sure
the brackets hold the monitor firmly.
Tighten the Nut for stability.
tighen
Nut
E
h
o
n1
n2
E
D
D
E
E
D
D
E
D
E
E
E
D
D
E
E
E
tighen
2
3
1
1
E
E
A B C
③
②
①
dd
e
h
e
d
o
h
Guide the cable through the Wire Clips ( n1, n2 ) and store the Allen
Keys o in the Wire Clip n . Manually swivel, tilt, and rotate the monitor
for the best viewing angle.
n1
n1
o
n2
o
Notice:
Please make sure the security nut is installed before you
rotate the monitor.
h
90°
90°
90°
90°


