background image


4

LCD screen 

Display scanning status, scanned images and scanner settings 


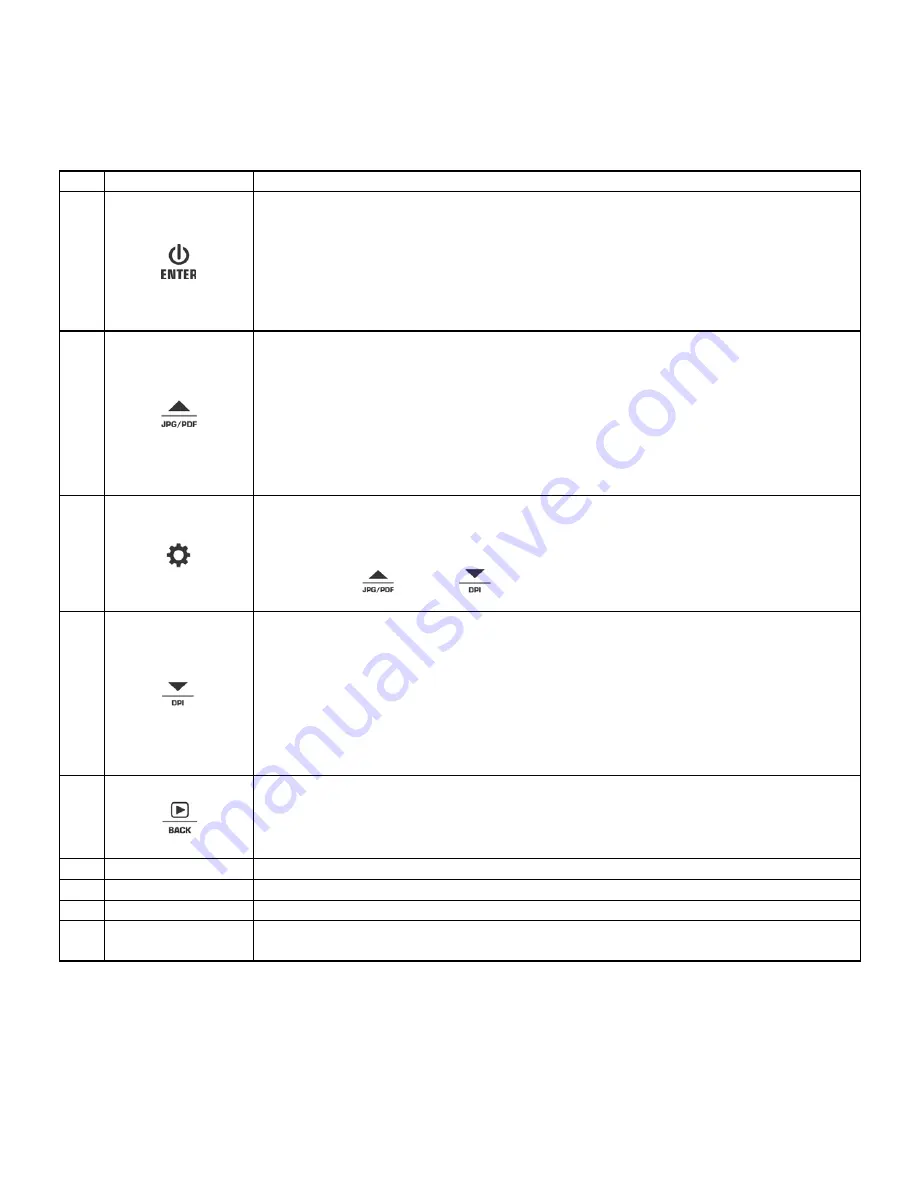
Power On/Off: Press and hold this key for 3 seconds to power on or off. 
In Setup mode, press this button to confirm changes. 
In Playback mode, press this button to change the zoom between 4x, 8x and 
normal. 
When connected to the computer, press this button once to switch between 
Standby and USB modes. 


Press this button to select JPG (JPEG), PDF-A (PDF-A4) or PDF-L 
(PDF-Letter) file format. The icon of the selected mode will be displayed on 
the LCD screen. 
In Setup mode: Press this button to move up the selection bar. 
In Playback mode: Press this button to preview the pervious image. 
When zooming in under Playback mode: press it to move to the upper/left 
portion of the image. 


Press this button to enter Setup Menu 
In Playback mode: Press this button to enter single file delete option. 
When zooming in under Playback mode: press this button to shift the 

functions of 

 and  

  between UP/DOWN and LEFT/RIGHT. 


Press this button to select LO (300dpi), MI (600dpi) or HI (1200dpi) scan 
quality in DPI. The icon of the selected quality will be displayed on the LCD 
screen. 
In Setup mode: Press this button to move down the selection bar. 
In Playback mode: Press this button to preview the next image. 
When zooming in under Playback mode: press it to move to the lower/right 
portion of the image. 


Press this button to enter Playback mode; 
Press this button to return to the previous screen 
In Setup mode: Press this button to exit Setup mode. 

Guiding Tab 

Adjust to scan documents of various sizes 

microSD card slot  The microSD card storage location. 

Reset 

Press to reset the scanner (Hardware reset) 

10 USB 

interface 

Connect to a computer with the USB cable provided to view and transfer files 
Used to charge the built-in battery with an optional AC/DC power adapter. 


Summary of Contents for PDS-ST480-VP

Page 1: ......

Page 2: ...How to Scan 6 4 5 How to Playback Image 8 4 6 Delete Single File 8 4 7 Setup Menu 9 Scan Format 9 Scan Quality 9 Scan Color 9 Language 9 Date Time 10 Instant Preview 10 Auto Off Auto Power Off 10 Del...

Page 3: ...no scan selection 300 LO 600 MI 1200 HI DPI scan quality selection Directly save JPG JPEG PDF files to the microSD microSDHC card Support the microSD microSDHC memory card up to 32GB Color display to...

Page 4: ...his button to enter single file delete option When zooming in under Playback mode press this button to shift the functions of and between UP DOWN and LEFT RIGHT 5 Press this button to select LO 300dpi...

Page 5: ...connecting to an AC DC power adapter via the USB interface 2 By connecting to a computer via included USB cable Note Once the battery is fully charged while the scanner is off battery indicator will...

Page 6: ...etected within 3 minutes To set Date Time Language 1 Press to jump to next setting option YEAR MONTH DATE HOUR MINUTE Note press to switch to the previous setting option 2 Press or to set the figure c...

Page 7: ...detected within 1 minute If Scan error icon appears on the LCD screen original memory card needs to be replaced with a higher call microSD card Class 6 or above is recommended The error image will sti...

Page 8: ...per portion of the image Press to view the lower portion of the image 5 Press to shift and navigational functions to and Press or button to view the left or right portion of the image Press to change...

Page 9: ...etup menu Follow the below three steps to enter setup screen for each Menu item 1 Press to enter setup mode 2 Press or to select the Menu item you want to set 3 Press to enter the setup screen Menu it...

Page 10: ...auto calibration mode The message 1 Insert the calibration sheet will appear on LCD screen 4 Insert the calibration card as the arrows indicate with the text facing down The scanner will start to scan...

Page 11: ...h resolution Color Medium resolution Mono Medium resolution Color Low resolution Mono Low resolution 10 0 Seconds 8 0 Seconds 5 0 Seconds 4 0 Seconds 5 0 Seconds 4 0 Seconds Capacity Based on 1GB micr...

Page 12: ...P Windows Vista Windows 7 Windows 8 and Mac OS 10 5 or above direct plug in driver installation not required CPU Pentium III or above RAM At least 256MB Interface USB port 8 Troubleshooting Problem Ca...

Page 13: ...1 The lens of scanner is dirty 2 Contact Image Sensor aged 1 Clean the lens with soft and dry cloth 2 Recalibrate the scanner Refer to section 4 8 Black Images Black or white vertical lines 1 Scanner...

Page 14: ...esired operation Measured diagonally Actual size is 1 48 viewable area is 1 44 Windows XP Windows Vista Windows 7 Windows 8 are registered trademarks of Microsoft Corporation Mac OS 10 5 is a register...

Reviews: