Vued Multimedia Digital Display User Manual Download Page 10

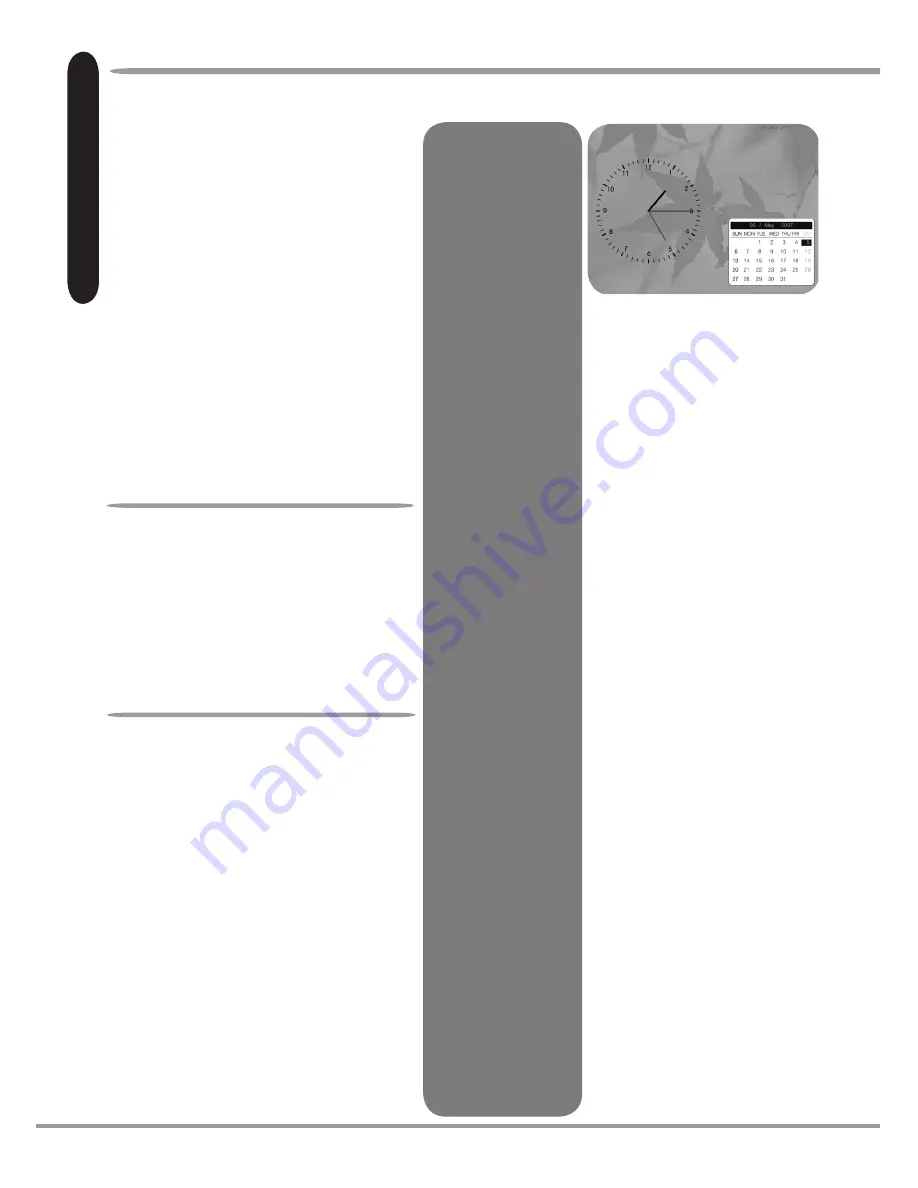
Displaying the Clock & 
Calendar on Full Screen

1. Press 

CLOCK

 key on the Remote 

Control to enter the 

CLOCK & 

CALENDAR

 mode and see following 

screen: 

2. Press 

CLOCK

 key again return to 

main menu. 

Displaying the Time and 
Date on the Display

To show the Date and/or/Time in the top 
right hand corner of the Display:
1. In the main menu or a file folder, 

press the 

SETUP

 key on remote control 

or hold down the 

ESC

 key on unit for 

3 seconds for the 

SETUP

 drop down 

menu to appear

2. Using the up/down arrow keys, 

highlight 

‘System’

 and press 

Enter


3. Using the up/down arrow keys, 

highlight 

‘Clock Mode’

 and press enter

4. Using the 

Up/Down

 arrow keys, 

highlight the desired 

‘Off’

,

 ‘DD/MM/

YYYY’ or ‘HH:MM DD/MM’

 option and 

press the 

Enter

 key to select.

C l o c k   a n d   C a l e n d a r

Clock and Calendar

Auto Timer

Setting the 
Timer for Slide 
Shows

To set a 
time for your 
slideshow to start 

automatically:

1. In the main 

menu or a file 

folder, press the 

SETU

P key on 

remote control 
or hold down the 

ESC

 key on unit 

for 3 seconds for 
the

 SETUP

 drop 

down menu to 
appear.
2. Using the 

Up/

Down 

arrow keys, 

highlight 

‘System’


and press 

Enter


3. Using the up/

down arrow keys, 

highlight ‘

Clock’ 

and press 

Enter

4. Using the 

Up/

Down

 arrow keys, 

highlight 

‘Auto 

Slide Show’

 and 

press 

Enter

.

5. Use the

 Up 

/Down

 arrow 

keys to select the 
start time for the 
slideshow, and the 

Left/Right

 arrow 

keys to move 
across to tick the 

box

6. Select 

‘Save’ 

and press 

Enter

 to 

update

Setting the Timer for 
Auto Power On/Off

Set the Digital Display to turn 
on or turn off using the timer 

function:
1. In the main menu or a file 

folder, press the 

SETUP

 key 

on remote control or hold 
down the

 ESC

 key on unit 

for 3 seconds for the 

SETUP


drop down menu to appear

2. Using the up/down arrow 

keys, highlight 

‘System’

 and 

press 

Enter


3. Using the 

Up/Down

 arrow 

keys, highlight 

‘Auto Power 

On’

 or 

‘Auto Power Off’

 and 

press

 Enter

4. Use the 

Up/Down

 arrow 

keys to set the desired time 
to 

Power On/Off

 and the left 

and right arrow keys to move 

across to tick the box

5. Select 

‘Save’

 and press 

Enter

 to update

6. Press the 

Power

 button 

on the remote control to be 
in 

Standby

 mode if you have 

selected 

‘Auto Power On’

.

For your slideshow to start 
automatically after 

‘Auto 

Power On’

, please also 

follow the instructions for 

‘Setting the Timer for 
Displays’

 and set both 

timers for the same time.

Changing the Time/Date

1. In the main menu or a file folder, 

press the 

SETUP

 key on remote 

control or hold down the 

ESC

 key on 

unit for 3 seconds for the 

SETUP

 drop 

down menu to appear
2. Using the 

Up/Down

 arrow keys, 

highlight 

‘System’

 and press 

Enter


3. With 

‘Set Clock’

 highlighted, press 

enter to show the current time and date
4. Use the 

Up/Down

 arrow keys to 

change the time and date settings, 
and the 

Left/Right

 arrow keys to move 

across the screen.
5. Select 

‘Save’

 and press 

Enter

 to 

update

10

v u e d

  D i g i t a l   D i s p l a y                                                                U s e r   m a n u a l 

Summary of Contents for Multimedia Digital Display

Page 1: ......

Page 2: ... messages Table of Contents Main Features 3 Safety Information 3 Pack Contents 3 Getting Started 4 Installing and Replacing the Remote Control Battery 4 Controls Overview 5 Product Buttons 5 Remote Control Buttons 5 Files Types and Memory Devices 6 Compatible File Types 6 Compatible Memory Devices 6 Inserting a Memory Device 6 Digital Display Operation 7 Displaying a Still Image 7 Playing Video fi...

Page 3: ...2 2 Safety Information This product must only be used as intended in accordance with the operating instructions This product is for indoor use only Do not allow the product to be exposed to rain or moisture Do not block the ventilation holes on the back of the product Avoid extremes of temperature either hot or cold place the product away from heat sources Do not open the case of the Digital Displ...

Page 4: ...ory go to www vued co uk to purchase G e t t i n g S t a r t e d 4 1 Place the Remote Control with the control buttons facing downward 2 While pressing down on the ridged area of the battery cover pull the tray out 3 Place a CR2025 lithium battery on the tray with the positive end facing toward you 4 Close the tray Installing and Replacing the Remote Control Battery Push the power switch on the un...

Page 5: ...n a Slide Show with MP3 background music Esc Enter C M Y CM MY CY CMY K Product Buttons Esc Exit screen and return to previous Hold this key for 3 seconds for SETUP drop down menu to appear Move the cursor left right Hold this key for 3 seconds for VOL to appear Enter Enter and play Hold this key for 3 seconds to enter SLIDE SHOW mode Move the cursor up down Hold this key for 3 seconds for BRT to ...

Page 6: ...ory Devices Inserting a Memory Device Compatible File types You can use your Digital Display to show still images play video files and or play MP3 sound files The Digital Display will only recognise the following file types Still Images JPEG DCF Photoshop s Baseline Music MP3 at 128K 44 1KHz Video Divx Xvid files and MPEG 4 files at 640x480 2000kbps F i l e T y p e s a n d M e m o r y D e v i c e ...

Page 7: ... the same time 1 In the main menu or a file folder press the SET UP key on the remote control or hold down the ESC button on the unit for 3 seconds to access the SET UP drop down menu 2 On the drop down menu press the down arrow key to highlight the Photo option and press Enter 3 Press the down arrow key to highlight the Slide Music option and press enter 4 Press the Up Down arrow to highlight the...

Page 8: ...t the Slide Show Shuffle option and press enter 4 Press the Up Down arrow to highlight the desired On or Off option and press the Enter key to select Changing the Slide Show 8 v u e d D i g i t a l D i s p l a y U s e r m a n u a l Off No effect simply flicks to the next image Fade Image fades into the next Shutter Uses a blind effect to the next image Cross Comb Uses horizontal and vertical comb ...

Page 9: ...eleting Files 1 On the Select Card Menu the very first screen select the source of the file s you want to delete Memory Card USB On Board Memory 2 On the main menu use the Right Left arrows on the Remote Control or on the unit to highlight the desired folder Photo Music Video or File and press Enter to select 3 Use the Right Left arrows on the Remote Control or on the unit to highlight the file yo...

Page 10: ...e Left Right arrow keys to move across to tick the box 6 Select Save and press Enter to update Setting the Timer for Auto Power On Off Set the Digital Display to turn on or turn off using the timer function 1 In the main menu or a file folder press the SETUP key on remote control or hold down the ESC key on unit for 3 seconds for the SETUP drop down menu to appear 2 Using the up down arrow keys hi...

Page 11: ...ned with the liquid Additional Information Photo Music Video System Reset Settings Exit Off On Off Fade Shuffer Cross Comb Mask Brick Dissolve Bar Random Fast Normal Slow English Deutsch Francais Italiano Espanol 11 File Copy and Delete In the main menu or a file folder press the SET UP key on the remote control or hold down the ESC button on the unit for 3 seconds to access the SET UP drop down m...

Page 12: ...ctures up to 16 Mega Pixels What is the best picture resolution displayed on the screen The best resolution is 1024x768 pixels Can I adjust the colours of the picture No All colour settings are preset at the factory You can adjust the brightness and contrast of the screen using the remote control This section answers some of your frequently asked questions Question Answers v u e d D i g i t a l D ...

Reviews: