User’s manual
w w w.v t e c h c a n a d a . c o m
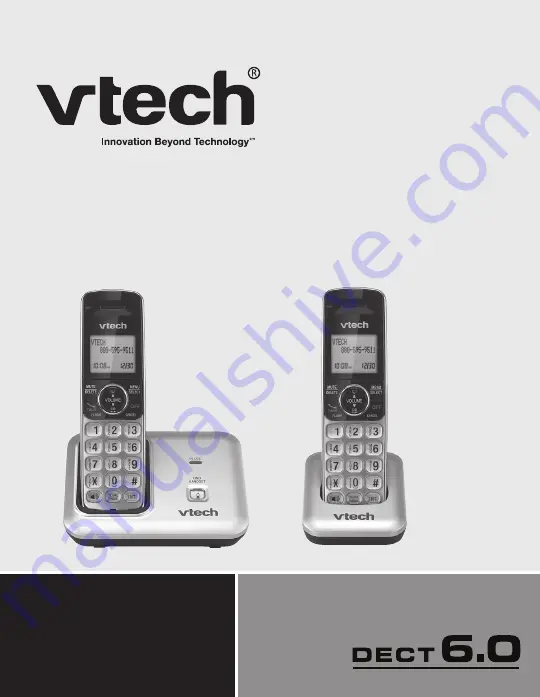
Models:CS6419/CS6419-2/
CS6419-3/CS6419-4
Page 1: ...User s manual w w w v tec hc anada c om Models CS6419 CS6419 2 CS6419 3 CS6419 4...
Page 2: ...everything new at VTech visit our website at www vtechcanada com The ENERGY STAR program www energystar gov recognizes and encourages the use of products that save energy and help protect our environ...
Page 3: ...ore a number from the redial list to the directory 17 Delete a redial entry 17 Chain dialing 18 Join a call in progress 19 Find handset 19 Intercom 20 Answer an incoming call during an intercom call 2...
Page 4: ...icators 36 Expand your telephone system 37 Troubleshooting 38 Important safety instructions 45 About cordless telephones 46 Operating range 47 Maintenance 47 The RBRC seal 48 FCC ACTA and IC regulatio...
Page 5: ...r CS6419 3 and 4 for CS6419 4 User s manual Wall mount bracket Getting started Charger and charger adapter 1 for CS6419 2 2 for CS6419 3 and 3 for CS6419 4 Battery 1 for CS6419 2 for CS6419 2 3 for CS...
Page 6: ...wall mount installation on page 5 for details Charger Telephone base Charger adapter Electrical outlet not controlled by a wall switch Telephone line cord If you have DSL high speed Internet service...
Page 7: ...against the battery compartment then slide it towards the center of the handset until it clicks into place Charge the handset by placing it in the telephone base or charger The CHARGE light is on when...
Page 8: ...ERY Battery indicators Battery status Action The screen is blank or displays PLACE IN CHARGER and flashes Battery has no or very little charge The handset cannot be used Charge without interruption ab...
Page 9: ...pter into the POWER jack on the bottom of the telephone base Position the telephone base against the wall mount bracket Insert the extend tabs marked B of the wall mount bracket into the slots marked...
Page 10: ...hem first Slide the black wall mount bracket up and remove it from the wall mount plate Unplug the end of the telephone line cord or DSL filter from the telephone wall jack Unplug the power adapter fr...
Page 11: ...t On when the handset is in use Flashes quickly when there is an incoming call Flashes slowly when another telephone sharing the same line is in use FIND HANDSET Press once and then release to page al...
Page 12: ...se or charger page 3 MUTE DELETE While on a call press to mute the microphone page 16 While using the dialing keys press to delete digits or characters While the handset is ringing press to silence th...
Page 13: ...y to show other dialing options when reviewing a call log entry page 32 INT intercom Press to start an intercom conversation or transfer a call pages 20 22 REDIAL PAUSE Press to review the redial list...
Page 14: ...Press or to adjust the volume A sample of each ringer volume plays as you scroll through the choices Press MENU SELECT to save your selection You hear a confirmation tone 1 2 3 1 2 3 4 5 The ringer vo...
Page 15: ...guage English French or Spanish to be used in all screen displays Press MENU SELECT when the handset is not in use Press or to select SETTINGS then press MENU SELECT Press or to select LCD LANGUAGE th...
Page 16: ...hese indicators Press MENU SELECT when the handset is not in use Press or to select SETTINGS then press MENU SELECT Press or to select CLR VOICEMAIL then press MENU SELECT The screen shows TURN OFF IN...
Page 17: ...he month is flashing press or until the screen displays the correct month Press MENU SELECT to confirm OR Press the dialing keys 0 9 to enter the current month for example if the month is March you mu...
Page 18: ...one Press MENU SELECT when the handset is not in use Press or to select SETTINGS then press MENU SELECT Press or to select DIAL MODE then press MENU SELECT Press or to choose TONE or PULSE Press MENU...
Page 19: ...andset in the telephone base or charger Speakerphone During a call press to switch between speakerphone and normal handset use When the speakerphone is active the handset shows SPEAKER and Volume Duri...
Page 20: ...l Press FLASH at any time to switch back and forth between calls Temporary ringer silencing When the telephone is ringing you can temporarily silence the ringer of the handset without disconnecting th...
Page 21: ...LASH or and then wait for a dial tone Press REDIAL PAUSE and then press or REDIAL PAUSE repeatedly to browse When the desired entry displays press MENU SELECT to dial Store a number from the redial li...
Page 22: ...ess MENU SELECT Press or to scroll to CALL LOG then press MENU SELECT Press or to scroll to the desired entry Press MENU SELECT to dial the displayed number To access the redial list while on a call P...
Page 23: ...ling key 0 9 TONE or on the handset Place the handset in the telephone base or charger Do not press and hold FIND HANDSET for more than four seconds It may lead to handset deregistration If 1 PRESS FI...
Page 24: ...the destination handset to temporarily silence the intercom ringer You can use two pairs of handsets on two intercom calls at a time For example you can use four handsets on two intercom calls and one...
Page 25: ...tside call is put on hold and your handset shows CALLING HANDSET X The destination handset rings and its screen shows OTHER HANDSET IS CALLING when you have two handsets or HANDSET X IS CALLING when y...
Page 26: ...ce your handset back in the telephone base or charger Your handset shows CALL TRANSFERRED The destination handset is then connected to the outside call You can press INT to switch between the outside...
Page 27: ...try to save an entry already stored in the directory the screen shows NUMBER ALREADY SAVED When the telephone number in the directory exceeds 15 digits appears in front of the telephone number Press T...
Page 28: ...DIAL PAUSE repeatedly to select a number Press MENU SELECT to edit the number Press MENU SELECT to move to the name The screen shows ENTER NAME Use the dialing keys to enter the name up to 15 characte...
Page 29: ...ing keys to enter the name Additional key presses show other characters of that particular key Press the key repeatedly until the desired character appears The first character and the character after...
Page 30: ...losest match in alphabetical order appears If necessary press or to browse Dial a directory entry Search for the desired entry in the directory see Review the directory or Alphabetical search above Wh...
Page 31: ...ress or to choose the desired speed dial location Press MENU SELECT to show the directory Press or to browse to desired entry OR Use the alphabetical search to find the desired entry Press MENU SELECT...
Page 32: ...o add a new entry Delete a speed dial entry Press MENU SELECT when the handset is not in use Press or to scroll to select DIRECTORY then press MENU SELECT Press or to select SPEED DIAL then press MENU...
Page 33: ...e to caller ID or call waiting service There may be fees for caller ID services In addition services may not be available in all areas This product can provide information only if both you and the cal...
Page 34: ...gical order When the call log is full the oldest entry is deleted to make room for new incoming call information XX MISSED CALLS shows when there are new call log entries that have not been reviewed C...
Page 35: ...a handset is in idle mode press CID to review the call log in reverse chronological order OR Press MENU SELECT Press or to scroll to CALL LOG then press MENU SELECT twice Press or to browse Press FLAS...
Page 36: ...er Save a call Iog entry to the directory Select a desired entry in the call log see Review and dial from the call log on page 31 Follow Step 2 to Step 6 in Create a new directory entry on page 25 1 2...
Page 37: ...TE ALL CALLS Press MENU SELECT to save The screen shows DELETING and then you hear a confirmation tone Call log display screen messages Displays When PRIVATE NAME The caller is blocking the name infor...
Page 38: ...h three or more handsets OTHER HANDSET IS CALLING for models with two handsets Another handset is calling INCOMING CALL There is a call coming in INTERCOM The handset is on an intercom call INTERCOM E...
Page 39: ...andset has lost communication with the telephone base PAGING The telephone base is paging all handsets PHONE The handset is on a call PLACE IN CHARGER The battery is very low The handset should be pla...
Page 40: ...Flashes when another telephone sharing the same line is in use Flashes when you are deregistering all handsets Handset icons Battery status flashes when the battery is low and needs charging Battery s...
Page 41: ...stem You can add new handsets CS6409 purchased separately to your telephone base Your telephone base supports a maximum of 5 handsets For more details refer to the user s manual that comes with your C...
Page 42: ...ly depleted it may take up to 30 minutes to charge the handset before LOW BATTERY appears on the screen page 4 Remove and install the battery again If that still does not work it may be necessary to p...
Page 43: ...f other telephones in your home are having the same problem the problem is in the wiring or local telephone service Contact your telephone service provider charges may apply Eliminate any background n...
Page 44: ...erence with your cordless phone Try installing your phone as far away as possible from these types of electronic devices Test a working telephone at the telephone wall jack If another telephone has th...
Page 45: ...a different location If this does not solve the problem relocate your telephone or modem farther apart from each other or use a different surge protector The location of your telephone base can impact...
Page 46: ...not receive caller ID or the telephone does not show caller ID during call waiting Make sure you subscribe to caller ID with call waiting features provided by your telephone service provider The calle...
Page 47: ...VOICEMAIL and appear on the display then your telephone has received a signal from your telephone service provider that you have a voicemail message waiting for you to retrieve from your telephone ser...
Page 48: ...he following in the order listed Disconnect the power to the telephone base Disconnect the cordless handset battery Wait a few minutes before connecting power to the telephone base Install the battery...
Page 49: ...n the product is subsequently used Do not overload wall outlets and extension cords Unplug this product from the wall outlet and refer servicing to an authorized service facility under the following c...
Page 50: ...ss telephone convenient create some limitations Telephone calls are transmitted between the telephone base and the cordless handset by radio waves so there is a possibility that the cordless telephone...
Page 51: ...parts so it must be treated with care Avoid rough treatment Place the handset down gently Save the original packing materials to protect your telephone if you ever need to ship it Avoid water Your tel...
Page 52: ...the trash or municipal waste which may be illegal in your area VTech s participation in RBRC makes it easy for you to drop off the spent battery at local retailers participating in the RBRC program or...
Page 53: ...be ensured when using this telephone To ensure safety of users the FCC has established criteria for the amount of radio frequency energy that can be safely absorbed by a user or bystander according t...
Page 54: ...facilities equipment operation or procedures that could affect the proper functioning of this product The telephone company is required to notify you if such changes are planned If this product is eq...
Page 55: ...uct extends for ONE 1 YEAR from the date of purchase If VTech repairs or replaces a Materially Defective Product under the terms of this limited warranty this limited warranty also applies to repaired...
Page 56: ...purchase or receipt and Provide your name complete and correct mailing address and telephone number Other limitations This warranty is the complete and exclusive agreement between you and VTech It sup...
Page 57: ...allowed by FCC and IC Actual operating range may vary according to environment conditions at the time of use Power requirements Handset 2 4V Ni MH battery Telephone base 6V AC 300mA Charger 6V AC 300...
Page 58: ...e 14 Directory 23 E End a call 15 Expand your telephone system 37 F Find handset 19 Flash 16 H Handset layout 8 9 Home area code 14 I Important safety instructions 46 47 Installation 2 3 Intercom 20 J...
Page 59: ...ephone base installation 2 Telephone base layout 7 Temporary ringer silencing 16 Temporary tone dialing 16 Transfer a call 21 Troubleshooting 39 46 V View dialing options 32 Voicemail 12 Volume 10 15...
Page 60: ...Tech is a registered trademark of VTech Holdings Limited Specifications are subject to change without notice 2014 VTech Technologies Canada Ltd All right reserved 09 14 CS6419 X_CA_WEBCIB_V6 0 Documen...