background image


UNPACKING INSTRUCTION 


CAUTION!

 Immediately upon receiving the product, carefully unpack the carton, check the contents to ensure that all parts are 

present, and have been received in good condition. Notify the shipper immediately and retain packing material for inspection if 
any parts appear damage from shipping or the package itself shows signs of mishandling. Save the package and all packing 
materials. In the event that the product must be returned to the factory, it is important that the product be returned in the original 
factory box and packing. 
 
If the device has been exposed to drastic temperature fluctuation (e.g. after transportation), do not switch it on immediately. The 
arising condensation water might damage your device. Leave the device switched off until it has reached room temperature. 
 

POWERSUPPLY 

On the label on the backside of the product is indicated on this type of power supply must be connected. Check that the mains 
voltage corresponds to this, all other voltages than specified, the product be irreparably damaged. The product must also be 
directly connected to the mains and may be used. No dimmer or adjustable power supply. 

 
Always connect the device to a protected circuit (circuit breaker or fuse). Make sure the device has an appropriate 
electrical ground to avoid the risk of electrocution or fire. 


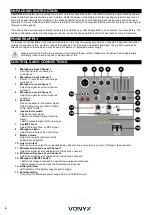
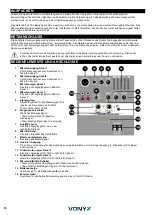
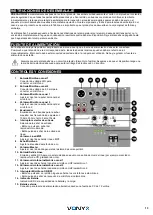
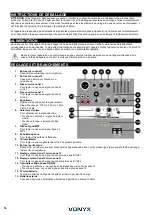
CONTROLS AND CONNECTIONS 


1.  Microphone Input Channel 1 

XLR input jack for connecting a 
microphone. 

2.  Microphone Input Channel 2 

6.3mm ¼” input jack for connecting a 
microphone. 

3.  Microphone Level Channel 1 

Adjust the signal level of microphone 
channel 1.


4.  Microphone Level Channel 2 

Adjust the signal level of microphone 
channel 2. 

5.  Equalizer


5-band equalizer for the master signal. 
Adjust frequencies are 100Hz, 300Hz, 
1kHz, 3kHz, 10kHz. 

6.  Input selector switch


Selects the input signal: 
• Button not pressed: signal of media 
player. 
• Button pressed: signal of the line input. 

7.  Line/MP3 Level


Adjust the level of line- or MP3-signal. 

8.  Microphone Echo 

Adjust the intensity of the echo effect. 

9.  Master Volume


Adjust the overall output level of the 
portable sound system. 

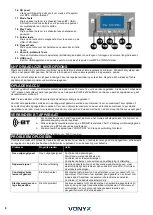
10.  Line In-/ Output


RCA jack in- and output for connecting audio units with line level output (e.g. mixer, CD player, tape recorder). 

11.  Wireless microphone Level Channel 1 

Adjust the signal level of wireless UHF microphone channel 1. 

12.  Wireless microphone Level Channel 2 

Adjust the signal level of wireless UHF microphone channel 2. 

13.  Microphone ON/OFF switch 

• Button not pressed: received no signal from wireless microphones. 
• Button pressed: receive signal from wireless microphones. 

14.  Battery indicator 

LED indicator of the battery capacity and charging. 

15.  External battery 

Connection for alternative power supply from a 12Volt DC source. 


Summary of Contents for 170.075

Page 1: ...SPJ Portable Sound System Series Ref nr 170 075 170 080 INSTRUCTION MANUAL GEBRUIKSAANWIJZING GEBRAUCHSANLEITUNG MANUAL DE INSTRUCCIONES MANUEL D INSTRUCTIONS INSTRUKCJA OBS UGI V1 2...

Page 2: ...2...

Page 3: ...nction always seek advice from a specialist Do not force the controls If this product is with speaker inside which can cause magnetic field Keep the product at least 60cm away from computer or TV If t...

Page 4: ...opriate electrical ground to avoid the risk of electrocution or fire CONTROLS AND CONNECTIONS 1 Microphone Input Channel 1 XLR input jack for connecting a microphone 2 Microphone Input Channel 2 6 3mm...

Page 5: ...eks the battery becomes defective CONNECT BT DEVICE 1 Set the search function on of the BT device you want to play the music See the operating instructions for that device 2 Press the MODE button unti...

Page 6: ...richtlijnen en moeten de aanwijzingen waarschuwingen worden gevolgd Het apparaat buiten bereik van kinderen houden Bovendien mag het apparaat nooit onbeheerd gelaten worden Gebruik geen schoonmaakspra...

Page 7: ...elektrocutie of brand te vermijden BEDIENINGSPANEEL EN AANSLUITINGEN 1 Microfooningang Kanaal 1 XLR ingang connector voor het aansluiten van een microfoon 2 Microfooningang Kanaal 2 XLR ingang connect...

Page 8: ...een optimale levensduur van de accu dient deze minimaal 1x per maand opgeladen te worden Houdt u er rekening mee dat als u langer dan 6 weken niet laadt u de kans loopt dat de accu kapot gaat VERBIND...

Page 9: ...z hintereinander ein und ausschalten Dadurch verk rzt sich die Lebensdauer erheblich Das Ger t au erhalb der Reichweite von Kindern halten Das Ger t niemals unbeaufsichtigt lassen Die Regler nicht mit...

Page 10: ...ermeiden BEDIENELEMENTE UND ANSCHL SSE 1 Mikrofoneing ng Kanal 1 XLR Klinkenbuchsen zum Anschluss von Mikrofon Kanal 1 2 Mikrofoneing ng Kanal2 XLR Klinkenbuchsen zum Anschluss von Mikrofon Kanal 2 3...

Page 11: ...regelm ig aufgeladen werden F r eine optimale Lebensdauer sollte die Batterie mindestens 1x pro Monat aufgeladen werden Bitte beachten Sie dass wenn die Batterie 6 Wochen nicht geladen ist diese nich...

Page 12: ...ectrices aplicables y seguir las instrucciones No lo apague y encienda repetidamente Esto acorta su tiempo de vida Mantenga el aparato fuera del alcance de los ni os No deje el aparato sin vigilancia...

Page 13: ...toma de tierra el ctrica adecuada para evitar el riesgo de electrocuci n o incendio CONTROLES Y CONEXIONES 1 Entrada Micr fono canal 1 Conector de entrada XLR para conectar un micr fono 2 Entrada Micr...

Page 14: ...horas La bater a debe cargarse regularmente Para una duraci n ptima de la bater a debe cargarse al menos una vez al mes Tenga en cuenta que si no carga dentro de 6 semanas la bater a se puede volver d...

Page 15: ...r glages L appareil contient un haut parleur pouvant engendrer des champs magn tiques Tenez cet appareil 60 cm au moins d un t l viseur ou ordinateur Cet appareil contient un accumulateur rechargeable...

Page 16: ...CHEMENTS 1 Entr e micro canal 1 Prise XLR pour brancher un microphone 2 Entr e micro canal 2 Prise jack 6 3mm pour brancher un microphone 3 Niveau micro canal 1 Pour r gler le niveau de signal du cana...

Page 17: ...devrait tre charg 1 fois par mois au mois Attention si vous ne chargez pas l accumulateur pendant 6 semaines il sera d fectueux APPAREIL BT 1 R glez la fonction recherche sur l appareil BT qui doit li...

Page 18: ...u okolicy monta u Montuj sprz t w odleg o ci co najmniej 50cm od materia w atwopalnych i zachowuj co najmniej 1m wolnej przestrzeni z ka dej strony aby zapewni odpowiednie ch odzenie Urz dzenie posiad...

Page 19: ...u ce do pod czenia mikrofonu przewodowego 3 G o no mikrofonu 1 Regulacja mikrofonu z wej cia XLR MIC 1 4 G o no mikrofonu 2 Regulacja mikrofonu z wej cia Jack 6 3mm MIC 2 5 Korektor graficzny 5 pasmo...

Page 20: ...c Je li bateria b dzie nieu ywana przez 6 tygodni utraci swoje w a ciwo ci PO CZENIE BT 1 Uruchom funkcj BT w urz dzeniu z kt rego chcesz odtwarza muzyk Je eli nie wiesz jak to zrobi zajrzyj do instr...

Page 21: ...or 12V DC Battery Power 150W 300W MP3 Player YES BT Function Freq range 50Hz 19kHz 50Hz 19kHz UHF Frequency Europe 863 1Mhz 864 5Mhz UHF Frequency Australia New Zealand 520 750Mhz 523 750Mhz Woofer S...

Page 22: ...22...

Page 23: ...2UHF Product Description 170 075 170 080 Trade Name VONYX Regulatory Requirement EN 60065 2002 A12 2011 EN 301489 1 2011 09 EN 301489 9 2007 11 EN 300422 1 2011 08 EN 300422 2 2011 08 EN 62479 2010 I...

Page 24: ...Specifications and design are subject to change without prior notice www tronios com Copyright 2017 by TRONIOS the Netherlands...

Reviews: