background image

PL

51

WWW.VONROC.COM

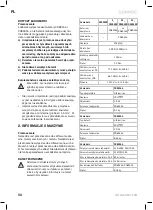
Akumulatory należące do platformy VONROC 

POWER 20 V można stosować we wszystkich 

narzędziach z platformy VONROC POWER 20 V.

CD801AA 20V, 2 Ah Litowo-jonowy 

CD803AA 20V, 4 Ah Litowo-jonowy

Następującej ładowarki można używać do 

ładowania tych akumulatorów.

CD802AA   Szybka ładowarka

Akumulatory należące do platformy VONROC 

POWER 20 V można stosować we wszystkich 

narzędziach z platformy VONROC POWER 20 V.

Poziom drgań

Poziom emisji drgań podany w niniejszej instrukcji 

został zmierzony zgodnie ze zharmonizowanym 

testem podanym w normie EN 62841 i może być 

stosowany do porównywania narzędzi ze sobą 

oraz w celu wstępnego oszacowania narażenia na 

drgania podczas stosowania narzędzia zgodnie z 

podanym przeznaczeniem:

-   używanie narzędzia do innych zastosowań lub 

z innymi albo źle konserwowanymi akcesoriami 

może znacząco zwiększać poziom ekspozycji

-   okresy, kiedy narzędzie jest wyłączone, lub 

gdy jest włączone, ale nie jest używane, mogą 

znacząco ograniczać poziom ekspozycji.

Chroń się przed wpływem drgań, konserwując 

odpowiednio narzędzie i akcesoria, utrzymując 

ciepłotę dłoni oraz odpowiednio organizując pracę.

OPIS

Liczby w tekście odnoszą się do rysunków na 

stronie 2-3.

1. 

 Przełącznik  wł./wył.

2. 

 Kolektor  pyłu

3.   Pokrętło regulacji prędkości

4. 

 Podkładka  szlifująca

5A.  Górny uchwyt

5B.  Dolny uchwyt

6.   Rura odprowadzania pyłu

7.   Przycisk odblokowania akumulatora

8. 

 Akumulator

9. 

 Papier  ścierny

10.   Gumowy  pierścień

11.  Przycisk diod LED akumulatora

12.  Diody LED akumulatora

13. Ladowarka

14.  Diody LED ladowarki

15A. Złącze  odsysania

15B. Adapter  odsysania

3.   MONTAŻ

 Przed rozpoczęciem jakichkolwiek pracy 

dotyczących elektronarzędzia, wyjąć 

akumulator.

 Akumulator należy naładować przed 

pierwszym użyciem.

Wkładanie akumulatora do narzędzia (Rys. C)

 Dopilnować, aby zewnętrzna powierzchnia 

akumulatora była czysta I sucha przed 

podłączeniem do ładowarki lub narzędzia.

1.   Włożyć akumulator (8) w podstawę narzędzia, 

zgodnie z rys. C.

2.   Wcisnąć akumulator dalej, aż zatrzaśnie się w 

poprawnym położeniu.

Wyjmowanie akumulatora z narzędzia (Rys. C)

1.   Nacisnąć przycisk odblokowania akumulatora 

(7).

2.   Wyjąć akumulator z narzędzia zgodnie z rys. C.

Sprawdzanie stanu naładowania akumulatora  

(Rys. E)

•    Aby sprawdzić stan naładowania akumulatora, 

wcisnąć przycisk (11) na akumulatorze na  

chwilę.

•    Akumulator ma 3 diody informujące o poziomie 

naładowania. Im więcej świeci diod, tym wyższy 

poziom naładowania akumulatora.

•    Jeśli diody nie świecą, oznacza to, że akumula-

tor jest rozładowany i wymaga niezwłocznego 

naładowania.

Ładowanie akumulatora ładowarką (Rys. E)

1.   Wyjąć akumulator (8) z narzędzia.

2.    Ustawić akumulator (8) spodem do gory I ws-

unąć go na ładowarkę (13) zgodnie z rys. E.

3.   Wcisnąć akumulator do oporu do gniazda.

4.    Podłączyć ładowarkę do gniazdka i poczekać 

chwilę. Dioda LED na Akumulator (13) zaświeci 

się, informując o stanie ładowania.

Summary of Contents for 8717479091409

Page 1: ...Vertaling van de oorspronkelijke gebruiksaanwijzing 18 FR Traduction de la notice originale 25 ES Traducci n del manual original 32 IT Traduzione delle istruzioni originali 39 PL T umaczenie instrukcj...

Page 2: ...WWW VONROC COM A 7 2 8 3 5A 1 5B 4 B 4 9 1 2 7 8 C 2...

Page 3: ...WWW VONROC COM D 2 6 10 E 8 13 12 11 14 14 3...

Page 4: ...mes c Keep children and bystanders away while ope rating a power tool Distractions can cause you to lose control 2 Electrical safety a Power tool plugs must match the outlet Never modify the plug in a...

Page 5: ...ondition that may affect the power tool s operation If damaged have the power tool repaired before use Many accidents are caused by poorly maintained power tools f Keep cutting tools sharp and clean P...

Page 6: ...ecause of prolonged use Never put the machine down on a table or a workbench before it has been switched off SAFETY WARNINGS FOR BATTERY a Do not open the battery Danger of short circuiting b Protect...

Page 7: ...20 minutes Recommended batteries CD801AA CD803AA Weight 0 36 kg Only use the following batteries of the VONROC VPOWER 20V battery platform Using any other batteries could cause serious injury or damag...

Page 8: ...er 13 as shown in Fig E 3 Push the battery until it is fully pushed into the slot 4 Plug the charger plug into an electrical outlet and wait for a while The LED indicators on the charger 13 will light...

Page 9: ...after each use Make sure that the ventilation openings are free of dust and dirt Re move very persistent dirt using a soft cloth moiste ned with soapsuds Do not use any solvents such as gasoline alcoh...

Page 10: ...sicher auf Folgende Symbole werden im Benutzerhandbuch oder auf dem Produkt verwendet Benutzerhandbuch Bedienungsanleitung lesen Lebens und Verletzungsgefahr und Gefahr von Besch digungen am Werkzeug...

Page 11: ...gen aufzuh ngen oder um den Stecker aus der Steckdose zu ziehen Halten Sie die Anschluss leitung fern von Hitze l scharfen Kanten oder sich bewegenden Teilen Besch digte oder verwickelte Anschlussleit...

Page 12: ...ollieren Sie ob bewegliche Teile einwandfrei funktionieren und nicht klemmen ob Teile gebrochen oder so besch digt sind dass die Funktion des Elektrowerkzeugs beeintr chtigt ist Lassen Sie besch digte...

Page 13: ...ne an den isolierten Grifffl chen falls die Gefahr besteht dass das Zubeh r versteckte Leitungen oder das Netz kabel ber hren k nnte Falls das Zubeh r einen spannungsf hrenden Draht ber hrt k nnen die...

Page 14: ...en rollen Sie das Kabel immer vollst ndig ab 2 ANGABEN ZUM WERKZEUG Verwendungszweck Diese Maschine ist zum Schleifen von Holz Kunst stoffen und Metall vorgesehen Diese Maschine ist nur zum Trockensch...

Page 15: ...die Abbildungen auf Seite 2 3 1 Ein Aus Schalter 2 Staubsack 3 Geschwindigkeitseinstellrad 4 Schleifteller 5A Oberer Griff 5B Unterer Griff 6 Anschluss f r Staubabsaugvorrichtung 7 Akku Freigabetaste...

Page 16: ...eis Der Staubbeh lter sollte entleert werden wenn er zur H lfte gef llt ist um eine optimale Staubsammlung zu gew hrleisten Anbringen und Entfernen von Schleifpapier Abb B Halten Sie die Maschine seit...

Page 17: ...rgt werden GARANTIE VONROC Produkte werden nach den h chsten Qualit tsstandards entwickelt und sind f r den ge setzlich festgelegten Zeitraum ausgehend von dem urspr nglichen Kaufdatum garantiert frei...

Page 18: ...re werkomgevingen leiden tot ongelukken b Gebruik elektrisch gereedschap nooit in een omgeving waar explosiegevaar bestaat zoals in de nabijheid van ontvlambare vloeistoffen gassen dampen of andere st...

Page 19: ...e door stof worden veroorzaakt h Denk niet dat doordat u gereedschap vaak gebruikt u wel weet hoe het allemaal werkt en dat u de veiligheidsbeginselen voor het gebruik van het gereedschap wel kunt neg...

Page 20: ...aad de accu of het gereedschap niet op buiten het temperatuurbereik dat in de instructies wordt aangeduid Op een onjuiste wijze laden of laden bij temperaturen buiten het aangeduide bereik kan de accu...

Page 21: ...toezicht staan of zijn ge nstrueerd b Laat kinderen onder toezicht niet met het appa raat spelen c Laad niet herlaadbare accu s niet opnieuw op d Plaats de accu s tijdens het opladen in een goed geven...

Page 22: ...of met andere of slecht onderhouden accessoires kan het blootstellingsniveau aanzienlijk verhogen wanneer de machine is uitgeschakeld of wan neer deze loopt maar geen werk verricht kan dit het blootst...

Page 23: ...fafzuiging Op de aansluiting 15A voor de stofafzuiging kan een stofzuiger op de machine worden aangesloten Ook wordt er een adapter 15B bijgeleverd waarmee stofzuigerbuizen van kleinere diameter kunne...

Page 24: ...fgedankte Elektrische en Elektronische Apparatuur en de implementatie ervan in nationaal recht moet niet langer te gebruiken elektrisch gereedschap gescheiden worden verzameld en op een milieuvriendel...

Page 25: ...appareil lectrique sans fil fonctionnant gr ce une batterie 1 Espace de travail a Veillez toujours garder votre espace de travail propre et bien clair Les espaces mal rang s et sombres peuvent tre la...

Page 26: ...g Si les appareils sont fournis pour la connexion des quipements d vacuation et de r cup ration de la poussi re assurez vous que ces derniers soient correctement connect s et utilis s L utilisation d...

Page 27: ...as un bloc batterie ou un outil endommag ou modifi Une batterie endommag e ou alt r e peut avoir un comportement impr visible qui peut conduire un incendie une explosion ou un risque de blessure f N e...

Page 28: ...l utilisation Ne travaillez pas sur des mat riaux contenant de l amiante L amiante est consid r comme carcinog ne N utilisez pas la machine pour poncer des pi ces ouvrer contenant du magn sium Portez...

Page 29: ...t interchangeables pour tous les outils de la plateforme Batterie VONROC VPOWER 20V Niveau de vibrations Le niveau de vibrations mises indiqu en ce manuel d instruction a t mesur conform ment l essai...

Page 30: ...llument et indiquent l tat du chargeur Le chargeur poss de deux indicateur LED 14 qui indique l tat du processus de charge tat de l indica teur LED rouge tat de l indica teur LED vert tat du chargeur...

Page 31: ...toujours la machine hors tension et retirez la batterie de la machine Nettoyez le corps de la machine r guli rement au moyen d un chiffon doux de pr f rence apr s cha que utilisation V rifiez que les...

Page 32: ...cendios y o lesiones gra ves Conserve las advertencias de seguridad y las instrucciones para su posterior consulta Los siguientes s mbolos se utilizan en el manual de usuario o en el producto Lea el m...

Page 33: ...n un lugar h medo use suministro protegido mediante dispositivo diferencial re sidual DDR El uso de un DDR reduce el riesgo de choque el ctrico h No permita que la familiaridad adquirida con el uso fr...

Page 34: ...uellos para los que est dise ada 5 Uso y cuidado de las herramientas alimentadas por bater a a Recargue las bater as nicamente con el cargador recomendado por el fabricante Un cargador que es apto par...

Page 35: ...tocircuito b Proteja la bater a del calor p ej de la luz solar intensa continua los incendios el agua y la humedad Peligro de explosi n c En caso de da o y uso incorrecto de la bater a esta puede emit...

Page 36: ...ater as de la plataforma de bater as VONROC POWER 20V El uso de cualquier otra bater a puede causar lesiones graves o da ar la herramienta CD801AA 20V 2 Ah de iones de litio CD803AA 20V 4 Ah de iones...

Page 37: ...teria La bateria tiene 3 luces que indican el nivel de carga cuantas mas luces esten encendidas mas bateria queda Cuando las luces estan apagadas significa que la bateria esta vacia y debe cargarse in...

Page 38: ...Fig A La rueda de ajuste de velocidad 3 se utiliza para ajustar la velocidad La rueda de ajuste de veloci dad puede situarse en 6 posiciones La velocidad ideal depende del tama o de grano deseado y de...

Page 39: ...reparaci n o a la sus tituci n de las unidades o piezas no conformes El producto y el manual de usuario est n sujetos a variaciones Las especificaciones pueden variarse sin previo aviso 1 ISTRUZIONI D...

Page 40: ...un arnese elettrico Non usare un arnese elettrico mentre si stanco o sotto l effetto di droghe alcool o medicinali Un momento di disattenzione mentre si accendono arnesi elettrici pu causare delle gr...

Page 41: ...o o incendio c Quando il pacco batterie non in uso tenerlo lontano da oggetti metallici quali fermagli monete chiavi chiodi viti o altri piccoli oggetti metallici che potrebbero mettere in collegament...

Page 42: ...inazione con il prodotto Vonroc Questo accorgimento proteg ge la batteria da un sovraccarico pericoloso e La batteria pu essere danneggiata da oggetti appuntiti come chiodi o cacciaviti o da una forza...

Page 43: ...Le batterie della piattaforma di batterie da 20 V VONROC POWER sono intercambiabili con tutti gli elettroutensili con batterie della piattaforma da 20 V VONROC POWER Livello delle vibrazioni Il livell...

Page 44: ...elettrica e attendere un momento Gli indicatore a LED sul caricabatterie 13 si illuminano e mostrano lo stato di carica della batteria Sul caricabatterie sono presenti 2 indicatori a LED 14 che mostr...

Page 45: ...Prima di appoggiare l elettroutensile spegnerlo e attendere che si arresti completamente 5 MANUTENZIONE Prima di eseguire qualsiasi operazione di pulizia e intervento di manutenzione spegnere sempre l...

Page 46: ...az instrukcji mo e prowadzi do pora enia pr dem po aru i lub powa nych obra e cia a Zachowa ostrze enia dotycz ce bezpiecze stwa oraz inst rukcje na przysz o Nast puj ce symbole s umieszczone w instru...

Page 47: ...ystawia na dzia anie ciep a smar w Powinien on znajdowa si w bezpiecznej odleg o ci od ostrych kraw dzi i cz ci rucho mych Przewody uszkodzone lub popl tane zwi kszaj ryzyko pora enia pr dem e Podczas...

Page 48: ...e y sprawdza czy cz ci ruchome s w a ciwie za o one i czy si nie zacinaj Nale y r wnie sprawdza czy jakie cz ci nie s uszkodzone oraz sprawdza wszelkie inne elementy kt re mog wp yn na prac urz dze Je...

Page 49: ...szlifowania przed miot w zawieraj cych magnez U ywa gogli ochronnych Stosowa os on dla uszu W razie potrzeby stosowa rodki ochronne takie jak r kawice ochronne obuwie ochronne etc Przytrzymywa urz dze...

Page 50: ...ie jest przeznaczone do szlifowania dre wna tworzyw sztucznych i metalu Narz dzie jest przeznaczone wy cznie do szlifowania na sucho Maszyna nie jest przeznaczona do obr bki powier zchni zawieraj cych...

Page 51: ...yt 5B Dolny uchwyt 6 Rura odprowadzania py u 7 Przycisk odblokowania akumulatora 8 Akumulator 9 Papier cierny 10 Gumowy pier cie 11 Przycisk diod LED akumulatora 12 Diody LED akumulatora 13 Ladowarka...

Page 52: ...nie papieru ciernego Rys B Po o y narz dzie na boku lub spodem do g ry i przytrzyma Za o y papier cierny 9 o odpowiednim rozmiarze ziarna na podk adk szlifuj c 4 Upewni si czy perforacja na papierze c...

Page 53: ...ateria owe i wady wykonania na okres wymagany prawem licz c od dnia zaku pu Je li wyst pi usterka produktu w tym okresie spowodowana wad materia ow i lub wad wykonania prosz bezpo rednio skontaktowa s...

Page 54: ...54...

Page 55: ...e volgende standaarden en reguleringen FR Nous d clarons sous notre seule responsabilit que ce produit est conforme aux standards et directives suivants est conforme la Directive 2011 65 EU du Parleme...

Page 56: ...2020 VONROC WWW VONROC COM 2007 24...

Reviews: