VMS Touring 600 Quick Start Manual Download Page 6

quick start guide

6

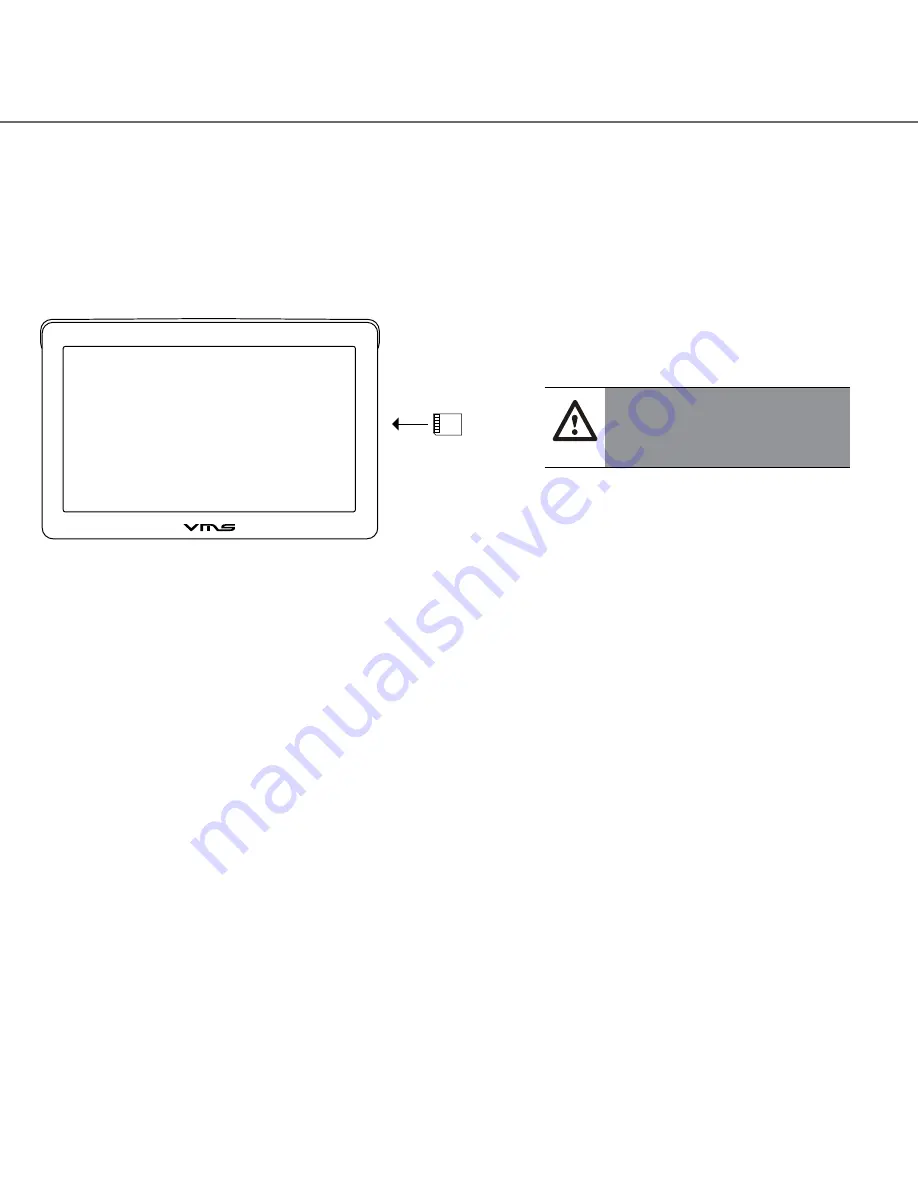
3.1 INSERTING SD MEMORY CARD

Step 1: Remove sd card from its plastic holder.

Step 2: Locate the SD card slot on the right side of the DEVICE.

Step 3: Ensure orientation of the SD card is correct.

Step 4: Insert the SD card by sliding it gently into the slot completely. The card will click indicating  

            correct installation.

3.2 INSTALLING THE DEVICE

1. Select a suitable location to mount the GPS on your windscreen.

2. Clean & dry the suction cup and select the area of your windscreen.

3. Plug the Car Charger into the side of the GPS.

4. Attached the cradle to the suction cup mount.

5. Adjust the angle with the rotary clamp if necessary.

6. Place the suction cup on the windscreen and secure with rotary latch.

7. Place the bottom of the GPS on to the cradle and gently click the top of the GPS into the cradle.

8. Plug the car charger into a power outlet in your vehicle. Your unit should turn on automatically if it  

    is plugged in and your vehicle key is turned to ON/ACC.

3.3 POWER ON/OFF & SLEEP MODE

Power on: 

press and hold the power button until the device turns on.

Power off / Sleep:

 press the power button until the unit displays “POWER OFF”, or press the power 

button for 1 sec then release, the message “SLEEP” will appear on the screen to indicate it’s gone 

into sleep mode. During sleep mode, the device is not completely switched off and therefore the bat-

tery will continue to consume power.

Touring 600

C a

u t

i o

n

Please note the orientation of

the sd card before inserting

Summary of Contents for Touring 600

Page 1: ...quick start guide TM Touring 600...

Page 2: ...rough tracks can switch to the iTOPO 1 250 000 scale topographic maps This map collection covers the entire country and displays the majority of 4x4 tracks Street navigation features the latest Where...

Page 3: ...ngs 4 1 Main menu 7 4 2 Date and time 4 2 1 Time 8 4 2 2 Date 8 4 2 3 Time zone 9 4 3 Calibrating the touchscreen and device information 9 4 4 Multimedia extras 9 4 4 1 Photos 10 4 4 2 Videos 10 4 4 3...

Page 4: ...with a VMS icon 3 Copy all data from the sd card to your PC hard drive PERFORM A RESTORE FROM YOUR BACK UP RESTORE BACK UP DATA TO INTERNAL STORAGE 1 Power on the device 2 Connect the device to the P...

Page 5: ...e 3 Camera input Input for Reverse Camera cable 4 USB charger Car charger input USB type 5 LED indicator Red when charging green when fully charged 6 Earphone jack 3 5mm Audio output 3 5 mm earphone 7...

Page 6: ...sary 6 Place the suction cup on the windscreen and secure with rotary latch 7 Place the bottom of the GPS on to the cradle and gently click the top of the GPS into the cradle 8 Plug the car charger in...

Page 7: ...ccess the Setup menu Back Access the Extras menu Access the GPS Console 100 0 Charging Back Back TIP Each navigation software has it s own settings To access software settings refer to the correspond...

Page 8: ...m Time Touch to enter time settings System Date Touch to enter date settings 4 2 1 DEVICE TIME or hour toggle Minutes Display Hour Display Back to Date Time Settings or min toggle 4 2 2 DEVICE DATE or...

Page 9: ...ICE INFORMATION and CALIBRATING THE TOUCHSCREEN Reset GPS receiver To calibrate the touchscreen tap this button follow the on screen instructions System Information Display Back to Settings menu Reset...

Page 10: ...r down Browse up one folder 4 4 1 PHOTO VIEWER Photo Display Area Zoom in or out of photo Back to Main menu Back to Photo Browser Menu Next or Prev photo Full screen mode rotate photo 4 4 2 VIDEO BROW...

Page 11: ...l indicator Stop Play FF Back to Video browser menu Status indicator 4 4 3 MUSIC BROWSER SD card content Back to Main menu Back to Main Menu Scroll up or down 4 4 3 MUSIC PLAYER Back to Main Menu Cont...

Page 12: ...urn on your GPS and select the navigation icon Select the following options a Street navigation b Off road GPS The default Off Road application is Mud Map c Change Off road GPS software If you wish to...

Page 13: ..._support 8 Reverse Camera Setup The Touring 600 has the capability to display reverse camera images from up to two VMS cameras 8 1 Setting up reverse camera 8 2 REVERSE CAMERA OPERATION Single Vehicle...

Page 14: ...ng and use voice prompts when possible Do not input destinations change settings or access any functions requiring prolonged use of the device s controls while driving Pull over in a safe and legal ma...

Page 15: ...f time store within the following temperature range 0 to 55 C When storing the device for an extended time store within the following temperature range 0 to 25 C Do not operate the unit outside the fo...

Page 16: ...IVES YOU SPECIFIC LEGAL RIGHTS WHICH MAY VARY FROM STATE TO STATE IN NO EVENT SHALL VMS BE LIABLE FOR ANY INCIDENTAL SPECIAL INDIRECT OR CONSEQUENTIAL DAMAGES WHETHER RESULTING FROM THE USE MISUSE OR...

Page 17: ...this may cause permanent damage The device is not water proof Do not expose to water Contact with water can cause this unit to malfunction Never use a hard or sharp object to operate the touchscreen...

Page 18: ...d is protected under Australia copyright laws and international copyright treaties You further acknowledge that the structure organisation and code of the software are valuable trade secrets of VMS an...

Page 19: ...this page has been left intentionally blank...

Page 20: ...om June 2010 Rev 1 0 Printed in China VMS is a trademark of XIA GROUP PTY LTD registered in Australia and other countries and may not be used with out the express permission of XIA GROUP Pty Ltd copyr...

Reviews: