background image

VIZIO

®

 VW22L HDTV10T User Manual 


Version 7/14/2008 


www.VIZIO.com


Opening the Package


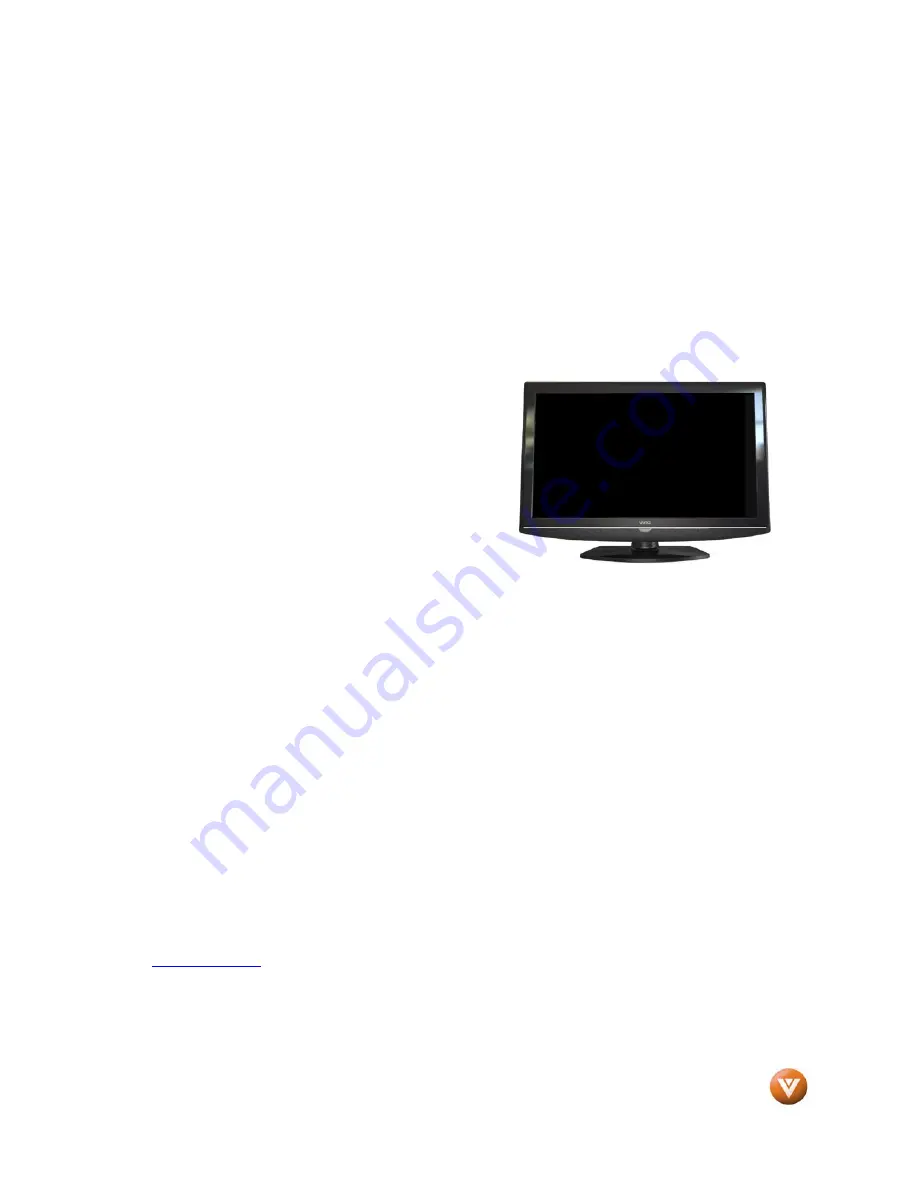
Your  VIZIO  VW22L  HDTV10T  and  its  accompanying  accessories  are  carefully  packed  in  a  cardboard 
carton that has been designed to protect it from transportation damage.  Now you have opened the carton 
check that the VW22L HDTV10T is in good condition and that all of the accessories are included. 

The screen can easily be  scratched or broken so please handle the product  gently and never place the 
HDTV with the glass facing downwards on a surface without protective padding. 


IMPORTANT: Save the carton and packing material for future shipping. 


Package Contents


VIZIO VW22L HDTV10T 

VIZIO Remote Control VR1 

Two (Double A) Batteries for the Remote Control 

Base 

One M4 16mm screw (to attach the Base to the stand) 

Power Cord 

This User Manual 

Quick Setup Guide 

Registration Card 

VIZIO Warranty and Repair Information 


IMPORTANT: 

Do  not  apply  pressure  to  the  screen  display  area  which  may  compromise  the  integrity  of 

the display.  The manufacturer’s warranty does not cover user abuse or improper installations. 


Additional  Certified  Accessories  for  the  VIZIO 
VW22L HDTV10T are sold separately


Wall Mounts 

High Definition Cables 

Extra or replacement Remote 


VIZIO also offers Installation Services and Extended Warranty Services for your VIZIO VW22L HDTV10T 


To  purchase  or  inquire  about  additional  accessories  and  services  for  your  VIZIO  product,  visit  our  web 
site at 

www.VIZIO.com

 or call us toll free at 888-VIZIOCE (888-849-4623) 


Summary of Contents for VW22L - 22" LCD TV

Page 1: ...call toll free at 888 VIZIOCE 888 849 4623 We recommend you register your VIZIO VW22L HDTV10T either at our website www VIZIO com or fill in your registration card and mail it in For peace of mind and to protect your investment beyond the standard warranty VIZIO offers on site extended warranty service plans These plans give additional coverage during the standard warranty period Visit our website...

Page 2: ...ly into a grounded power outlet as a safety feature If your outlet does not accommodate the three wire plug have an electrician install the correct outlet or use an adapter to ground the appliance safely Do not defeat the safety purpose of the grounded plug Do not overload power strips and extension cords Overloading can result in fire or electric shock The wall socket shall be installed near the ...

Page 3: ...nd supporting structure grounding of the lead in wire to an antenna discharge unit size of the grounding conductors location of antenna discharge unit connection to grounding electrodes and requirements of the grounding electrode Lightning Protection For added protection of the TV during a lightning storm or when it is left unattended or unused for long periods of time unplug the TV from the wall ...

Page 4: ...VW22L HDTV10T VIZIO Remote Control VR1 Two Double A Batteries for the Remote Control Base One M4 16mm screw to attach the Base to the stand Power Cord This User Manual Quick Setup Guide Registration Card VIZIO Warranty and Repair Information IMPORTANT Do not apply pressure to the screen display area which may compromise the integrity of the display The manufacturer s warranty does not cover user a...

Page 5: ...e electronic components Install the TV in landscape orientation any 90 clockwise or counter clockwise installation may induce poor ventilation and excessive component damage VIZIO offers professional installation services Please contact VIZIO for more information on these services at 888 VIZIOCE 888 849 4623 or www VIZIO com Attaching the Base IMPORTANT The Base of the HDTV must be assembled prior...

Page 6: ...ree 3 screws holding the base to the VW22L 4 Carefully remove the stand base 5 Now the VW22L can fit securely to a mount sold separately by utilizing the mounting holes in the center of the back panel of the TV Please ensure to follow the instructions of your specific mount to properly hang the VW22L HDTV10T The pitch of the mounting holes is 100mm horizontal and 100mm vertical The screw type requ...

Page 7: ... 2 4 1 Using Composite Video 20 2 4 2 Using Coax RF 20 2 5 Connecting Your DVD Player 21 2 5 1 Using HDMI 21 2 5 2 Using Component Video 22 2 5 3 Using S Video AV 23 2 5 4 Using Composite AV Video 23 2 6 Connecting Your VCR or Video Camera 24 2 7 Connecting to a PC Computer 24 2 7 1 Preset PC Resolutions 25 2 7 2 Using a PC 25 Chapter 3 Setting Up to Watch Television 26 3 1 Basic LCD HDTV Start Up...

Page 8: ...Caption 35 4 4 10 Input Label 35 4 4 11 Component Set 35 4 4 12 VGA Set 35 4 5 Understanding Viewing Modes 36 4 6 Using a Cable or Satellite Remote 37 Chapter 5 Maintenance and Troubleshooting 37 5 1 Maintenance 37 5 2 Troubleshooting Guide 38 5 3 Telephone Technical Support 39 5 4 Compliance 40 5 5 FCC Class B Radio Interference Statement 40 Chapter 6 Miscellaneous Information 41 6 1 Specificatio...

Page 9: ...f a sub menu is active pressing this button will return to the previous menu level CH Use these buttons to step up or down the TV channels While the OSD is active these buttons function as up and down controls in the OSD menus VOL Use these buttons to increase or decrease to the speaker volume While the OSD is active these buttons function as left and right arrow to go to the next menu or increase...

Page 10: ...rs to connect the external audio from the same source The signal being carried by the S Video cable and connector if connected will take priority over the Video RCA connector yellow connector 4 COMPONENT YPb CbPr Cr with Audio L R Connect the primary source for component video devices such as a DVD Player or set top box here From left to right use red for Pr blue for Pb green for Y red for right a...

Page 11: ... channel 28 2 would be selected by the following button sequence 2 8 2 CH or These buttons change the channels up or down VOL or Press to increase or decrease the volume LAST This button recalls the previously viewed channel MUTE This button turns the sound on and off VOL or These buttons turn the volume up or down MENU Use this button to access the On Screen Display OSD menus INFO This button dis...

Page 12: ...T Press this button to select the Component YPbPr input HDMI Press this button to select HDMI input source ZOOM and These buttons have no effect because this function is not available on this HDTV FREEZE This button has no effect because this function is not available on this HDTV RGB This button selects an RGB Analog component such as a PC PIP This button has no effect because this function is no...

Page 13: ...ol Range Point the remote control at the remote control sensor to transmit the commands Do not place any obstacles between the remote control and the receiver window The effective range of the remote control is approximately 26 feet 8 meters from the front of the receiver window about 13 feet 4 meters when 30 to the left and right 20 up and down 1 5 3 VIZIO Remote Control Precautions The remote co...

Page 14: ...cable Best analog RGB PC Video4 This video input has separate red green and blue color components The signal carries horizontal and vertical sync information on the green signal This is most commonly used for PC input Better analog Component Video3 The video signal is separated into three signals one containing the black and white information and the other two containing the color information This...

Page 15: ...HDTV 4 Select DTV using the INPUT button on the remote side of the HDTV or directly by pressing the TV button on the Remote Control Note a Not all digital TV broadcasts are High Definition HD Refer to the program guides or consult your cable satellite or TV station operator b Digital broadcasts are not available in all areas Refer to www antennaweb org for detailed information c Make sure the ante...

Page 16: ... side of the HDTV or directly by pressing the TV button on the Remote Control 2 2 3 Using the Antenna or Cable for your VCR 1 Turn off the power to the HDTV and VCR 2 Connect the Output to TV RF Out or Antenna Out connector on the rear of your VCR to the ANTENNA CABLE DIGITAL ANALOG connector at the rear of the HDTV 3 Turn on the power to the HDTV and VCR 4 Select TV using the INPUT button on the ...

Page 17: ...wer to the HDTV and HDTV Set Top Box 4 Select HDMI using the INPUT button on the remote side of the HDTV or directly by pressing the HDMI button on the Remote Control Note To maintain the display quality use a VIZIO certified HDMI cable that is 10 meters See www VIZIO com or call 1 888 VIZIOCE 1 888 849 4623 for details Note a The HDMI input on the HDTV supports High bandwidth Digital Content Prot...

Page 18: ...on on the remote side of the HDTV or directly by pressing the HDMI button on the Remote Control Note a The HDMI input on the HDTV supports High bandwidth Digital Content Protection HDCP HDCP encrypts the transmission between the video source and the digital display for added security and protection b Refer to your HDTV Set Top Box user manual for more information about the video output requirement...

Page 19: ...our HDTV Set Top Box to the corresponding Y green color connector in the Component group 5 Using an audio cable red and white connectors connect the cable to the audio output connectors associated with the Component output on your HDTV Set Top Box and connect the other end to the audio connectors associated with the Component 6 Turn on the power to the HDTV and HDTV Set Top Box 7 Select Component ...

Page 20: ... with the AV input at the rear of the HDTV 4 Turn on the power to the HDTV and Set Top Box 5 Select Composite Video 1 using the INPUT button on the remote side of the HDTV or directly by pressing the AV button on the Remote Control 2 4 2 Using Coax RF 1 Turn off the power to the HDTV and Set Top Box 2 Using a Coax RF cable connect one end to the TV OUT RF on your Set Top Box and the other end to t...

Page 21: ...tly by pressing the HDMI button on the Remote Control For DVD Players with DVI 1 Turn off the HDTV and DVD player 2 Using a HDMI DVI cable connect the DVI end to your DVD player and the HDMI end to the HDMI Input at the rear of the HDTV 3 Turn on the power to the HDTV and your DVD player 4 Select HDMI using the INPUT button on the remote or side of the HDTV or directly by pressing the HDMI button ...

Page 22: ...color connector on your DVD player to the corresponding Y green color connector in the Component group at the rear of the HDTV 5 Using an audio cable red and white connectors connect the cable to the audio output connectors associated with the Component output on your DVD player and connect the other end to the audio connectors associated with the Component input at the rear of the HDTV 6 Turn on ...

Page 23: ...to the HDTV and DVD player 5 Select S Video Video 2 using the INPUT button on the remote side of the HDTV or directly by pressing the AV button on the Remote Control 2 5 4 Using Composite AV Video Connecting your DVD Player Good 1 Turn off the power to the HDTV and DVD player 2 Connect the Video yellow color connector on your DVD player to the Video yellow color connector in the AV group 3 Connect...

Page 24: ...the Remote Control 2 7 Connecting to a PC Computer 1 Turn off the power to the HDTV and PC Computer 2 Connect a 15 pin D Sub RGB VGA cable to the RGB output of your pc computer and the other end to the RGB PC input at the rear of the HDTV 3 Connect the Audio Out on your pc computer to the RGB PC Audio input at the rear of the HDTV 4 Turn on the HDTV and PC Computer 5 Select RGB using the INPUT but...

Page 25: ...00x600 72 48 08 72 19 P P 50 000 800x600 75 46 87 75 00 P P 49 500 1024x768 60 48 36 60 00 N N 65 000 1024x768 70 56 48 70 07 N N 75 000 1024x768 75 60 02 75 03 P P 78 750 1680x1050 60 64 67 59 88 P N 119 000 NOTES N Negative P Positive Primary Native Mode 2 7 2 Using a PC If connecting to a PC through the RGB PC input set the TV timing mode to VESA 1680x1050 at 60Hz for best picture quality refer...

Page 26: ... of the HDTV or directly by pressing the TV button on the remote control and Auto Scan for the available TV channels a Press Menu on the remote or the side of the HDTV to bring up the On Screen Display OSD b Select the SETUP option and press the right arrow button on the remote control to enter the SETUP menu c Highlight the AUTO CH SEARCH option and press right arrow button on the remote to begin...

Page 27: ...onnected by a Component YPbPr cable select Component directly by pressing the Component button on the remote or by pressing the INPUT button on the remote or on the side of the HDTV 3 When using option 2a press the Channel buttons on the remote or the CH buttons on the side of the HDTV to change the channel Note The Channel buttons on the side of the HDTV and on the remote control will not work if...

Page 28: ...hen you change TV channels or inputs or press the INFO button on the remote an Information Banner is displayed for a few seconds to tell you the status of the LCD HDTV TV Channel Number and Station Name ATSC HDTV High Definition TV Program Information Provided by Broadcaster Current Time Program Time ...

Page 29: ...ome of the submenu options may vary depending on your selected input source 1 Press the MENU button on the remote control or the side of the TV and the OSD menu will be shown on the screen 2 Press the UP and Down arrow buttons on the remote control or buttons the CH or CH buttons on the side of the HDTV to select one of the other menu options 3 Once the menu option is displayed press the Left arro...

Page 30: ...ightness Indicator Bar so you can see the brightness level between the minimum and maximum available levels The Brightness adjusts the black levels in the picture If the brightness is too low you will not be able to see the detail in darker parts of the picture and if the brightness is too high the picture will look washed out 4 2 4 Sharpness Select the Sharpness option in the Video submenu Press ...

Page 31: ... of color first as the case of this is often too much color Note This option is not available when VGA Video 4 is selected as the input source 4 2 7 Backlight Select the Backlight option in the Video submenu Press the Right and Left arrow buttons to start adjusting the Backlight and the menu page will disappear and be replaced by a small Backlight Indicator Bar so you can see the backlight level b...

Page 32: ...e bass level between the zero and maximum available levels 4 3 4 Treble Select the Treble option in the Audio submenu Press the Right and Left arrow buttons to start adjusting the Treble and the menu page will disappear and be replaced by a small Treble Indicator Bar so you can see the treble level between the zero and maximum available levels 4 3 5 Balance Select the Balance option in the Audio s...

Page 33: ...option in the Feature submenu to set the Noise Reduction Color Temperature 3D Y C and Dynamic Contrast The Noise Reduction may be set to OFF Low Mid or High Use this feature to diminish picture artifacts caused by the digitizing of image motion content that may be present in the picture The Color Temperature may be set to Cool Normal or Warm The 3D Y C may be set to ON or OFF The Dynamic Contrast ...

Page 34: ... following TV ratings Y All children Y7 Older children G General audience PG Guidance suggested 14 Strongly cautioned MA Mature audience You can also customize the TV ratings for the following content FV Fantasy Violence L Adult language S Sexual situations V Violence D Sexually suggestive dialog Note This feature is not available when HDMI Component or VGA is selected as the input source 4 4 7 Di...

Page 35: ...aracters to label the input Note This feature is not available when DTV TV is selected as the input source 4 4 11 Component Set The Component Set option is available in the Feature menu This option lets you adjust the Horizontal Position Vertical Position and Phase Select the Settings option to restore to factory default settings Note This feature is only available when Component is selected as th...

Page 36: ...me movie in this mode the display image is stretched proportionately to fill the TV screen When watching a widescreen 1 78 1 source program or movie the display image fills the TV screen If you are watching a widescreen 1 85 1 or 2 35 1 source program or movie there will still be black bars at the top and bottom When watching a standard definition 4 3 aspect ratio 1 33 1 source the picture will fi...

Page 37: ...that the power cable is removed from the socket before cleaning the TV 2 Do not use volatile solvent such as toluene rosin and alcohol to clean the TV Such chemicals may damage the housing screen glass and remote control and cause paint to peel Cleaning the Housing and Remote Control 1 Use a soft cloth for cleaning 2 If the housing or remote control is seriously contaminated use a soft cloth moist...

Page 38: ...ue are missing check the video cable to make sure it is securely connected Control buttons do not work Press only one button at a time Remote Control does not work Make sure batteries are inserted correctly Batteries could be weak There appears to be image quality issues For best image quality view HD wide screen programs where possible If HD content is not available view Standard Definition from ...

Page 39: ... is higher or lower from another source then the loudness will change You switch to a different input and the screen size changes The TV remembers the viewing mode from the last time you used a particular input AV Component HDMI and TV Tips for High Definition Users The LCD HDTV is an ideal platform for viewing High Definition Content Best Image Quality will be achieved by the HDMI Input then YPbP...

Page 40: ... occur in a particular installation If this equipment does cause harmful interference to radio or television reception which can be determined by turning the equipment off and on the user is encouraged to try to correct the interference by one or more of the following measures 1 Reorient or relocate the receiving antenna 2 Increase the separation between the equipment and receiver 3 Connect the eq...

Page 41: ...tures De interlacer 3D Comb Filter 3 2 Pull Down Recovery Sleep Timer Wall Mountable Multiple Picture Mode Time Set V Chip Parental Control Digital Closed Caption Supports 480i SDTV 480P EDTV 720P HDTV 1080i HDTV and 1080P HDTV TV Signals Speakers 3 Watts x 2 Power Input IEC Connector for direct power line connection Voltage Range 100 240Vac at 50 60Hz Power Consumption 60W max Environmental Condi...

Page 42: ...nes 720P or 1080 interlaced lines 1080i and Dolby digital surround sound HDTV provides 900 000 2 1 million pixels Integrated HDTV An HDTV that has the digital tuner built into the set It does not need a separate set top box to receive over the air DTV signals Interlace Scan A way to scan vertical lines onto a TV picture by scanning all the odd lines first then filling the in the even lines this ha...

Page 43: ...Digital Output 32 Language 32 Treble 32 TV Speaker 32 Volume 32 DTV Feature Setup Advanced Video Menu 33 Analog Captions 35 Auto Search 33 Component Set 35 Digital Captions 34 Digital Closed Caption 34 Input Label 35 Parental Control 34 Password Set 33 Sleep Timer 33 TV Input 33 VGA Set 35 DTV Picture Adjust Backlight 31 Brightness 30 Color 30 Contrast 30 Settings 31 Sharpness 30 Tint 31 DVI Conne...

Page 44: ... 36 S Video Connecting your DVD Player 23 Connecting your VCR 24 Connecting your Video Camera 24 T Technical Specifications 41 Technical Support 39 Troubleshooting Guide 38 TV Audio Adjustment 32 Picture Adjustment 30 TV Audio Adjust Balance 32 Bass 32 Treble 32 TV Tuner Setup 33 W Watching TV Basic Adjustments 27 Basic connections 26 First Startup 26 Getting your Programs 27 Status Information 28...

Reviews: