Vizio VSB207BT Quick Start Manual Download Page 10

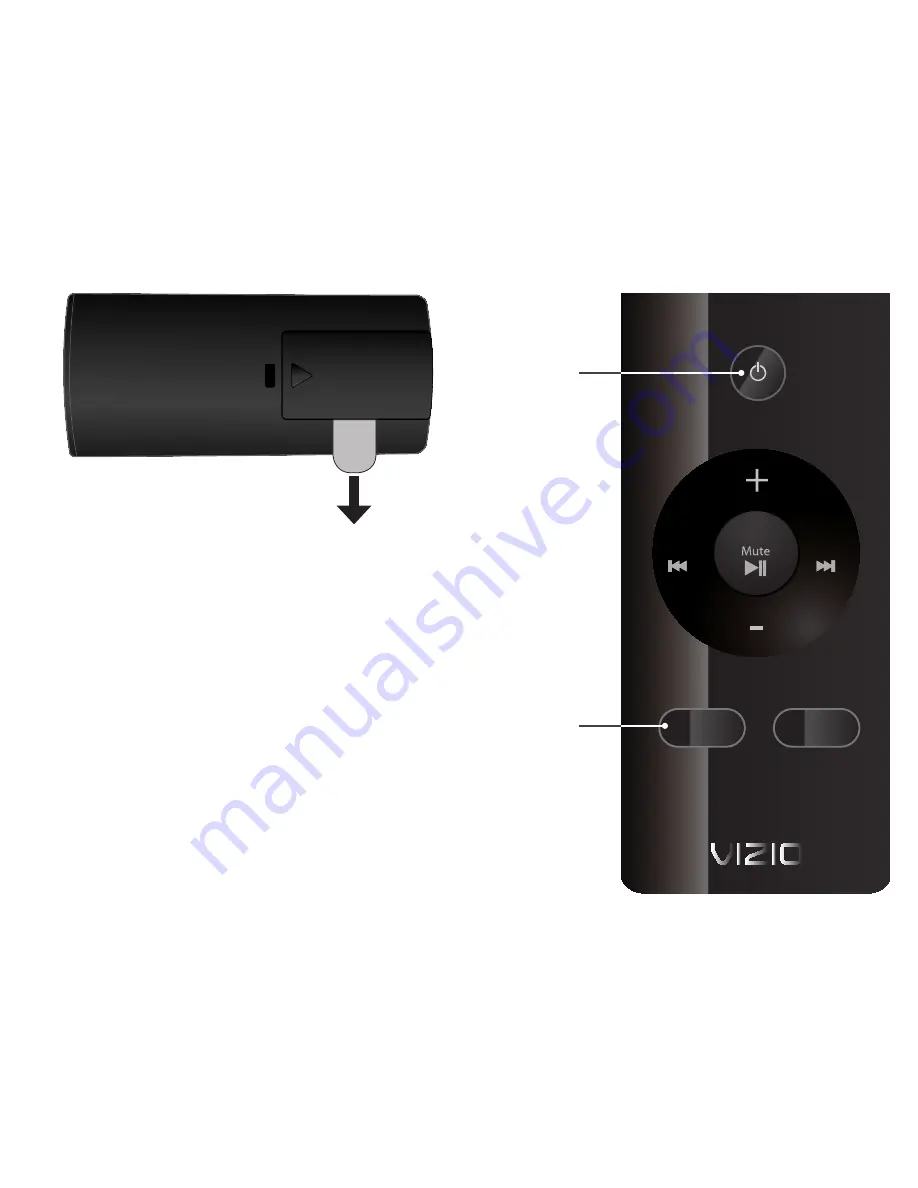
Turn your TV on, then press the 

Power

 button 

on the remote to turn the Sound Bar on. 

Press the Input button to switch between 

audio sources. For example, if you 

connected your TV to Input 1, set the Sound 

Bar to Input 1.

Setup is complete.

Input

Power

Input

Sub -

Sub +

DTS

Gently  pull  the  plastic  tab  from 
the  back  of  the  remote  control. 


(The  plastic  tab  can  be  thrown 

away)

Summary of Contents for VSB207BT

Page 1: ...QUICK START GUIDE Model VSB207BT VIZIO...

Page 2: ...safety instructions before operating your Sound Bar Keep these instructions in a safe place for future reference To reduce the risk of electric shock or component damage switch off the power before co...

Page 3: ...n just two 2 hours and can lead to death Keep new and used batteries away from children If the battery compartment does not close securely stop using the product and keep it away from children If you...

Page 4: ...ONTENTS Remote Control with Battery High Definition Sound Bar This Quick Start Guide Quick Start Guide Model VSB207BT VIZIO Power Adapter w Cable Stereo RCA to 3 5mm Audio Cable Input Sub Sub DTS Opti...

Page 5: ...t Press to change input source Input 1 Input 2 etc V Input 1 Stereo RCA Power Port Service Port For use only by service technician Input 2 Stereo 3 5mm V Sub Out RCA CONTROLS CONNECTIONS Optical Input...

Page 6: ...DISPLAY PANEL Power Light DTS Light Input Volume Indicator Lights The Display Panel on the front of the Sound Bar has Indicator Lights that provide information about the functionality of the Sound Bar...

Page 7: ...other devices Blu ray player game system etc see your device s user manual If using the Optical Input make sure your TV s audio is set to PCM output BACK OF SOUND BAR Connect one of the included cable...

Page 8: ...4 V 2 V 3...

Page 9: ...For the best surround sound experience position the Sound Bar as shown The Sound Bar should be close to ear level Sound Bar is centered below the TV...

Page 10: ...n Press the Input button to switch between audio sources For example if you connected your TV to Input 1 set the Sound Bar to Input 1 Setup is complete Input Power Input Sub Sub DTS Gently pull the pl...

Page 11: ...at the right side of the Sound Bar The sensor is located there Sub Press to decrease subwoofer volume Sub Press to increase subwoofer volume USING THE REMOTE Play Pause Press to Play or Pause Fast Re...

Page 12: ...he Bluetooth button on the Sound Bar for five 5 seconds When the Sound Bar is in Bluetooth Pairing Mode the Indicator Lights on the Display Panel on the front of the Sound Bar will light sequentially...

Page 13: ...t Keep in mind that Bluetooth is a compressed audio format so streamed music may lose some integrity when compared to a wired connection Try the following if your sound quality is less than optimal If...

Page 14: ...on the display panel will illuminate to show which input source has been selected CHANGING THE INPUT SOURCE RCA 3 5mm Bluetooth Optical Input Lights In order for the Optical Input to decode sound the...

Page 15: ...new CR2032 Be sure that the sign on the battery is facing up Push the battery cover until it clicks back into place Insert a flat head screwdriver into the slot as shown Gently push down on the tab th...

Page 16: ...BOTH SOUND BAR AND SUBWOOFER OFF CONNECT AN RCA CABLE TO YOUR SUBWOOFER NOT INCLUDED The volume on your Subwoofer must be manually adjusted See your Subwoofer s user manual for details on proper opera...

Page 17: ...s Wall mounting hardware is not included Reattach stands using the included screw 1 Remove the screw from the Sound Bar stands and rotate as shown If you are unfamiliar with power tools or the layout...

Page 18: ...NDARD not VARIABLE Consult your TV s user manual for more detailed information If using Bluetooth ensure that the volume on your source device is turned up and that the device is not muted If using Bl...

Page 19: ...on the remote may not be supported by the streaming application e g a music streaming app may not support the Back Fast Rewind button The audio is distorted in Bluetooth mode Move the source device cl...

Page 20: ...ice center Limitations and Exclusions VIZIO s one year limited warranty only covers defects in materials and workmanship This warranty does not cover for example cosmetic damage normal wear and tear i...

Page 21: ...mission limits 3 The manufacturer is not responsible for any radio or TV interference caused by unauthorized modification to this equipment It is the responsibilities of the user to correct such inter...

Page 22: ...Thin Light is the Ultrabook that s impossible to ignore Ultra responsive and ultra portable the VIZIO Thin Light boots up instantly and goes wherever you do If good things come in small packages this...

Page 23: ...g any HDTV into the ultimate smart TV Using the latest version of Google TV Co Star decks out your existing HDTV with apps full screen Web browsing and the best in streaming entertainment And with 108...

Page 24: ...2013 VIZIO INC ALL RIGHTS RESERVED 130121CH NC...

Reviews: