Vizio VO32LF - 32

VIZIO VO32L FHDTV10A User Manual 
 

 16  

www.VIZIO.com


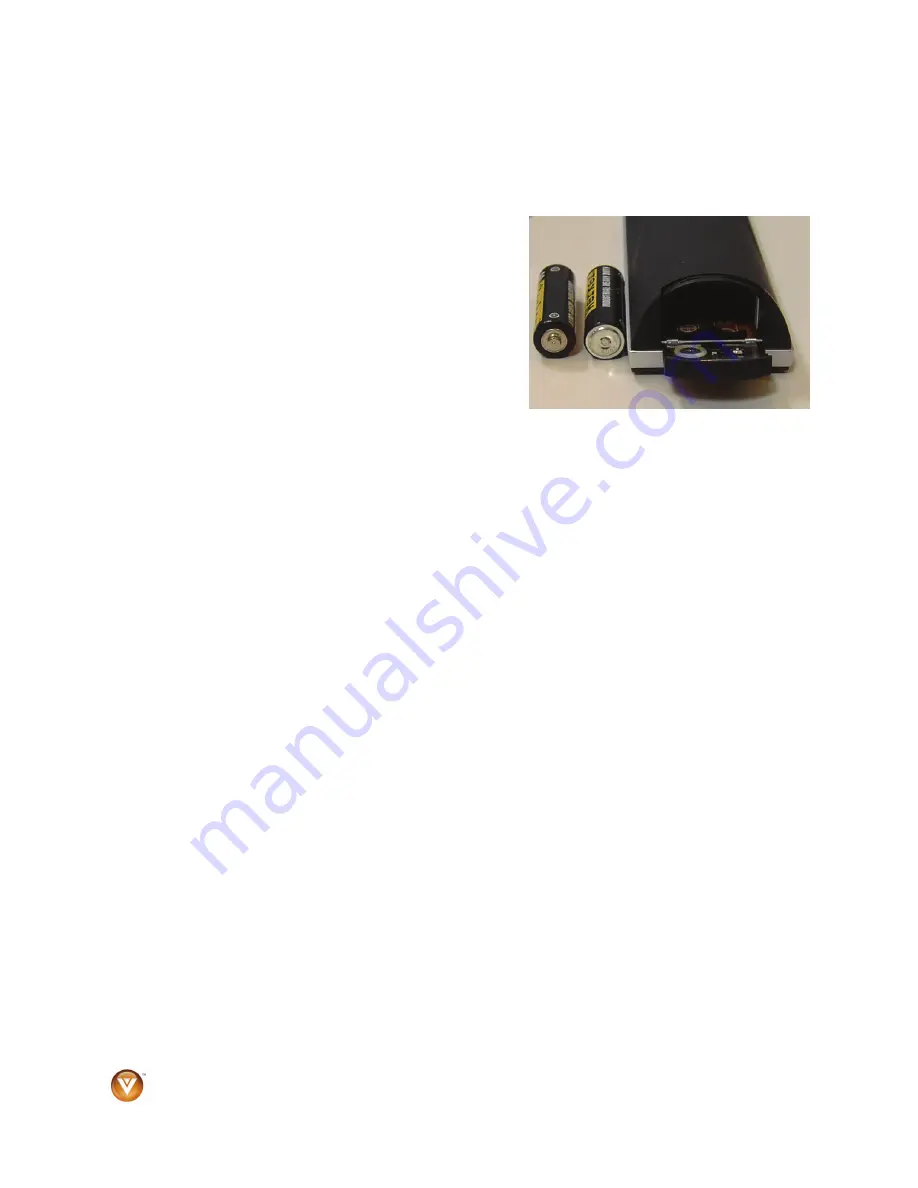
Insertion of Batteries in the Remote Control 

Insert two AA batteries into the remote control.  Make sure that you match the (+) and (-) symbols on the 
batteries with the (+) and (-) symbols inside the battery compartment.  Re-attach the battery cover. 
 

Precautionary Tips for Inserting the Batteries: 

 
Only use the specified AA batteries. 
Do not mix new and old batteries.  This may result in 
cracking or leakage that may pose a fire risk or lead to 
personal injury. 
Inserting the batteries incorrectly may also result in cracking 
or leakage that may pose a fire risk or lead to personal injury. 
Dispose of the batteries in accordance with local laws and 
regulations. 
Keep the batteries away from children and pets. 
 

Remote Control Range 

Point the remote control at the remote control sensor to transmit the commands. 
Do not place any obstacles between the remote control and the receiver window. 
The effective range of the remote control is approximately 30 feet (10 meters) from the front of the 
receiver window, 30° to the left and right, 20° up and down. 
 

VIZIO Remote Control Precautions 

The remote control should be kept dry and away from heat sources.  Avoid humidity. 
If the TV responds erratically to the remote control or does not respond at all, check the batteries.  If the 
batteries are low or exhausted, replace them with fresh batteries. 
When not using the remote control for a long period of time, remove the batteries. 
Do not take the batteries apart, heat them, or throw them into a fire. 
Do not subject the remote control to undue physical stress, such as striking or dropping it. 
Do not attempt to clean the remote control with a volatile solvent.  Wipe it with a clean, damp cloth. 
 

Summary of Contents for VO32LF - 32" LCD TV

Page 1: ...in For peace of mind and to protect your investment beyond the standard warranty VIZIO offers on site extended warranty service plans These plans give additional coverage during the standard warranty...

Page 2: ...penings in the back and bottom of the cabinet are provided for ventilation To ensure reliable operation of your HDTV and to protect it from overheating be sure these openings are not blocked or covere...

Page 3: ...lug the power cord and contact your dealer immediately Do not try to repair your HDTV yourself Avoid using dropped or damaged appliances If your HDTV is dropped and the housing is damaged the internal...

Page 4: ...nes Do not locate the antenna near overhead light or power circuits or where it could fall into such power lines or circuits Remember the screen of the coaxial cable is intended to be connected to ear...

Page 5: ...easily be scratched or broken so please handle the product gently and never place the HDTV with the glass facing downwards on a surface without protective padding IMPORTANT Save the carton and packing...

Page 6: ...ding feature must not be defeated The TV should be installed on a flat surface to avoid tipping For proper ventilation you must allow space between the back of the TV and the wall If you would like to...

Page 7: ...o top foam end caps 3 Remove the stand base under foam end cap 4 Remove the TV from the box and lay it face down on a clean flat surface Note Make sure that the surface is free of debris to prevent th...

Page 8: ...remove the stand base Now the VO32L FHDTV10A can fit securely to a mount sold separately by utilizing the mounting holes in the center of the back panel of the TV Please make sure to read the instruct...

Page 9: ...ng HDMI Input 23 Using Component Video 25 Using S Video AV1 S VIDEO 26 Using Composite AV Video Input 26 Connecting Your VCR or Video Camera 27 Connecting an external Receiver Amp 28 Optical Output of...

Page 10: ...Reset 62 HDMI Input Picture Adjustment 62 HDMI Input Audio Adjustment 63 HDMI Input Setup 63 Video Input Picture Adjustment 63 Video Input Audio Adjustment 64 Video Input Setup 64 Video Input Parenta...

Page 11: ...l proceed to the next menu level CH Use these buttons to step up or down the TV channels While the OSD is active these buttons function as up and down controls in the OSD menus VOL Use these buttons t...

Page 12: ...component video devices such as a DVD Player or set top box here From left to right use white for left audio and red for right audio inputs green for Y blue for Pb or Cb and red for Pr or Cr The green...

Page 13: ...he red and white audio connectors are shared between AV2 and COMPONENT2 3 COMPONENT2 YPb CbPr Cr with Audio L R Connect the source for component video devices such as a DVD Player or set top box here...

Page 14: ...press it repeatedly AV Press this button to select AV either Composite or S Video input MENU Use this button for the On Screen Display OSD menu When it is used within a menu selection the V ball key...

Page 15: ...h the input sources in the following sequence TV AV1 S VIDEO AV2 Component 1 Component 2 RGB HDMI 1 HDMI 2 and HDMI 3 Once you have stepped through the entire sequence you will return to the beginning...

Page 16: ...rol Range Point the remote control at the remote control sensor to transmit the commands Do not place any obstacles between the remote control and the receiver window The effective range of the remote...

Page 17: ...ard NTSC TV using antenna or cable Best analog Blue RGB PC VGA This video input has separate red green and blue color components The signal carries horizontal and vertical sync information on the gree...

Page 18: ...e HDTV and VCR 2 Connect the Output to TV RF Out or Antenna Out connector on the rear of your VCR to the DTV TV CABLE ANTENNA connector at the rear of the HDTV 3 Turn on the power to the HDTV and VCR...

Page 19: ...o the HDTV and HDTV Set Top Box 4 Select HDMI using the INPUT button on the remote or side of the HDTV or directly by pressing the HDMI button on the Remote Control Note To maintain the display qualit...

Page 20: ...other end to the audio connectors associated with the HDMI input white area at the rear of the HDTV 4 Turn on the power to the HDTV and HDTV Set Top Box 5 Select HDMI 2 using the INPUT button on the r...

Page 21: ...green color area row of connectors nearest to you when viewing from the rear of the TV at the rear of the HDTV 5 Using an audio cable white and red connectors connect the cable to the audio output con...

Page 22: ...iated with the AV input yellow color area at the rear of the HDTV 4 Turn on the power to the HDTV and Set Top Box 5 Select AV1 using the INPUT button on the remote or side of the HDTV or directly by p...

Page 23: ...MI input of the VIZIO VO32L FHDTV10A for optimal results Connecting your DVD Player Best 1 Turn off the power to the HDTV and DVD player 2 Connect a HDMI cable to the HDMI output of your DVD player an...

Page 24: ...d connectors to the audio output connectors associated with the DVI output of the DVD player and connect the other end to the audio connectors by the HDMI input white area at the rear of the HDTV 4 Tu...

Page 25: ...omponent1 input green color area row of connectors nearest to you when viewing from the rear of the TV at the rear of the HDTV 5 Using an audio cable white and red connectors connect the cable to the...

Page 26: ...ing Composite AV Video Input Connecting your DVD Player Good Turn off the power to the HDTV and DVD player 1 Connect the Video yellow color connector on your DVD player to the Video yellow color conne...

Page 27: ...nectors cable to the audio output connectors associated with the S Video output on your VCR or Video Camera and connect the other end to the audio connectors associated with the AV input yellow red ar...

Page 28: ...her end to the ANALOG OUT white area audio connectors at the rear of the LCD HDTV 3 Turn on the power to the LCD HDTV and Receiver Amp 4 Then press the button on the remote control to open the On Scre...

Page 29: ...V 3 Turn on the power to the LCD HDTV and Receiver Amp 4 Then press the button on the remote control to open the On Screen Display OSD menu 5 Press the on the remote control to select the Audio Adjust...

Page 30: ...blue area at the rear of the HDTV 4 Turn on the HDTV and PC Computer 5 Select RGB using the INPUT button on the remote or side of the HDTV Note a For the best picture quality when connecting a pc comp...

Page 31: ...N N 65 Windows 1024x768 70 56 47 70 06 N N 75 Windows 1024x768 75 60 02 75 02 P P 78 75 Windows 720x400 70 31 46 70 08 N P 28 32 DOS 1920x1080 60 66 65 60 P P 136 5 Windows NOTES N Negative P Positiv...

Page 32: ...the side of the HDTV or press the Power ON Orange button on the remote control 4 Initial Setup After powering on the TV set the Initial Setup Welcome screen will come up Press the button on the remot...

Page 33: ...Service with no box press the button on the remote control to choose CABLE Press the button on the remote to go to the next screen b The Channel Scan screen will be displayed default choice is Scan Pr...

Page 34: ...information about availability in your area type of antenna and in which direction to point your antenna The channel availability through cable depends upon which channels your cable operator supplie...

Page 35: ...n your Cable Box VCR External TV Tuner or Satellite Receiver and you will see a picture on your TV set If there is not picture make sure you have selected the correct input on the TV set d If the sele...

Page 36: ...roll to the Advanced Video option b Press the button to select it c Use the or button to scroll to the Color Temperature option d Press the button to select it e Press either or button to change setti...

Page 37: ...scroll across to the icon showing the little satellite dish or antenna The next screen will appear showing Time Zone Press either or button to select it Press either or button to choose the proper Ti...

Page 38: ...s through a cable or satellite set top box connected by an HDMI cable select HDMI directly by pressing the HDMI button on the remote or by pressing the INPUT button on the remote or on the side of the...

Page 39: ...mote control once for the next or previous channel or hold it depressed until the desired channel is reached Note Channel up and down will only operate in DTV and TV modes Wide Using this feature you...

Page 40: ...t will update with the program schedule for the channel and the window will show the live program for that channel Press the GUIDE button to exit this feature Information on HDTV Status When you chang...

Page 41: ...ain menu options may have additional submenus i e the TV Rating submenu for Parental Controls Press the button on the remote control or the side of the TV and the Picture Adjust menu will be shown on...

Page 42: ...completely Backlight Press the button to highlight the Backlight selection Press the button to start adjusting the brightness of the Backlight and the menu page will disappear and be replaced by a sma...

Page 43: ...start adjusting the contrast and the menu page will disappear and be replaced by a small Contrast Indicator Bar so you can see the contrast level between the minimum and maximum available levels Use t...

Page 44: ...Press the button to start adjusting the sharpness and the menu page will disappear and be replaced by a small Sharpness Indicator Bar so you can see the sharpness level between the minimum and maximu...

Page 45: ...the button to highlight Enhanced Contrast Ratio This feature can be set to On or OFF to allow the TV set to adjust its backlight to display dark and bright scenes with a more vivid or intense quality...

Page 46: ...r the pictures adjustment tab will be reset DTV TV Input Audio Adjustment Audio Mode When the button is pressed the On Screen Display OSD appears on the PICTURE adjustment page Press the button to dis...

Page 47: ...ments are completed press the LAST button repeatedly to exit the OSD completely Balance Press the button to highlight the Balance selection Press the button to start adjusting the balance and the menu...

Page 48: ...speakers will change according to the volume setting on the TV If it is fixed the volume can only be changed by the settings on the external stereo system Press the LAST key once to return to the prev...

Page 49: ...menu Once the adjustments are completed press the LAST button repeatedly to exit the OSD completely Tuner Mode When the button is pressed the On Screen Display OSD appears on the PICTURE adjustment p...

Page 50: ...buttons to open the TV TUNER SETUP menu and then press the button to highlight SKIP CHANNEL Press the button to select this channel to be skipped when using the CH or CH button You will still be able...

Page 51: ...ment page Press the button until the SETUP page is displayed Press the button to highlight the Language selection The default is English Press the or button to select Espa ol or Fran ais Once the adju...

Page 52: ...9 9 RGB 9 9 9 HDMI 9 9 9 9 9 Indicates which inputs are available for PIP mode PIP Position When PIP is selected Press the button to highlight the PIP position selection Press the or button to choose...

Page 53: ...mpletely Wide The Wide option is the feature which allows you to select how your display would be size wise When in TV mode the selections are Normal Wide Stretch and Panoramic views Press the button...

Page 54: ..._ in the bracket Press either the or button and select either the letter or number belongs to this place Press the button to go to the next space _ and again Using either the or button select the sec...

Page 55: ...Press the button to go to the next screen Press either or button to toggle between the two options As Broadcaster and Custom If Custom is selected then you will have the way of customize the way Clos...

Page 56: ...ction Press the button to start adjusting the vertical position of the picture Use the or button to adjust the vertical position Once the adjustments are completed press the LAST button repeatedly to...

Page 57: ...arental then press the button The Password must be entered before the TV will continue with Parental settings The default password set in the factory is 0 0 0 0 If you are going to use the Parental Co...

Page 58: ...Parental Control menu and then press the button to highlight the US TV Rating selection Press the button and the Block TV Rating panel will be displayed In the Block TV Rating panel you can customize...

Page 59: ...nder 17 years of age Press the or button to navigate through the Movie rating options Press the button to block locked or allow unlocked Canadian English Rating Press the button to highlight the Canad...

Page 60: ...ntal guidance control feature in your TV to have the most current parental control database for a digital signal This option may be available in the future for activation This option works as follows...

Page 61: ...mpleted press the LAST button repeatedly to exit the OSD completely Change the Password Press the button to highlight the Access Code Edit selection Press the button and the new Password panel will be...

Page 62: ...for more information Note Previously scanned channels will be removed Reset All Settings Use this function to reset the TV to the default factory settings Press either the MENU button to return to th...

Page 63: ...Setup The Setup menu operates in the same way for the HDMI Input as for the TV input in section 0 The menu difference is that there is no DTV TV or Parental Control adjustments Video Input Picture Ad...

Page 64: ...and AV as for the TV input in section 0 The menu difference is that there is an auto phase setting under the H V Position submenu when using Component input Auto Phase for Component input Press the b...

Page 65: ...ht the Auto Adjust selection Press the button for the LCD HDTV to adjust to the PC signal timing automatically Once the adjustments are completed press the LAST button repeatedly to exit the OSD compl...

Page 66: ...igh the picture will look washed out Once the adjustments are completed press the LAST button repeatedly to exit the OSD completely Contrast Press the button to highlight the Contrast selection Press...

Page 67: ...letely If you choose the Custom option then a new menu will be displayed showing the primary color items Red Green and Blue Press the button to highlight the color you wish to adjust Press the button...

Page 68: ...r button to adjust the horizontal position Once the adjustments are completed press the LAST button repeatedly to exit the OSD completely V Position Press the button to highlight the Vertical Shift se...

Page 69: ...put as for the DTV TV input in section 0 The menu difference is that there are no icons along the top for DTV TV and Parental Control adjustments PC Input Setup The Setup menu operates in the same way...

Page 70: ...image is stretched proportionately to fill the TV screen When watching a widescreen 1 78 1 source program or movie the display image fills the TV screen If you are watching a widescreen 1 85 1 or 2 35...

Page 71: ...seriously contaminated use a soft cloth moistened with diluted neutral cleaner to clean the display Wring water out of the cloth before cleaning to prevent water from penetrating into the housing Wip...

Page 72: ...d green or blue are missing check the video cable to make sure it is securely connected Control buttons do not work Press only one button at a time Remote Control does not work Make sure batteries are...

Page 73: ...When your LCD HDTV s digital capabilities exceed a digital broadcast signal the signal is up converted increased to match your TV s display capabilities Up converting can cause noise or trash You swit...

Page 74: ...please contact our Support Department at the number below Customer support and quality service are integral parts of VIZIO s commitment to service excellence For technical assistance contact our VIZIO...

Page 75: ...ur in a particular installation If this equipment does cause harmful interference to radio or television reception which can be determined by turning the equipment off and on the user is encouraged to...

Page 76: ...on MTS stereo decoder Digital amplifier Dolby Digital for ATSC QAM Channel skip Video input naming capability Closed caption Parental control V Chip 2 0 Programmable Timer Freeze PIP POP SRS TSXT Audi...

Page 77: ...n the set High Definition Television HDTV The best quality picture wide screen 16x9 display with at least 720 progressively scanned lines 720P or 1080 interlaced lines 1080i and Dolby digital surround...

Page 78: ...nd date of purchase VIZIO Technical Support is available from 6 00AM to 9 00PM Pacific Time Monday through Friday and 10 00AM to 2 00PM Pacific Time Saturday and Sunday Please note that holiday hours...

Page 79: ...iod following the date of purchase A VIZIO return authorization number must first be obtained as provided below The refund will be the purchase price actually paid by the purchaser less a ten percent...

Page 80: ...s option and sole discretion the customer will be provided with a return authorization number and replacement instructions Proof of purchase is required to confirm the product is within the one year...

Page 81: ...e 47 Digital Audio Out 48 Equalizer 47 Lip Sync 48 Reset Audio Mode 49 Speakers 48 SRS TSXT 47 Volume 46 DTV Picture Adjust Advanced Video 44 Backlight 42 65 Brightness 43 66 Color 43 Color Temperatur...

Page 82: ...7 Connecting your Video Camera 27 T Technical Specifications 76 Troubleshooting Guide 72 TV Audio Adjustment 46 Parental Control 57 Picture Adjustment 42 Special Features 51 TV Picture Adjust Advanced...

Reviews: