


VIZIO L30 User Guide
Version - 2/21/2005
31
www.vizioce.com
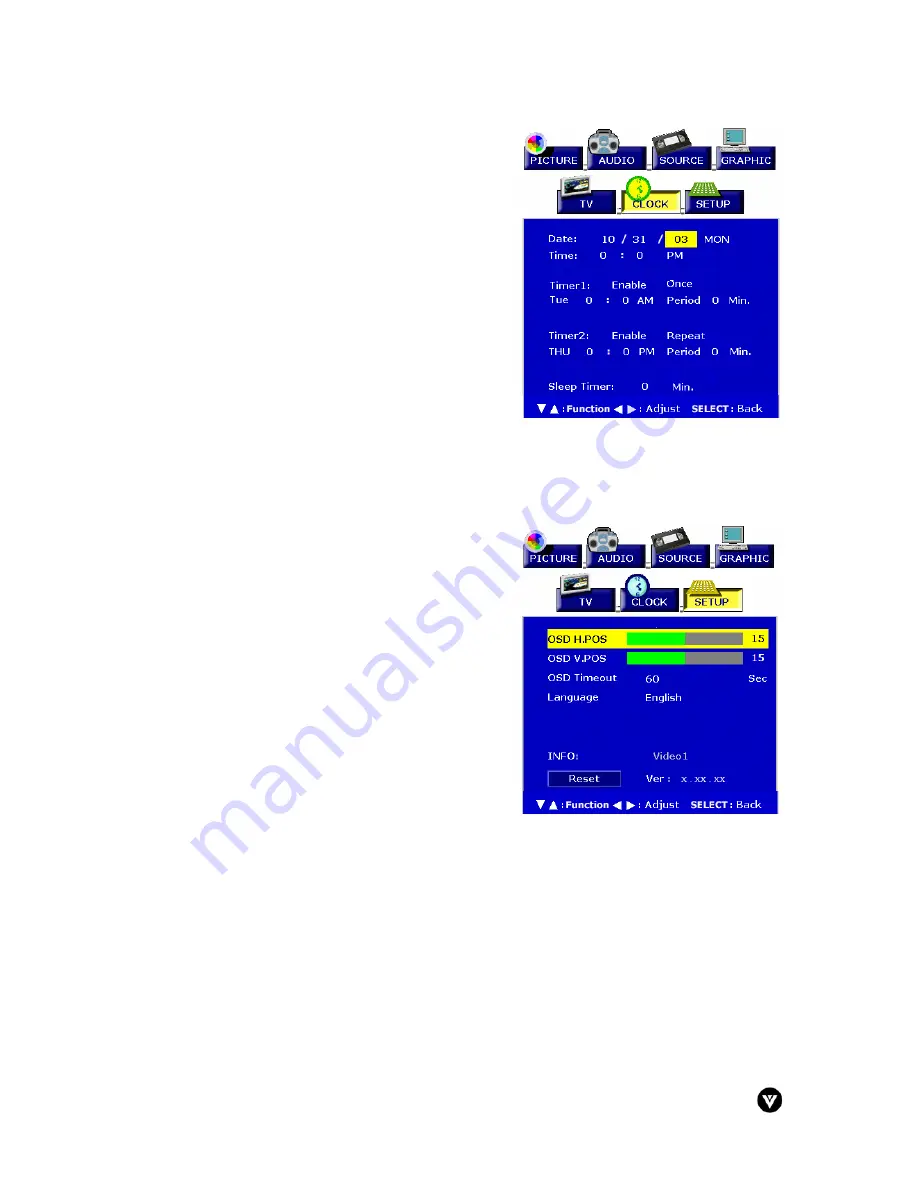
3.4.2.6 - CLOCK
Date – Display present date in MM/DD/YY format.
Time – Display present time.
Timer1 – Set the time and duration to automatically
turn on.
Timer2 – Set the time and duration to automatically
turn on.
Sleep Timer – Sets sleep timer either on or off. Users
can select the number of minutes the LCD TV
waits before it automatically turns off in 5-minute
increments. Maximum available time is 120
minutes.
3.4.2.7 - SETUP
OSD H Posi. – Adjusts the horizontal position of the
OSD within the display image.
OSD V Posi. – Adjusts the vertical position of the OSD
within the display image.
OSD Timeout – Specifies the number of seconds the
OSD menu is displayed before it automatically
turns off.
Language – Changes the language of the OSD menu.
INFO – Display Input Source, Type and Signal.
Reset – Reset default value.
Ver. – Software version.


