


–
9
–
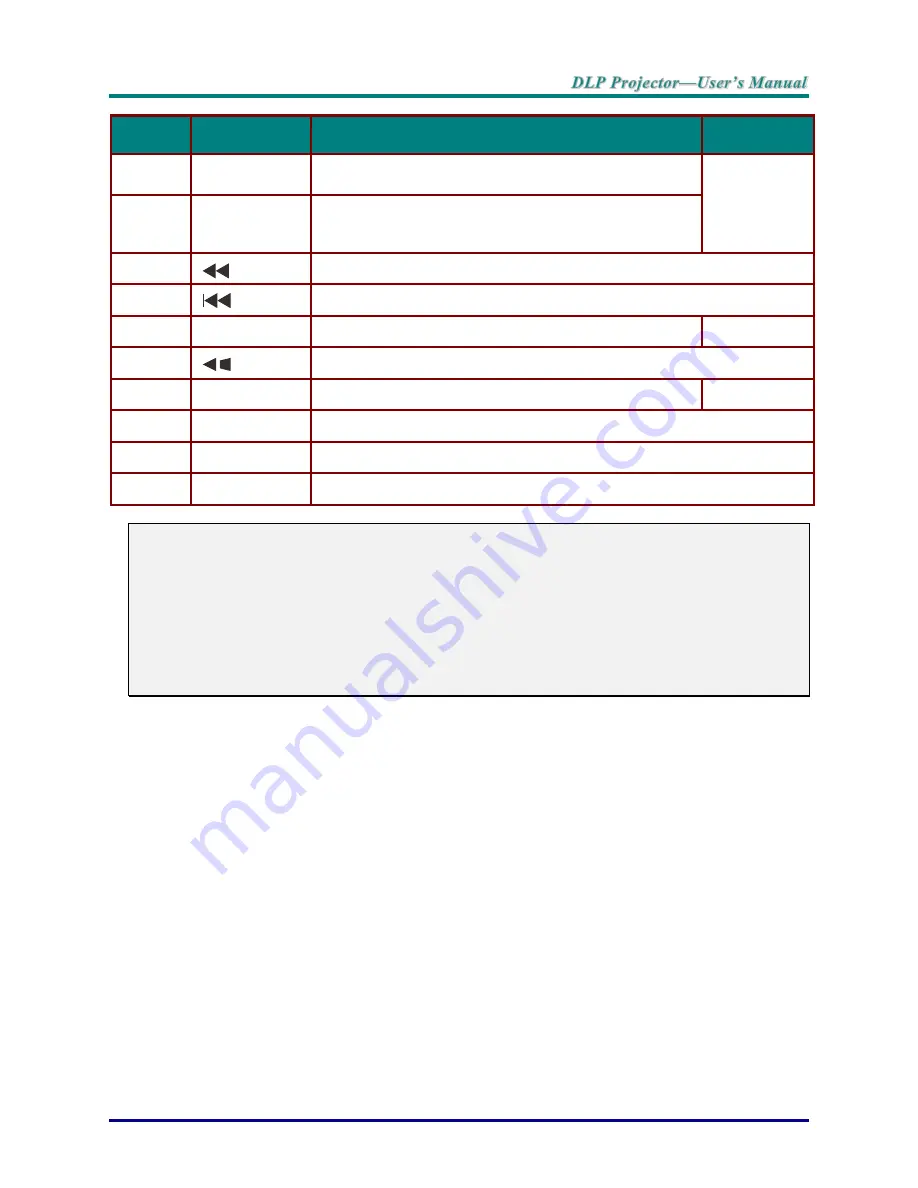
I
TEM
L
ABEL
D
ESCRIPTION
S
EE PAGE
25.
Auto/0
Auto adjustment for frequency, phase, and position
Number for Remote ID setting used.
18
26.
Source/ID
Displays the source selection bar
Combo key function for Remote Control customer code
settings (ID + Number).
27.
Fast reverses the file in MHL mode
28.
Goes to the previous file in MHL mode
29.
Keystone
Displays the keystone setting bar
16
30.
Navigates and changes settings in the OSD or MHL mode
31.
Menu
Opens the OSD
18
32.
HDMI
Toggles the input sources for display between HDMI sources
33.
ON
Turns the projector on
34.
Laser
Use as on-screen pointer.
DO NOT POINT IN EYES.
Note:
Controlling your smart device with the remote control
When the projector projects the contents from your MHL compatible smart device, you can use
the remote control to control your smart device.
To enter the MHL mode, the following buttons are available for controlling your smart device,
Arrow keys
(
▲
Up,
▼
Down,
◄
Left,
►
Right), MENU/EXIT, MHL
control buttons.
When the projector is under
MHL
mode, The keypad on projector should be with the same
definition of the key on remote control.
Remote Control Operating Range
The remote control uses infrared transmission to control the projector. It is not necessary to point the
remote directly at the projector. Provided you are not holding the remote perpendicular to the sides or
the rear of the projector, the remote will function well within a radius of about 7 meters (23 feet) and
15 degrees above or below the projector level. If the projector does not respond to the remote control,
move a little closer.
Projector and Remote Control Buttons
The projector can be operated using the remote control or the buttons on the top of the projector. All
operations can be carried out with the remote control; however, the buttons on the projector are
limited in use.
Summary of Contents for H1186 Series
Page 1: ......
Page 62: ... 53 Projector Dimensions ...


