DU8090Z DLP Projector - User Manual
15
UM80900217EN02
Installing the projector
The high quality display effect can be guaranteed only when the projector is correctly installed. Generally, the light
source facing the screen should be reduced or eliminated as much as possible. The contrast of the image will be
obviously reduced if the light directly shines on the screen, such as the beam from windows or the searchlight cast
on the image. The image may become faded and not bright.
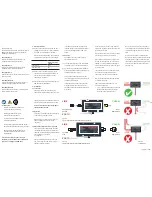
Precautions for Installation
Airflow and Heat Emission
Minimum Distance to Vent
Caution:
Projector installation must be done by a qualified professional. Contact your dealer for more information.
It is not recommended you install the projector yourself.
With ceiling installation, use approved mounting hardware & M4 screws; maximum depth of screw: 14
mm. Contact your dealer for information about mounting the projector on a ceiling.
Only use the projector on a solid, level surface, serious injury and damage can occur if the projector is
dropped.
Caution:
Ensure that the hot air from the exhaust vent is not sucked into the projector.
Ensure the air intake and exhaust vents are unobstructed and keep the required distance from any object.
Below is required minimum distance between the vent and any object.
All added enclosures should pass a certified thermal evaluation to ensure that the projector does not
recycle exhaust air, as this may cause the projector to shut down even if the enclosure temperature is with
the acceptable operation temperature range.
Caution:
Only use the projector on a solid, level surface, serious injury and damage can occur if the projector is dropped.
Please do not stack the projector on the surface of another projector, serious injury and damage may occur if the
projector is dropped


