Vivitar Vivicam T324N User Manual Download Page 21


20 


1. 

Press the OK button.   

2. 

Press the Right/Left button to select the 

icon.


3. 

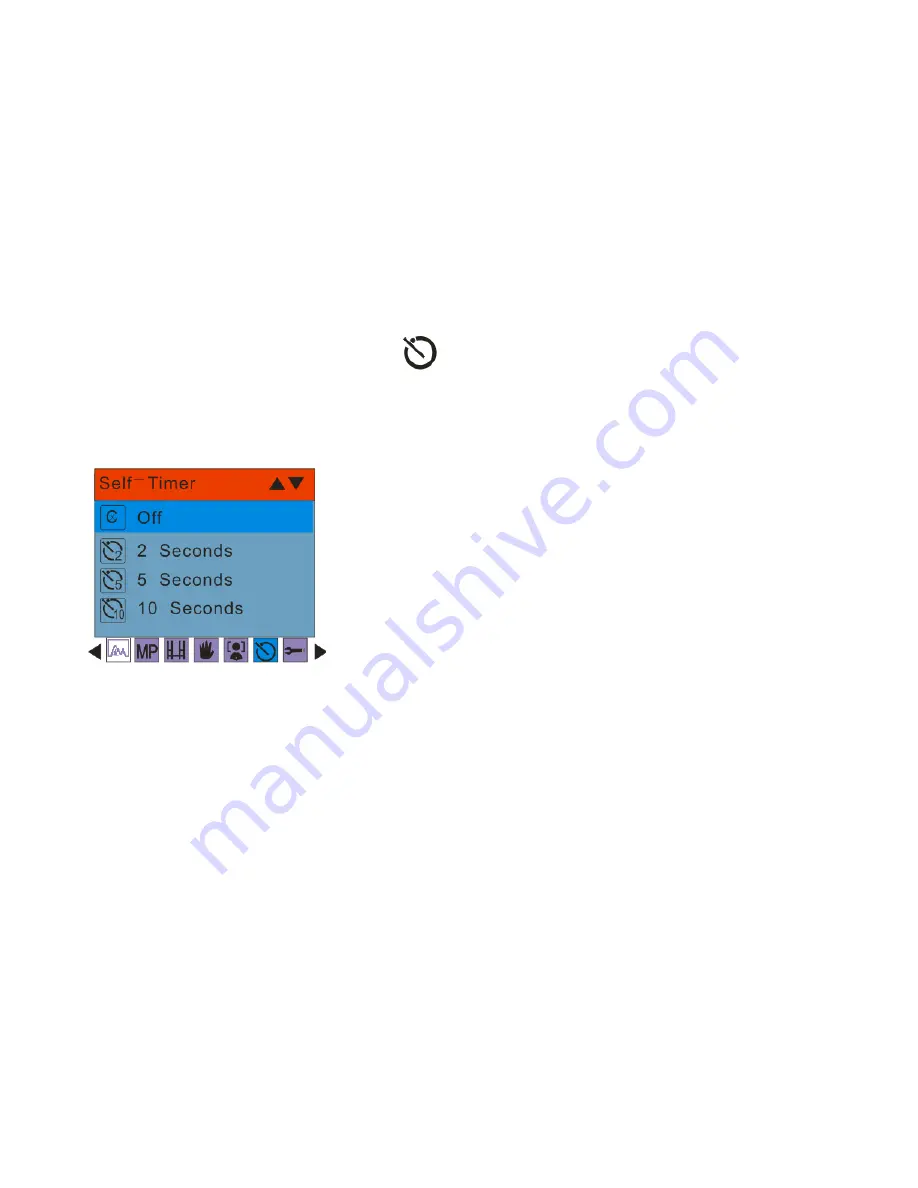
The Self -Timer menu appears in the center of the LCD. 

4. 

Press the Up/Down button to select one of the self timer options: 


5. 

Press the OK button to confirm, save your choice and exit to the camera standby mode. 

6. 

The Self-Timer icon selected will appear on the top of the LCD screen. 

7. 

Press  the Shutter  button  until  you  see  the self-timer count-down  begin in the center  of the  green 

frame that appears on the LCD. Your camera will count down 2, 5 or 10 seconds as per your choice. 

The  LED  will  flash  and  the  camera  will  emit  beeps  for  each  second  of  the  countdown  before  the 

photo is automatically taken.


Summary of Contents for Vivicam T324N

Page 1: ...l Camera User s Manual 2009 Sakar International Inc All rights reserved Windows and the Windows logo are registered trademarks of Microsoft Corporation All other trademarks are the property of their r...

Page 2: ...turing images 9 Starting Your Digital Camera 10 Camera Mode 11 Video Mode 34 Playback Mode 37 Install the Vivitar Experience Image Manager Software 48 Connect your camera to the computer 50 Get photos...

Page 3: ...ut of your digital camera Key Features Digital Video resolutions 640x480 Pixels VGA 320x240 Pixels QVGA 12 1 mega pixels camera with choice of 8 digital camera resolutions 12M 4000x3000 pixels 10M 364...

Page 4: ...nload photos and videos to your PC you will need the following minimum configuration Pentium 4 processor or above with Windows XP service pack 2 512 MB RAM with 100MB of free disk space 1024 x 768 Rec...

Page 5: ...at least 15GB of available space Support for Super VGA graphics Available USB Interface CD ROM drive QuickTime 6 or higher Microsoft Internet Explorer 7 or higher Internet connection required Computer...

Page 6: ...5 A Quick Look at Your Camera...

Page 7: ...n will appear on the bottom left of the LCD screen Full battery power Medium battery power Low battery power Note 1 A Low battery message will flash on the LCD when the battery power is insufficient S...

Page 8: ...to your PC 1 Locate the Memory Card slot situated in the battery compartment at the bottom of the camera 2 Insert the Memory card into the slot in the correct direction 3 Push the card in until you fe...

Page 9: ...y to card message will appear on the LCD with Yes or No options On selecting Yes the photo will now be copied to your card 3 Formatting will delete all data on the SD memory card including protected d...

Page 10: ...Turn on the Power button to activate the Auto Focus zoom lens to open out like a periscope Hold the camera steady and correctly as shown is the diagram below Note Do not touch or move the lens once it...

Page 11: ...cally power off after a few seconds Mode selection Your digital camera has 3 main modes Camera mode Video mode and Playback mode The Camera mode is for you to take still photos adjust the camera setti...

Page 12: ...s in on the object 4 Center your object with the white frame that appears on the LCD 5 When the frame turns green lift your finger and the image will be captured 6 There will be a short delay while th...

Page 13: ...powers off Optical Zoom You can magnify your subject up to 3 times using the optical zoom by pressing the T button or press the W button to zoom back out Note When using this function the camera will...

Page 14: ...the flash Force Flash Auto Red eye reduction No Flash To set the flash 1 Press the Flash Up button 2 The icon appears on the LCD screen This will activate the automatic flash 3 The icon as well as the...

Page 15: ...setting options Scene the 9 scene options appear on the LCD for you to select Auto Night Portrait Night Scenery Portrait Scenery Sport Party Beach High Sensitivity Self timer Press the Self timer but...

Page 16: ...ortrait Scenery Sport Party Beach or High Sensitivity 1 Press the OK button 2 Press the Right Left button to select the Scene icon 3 The Scene menu appears in the center of the LCD 4 Press the Up Down...

Page 17: ...t button to select the icon 3 The Image Size menu appears in the center of the LCD 4 Press the Up Down buttons to select the image size in pixels you want to use 12M 4000x3000 10M 3648X2736 8M 3264x24...

Page 18: ...od in order to take good quality photos 1 Press the OK button 2 Press the Right Left button to select the icon 3 The Anti Shake menu appears in the center of the LCD 4 Press the Up Down button to sele...

Page 19: ...e OK button 2 Press the Right Left button to select the icon 3 The Macro menu appears in the center of the LCD 4 Press the Up Down button to select Macro On or Off Macro shooting On Far shooting Off 5...

Page 20: ...Detect On or Off 5 Press the OK button to confirm save your choice and exit to the camera standby mode 6 The Face Detect On or Off icon selected will appear on the bottom of the LCD screen Self Timer...

Page 21: ...ur choice and exit to the camera standby mode 6 The Self Timer icon selected will appear on the top of the LCD screen 7 Press the Shutter button until you see the self timer count down begin in the ce...

Page 22: ...or Sharpness Quality Digital Zoom Date Auto Power off Language Frequency Format Default Setting and Cancel 1 Press the M Menu OK button 2 Press the Right Left button to select the icon 3 The Setup men...

Page 23: ...ton to confirm save and exit to the camera standby mode 4 The Exposure icon for the option you selected appears on the bottom of the LCD ISO This is a special function that allows you to compensate th...

Page 24: ...t appears 4 Press the OK button to confirm save and exit to the camera standby mode 5 The ISO icon for the option you selected appears on the bottom of the LCD White Balance This setting allows the ca...

Page 25: ...scent Fluorescent 4 Press the OK button to confirm save and exit to the camera standby mode 5 The LCD screen will be adjusted as per the White Balance option you selected Color This setting allows you...

Page 26: ...tandby mode Sharpness This setting allows you to adjust the sharpness of your images making edges more or less distinct 1 Press the Up Down buttons to select the Sharpness option in the Setup menu 2 P...

Page 27: ...ne 1 Press the Up Down buttons to select the Quality option in the Setup menu 2 Press the OK button 3 Press the Up Down buttons to select a Quality option from the Menu that appears 4 Press the OK but...

Page 28: ...onfirm save and exit to the camera standby mode 5 The Zoom icon on the right side of the LCD will appear with or without the Digital zoom upper section depending on what you selected Date This allows...

Page 29: ...the photo once it is taken To Set the date 1 Press the Up Down button to enter the Set Date option 2 Press the OK button 3 Press the Right Left button to select and highlight the Year Month Day Hour...

Page 30: ...is idle for 60 seconds it will automatically be powered off Use the Auto Power Off option to change this setting 1 Press the Up Down button to select the Auto Power Off option in Setup menu 2 Press t...

Page 31: ...e Language This setting allows you to change the system language of the camera 1 Press the Up Down buttons to select the Language option in the Setup menu 2 Press the OK button 3 Press the Up Down but...

Page 32: ...enu that appears 50 Hz 60 Hz 4 Press the OK button to confirm save and exit to the camera standby mode 5 The camera is now set to the frequency option you selected Format This function will format the...

Page 33: ...t or Cancel to exit 4 Press the OK button to confirm 5 If you selected OK a Format confirmation message appears 6 Press the Right Left button to select Yes to format No to exit 7 Press the OK button t...

Page 34: ...utton to select OK 4 Press the Up Down button to select OK to set to default setting or Cancel to exit 5 Press the OK button to confirm 6 If you selected OK a Default Setting confirmation message will...

Page 35: ...to begin shooting the video 3 The elapse time will appear on the top right of the LCD screen and the icon will flash on the LCD screen 4 Press the Shutter button again to stop the recording and save...

Page 36: ...eo mode there are 3 setup options White Balance Size and Macro White Balance You can select 5 different White Balance light conditions for shooting videos 1 Press the OK button 2 Press the Right Left...

Page 37: ...ton to select the option for the Size menu to appear 3 Press the Up Down buttons to select an Image Size option from the Menu that appears VGA 640x480 QVGA 320x240 4 Press the OK button to confirm sav...

Page 38: ...ter the Playback mode When the icon appears on the top left corner of the LCD screen this indicates that you are in Playback mode Here you can preview the photos and videos you have captured and recor...

Page 39: ...ut of the Photo 1 Select a JPEG photo 2 The icon will display on the top left corner of the LCD screen 3 Press the T button to zoom into the photo 4 Press the Up Down Left Right button to navigate aro...

Page 40: ...1 Press the OK button 2 Press the Right Left button to select the rotate option 3 Press the Up Down buttons to select the Rotate option from the Menu that appears 4 Press the OK button to confirm how...

Page 41: ...creen 2 No card inserted will appear on the screen if no SD card is insert Please insert an SD memory card to use this function Protect You can protect your photos videos from accidental deletion by s...

Page 42: ...e one image or video clip at a time or delete all except the protected photos and videos that are currently stored and saved on the memory card 1 Press the OK button 2 Press the Right Left button to s...

Page 43: ...unprotected photo images on your SD card will be deleted This process is irreversible and all your images will be lost forever unless you have saved them or downloaded them to your computer previous t...

Page 44: ...T buttons to determine the size of the area to crop 7 Press the Up Down Right Left buttons to navigate the area of the photo you wish to crop 8 Press the Shutter button for the crop confirmation icon...

Page 45: ...tton to select the Pictbridge menu 4 Press the Up Down button and select Pictbridge to print photos or press Cancel to exit the menu 5 Press the OK button to enter the Pictbridge mode 6 A message will...

Page 46: ...n 4 Press the Shutter button to play the current AVI file 5 Press the Shutter button to pause and press it again to continue playing 6 Press the Up button to stop playing the AVI and revert back to th...

Page 47: ...unlock the current file Delete Delete unwanted videos at any time in order to free up memory You can delete one image or video clip at a time or delete all except the protected videos that are curren...

Page 48: ...onfirm 6 A Delete confirmation message appears 7 Press the Right Left button to select Yes or No 8 Press the OK button to confirm and delete the image s Note You cannot delete files that are locked Ca...

Page 49: ...ert the installation CD into your CD ROM drive The installation screen should automatically open 2 On PC The Vivitar Experience Image Manager Installer window appears If the window does not appear ope...

Page 50: ...to my computer button for instructions 5 If you have internet access the Choose your language window opens choose your language and click Next to open the next window 6 Select your camera model from t...

Page 51: ...the Close button when the installation is complete On Macintosh Click the Quit button when the installation is complete 13 Click the Launch Vivitar Experience Image Manager to open the application or...

Page 52: ...our camera to your computer An SD card needs to be inserted Do not disconnect the cable during transfer Doing so will cancel the transfer of any files on their way to your computer 1 Select the Get im...

Page 53: ...puter A media download progress bar appears on the bottom left showing the number of media files downloading to your computer A message appears when the download is complete 9 The photo and video file...

Page 54: ...om this folder into your computer Optionally select the files and choose Copy from the Edit menu Then select a folder and choose Paste from the Edit menu 5 We recommend that you copy the images into t...

Page 55: ...our Digital Camera The digital camera is a delicate device Please handle your camera with care to avoid damaging it Do not expose your camera to heat sources Do not use you camera in wet or moist cond...

Page 56: ...aytime MAIL TO ADDRESS BELOW Sakar International Attention Service Department 195 Carter Drive Edison NJ 08817 Technical Support For technical support issues please visit our website at www vivitar co...

Page 57: ...Inch TFT Lens Auto Focus Zoom 3X 36 108mm 1 2 8 4 8 Zoom 3X Optical Zoom 8X Digital Zoom Exposure 3 0EV 3 0EV White Balance Auto Daylight Cloudy Incandescent Fluorescent ISO Auto 100 200 400 Scene Aut...

Page 58: ...do I make sure I don t lose important pictures Your camera uses SDRAM memory which requires a constant electric current to store your test photos Should your camera lose power for instance if the bat...

Reviews: