background image

SAGA “XL” Series 

156 

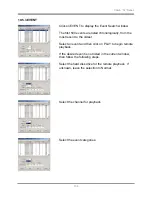
10.5.3 EVENT 


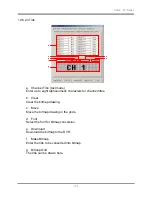
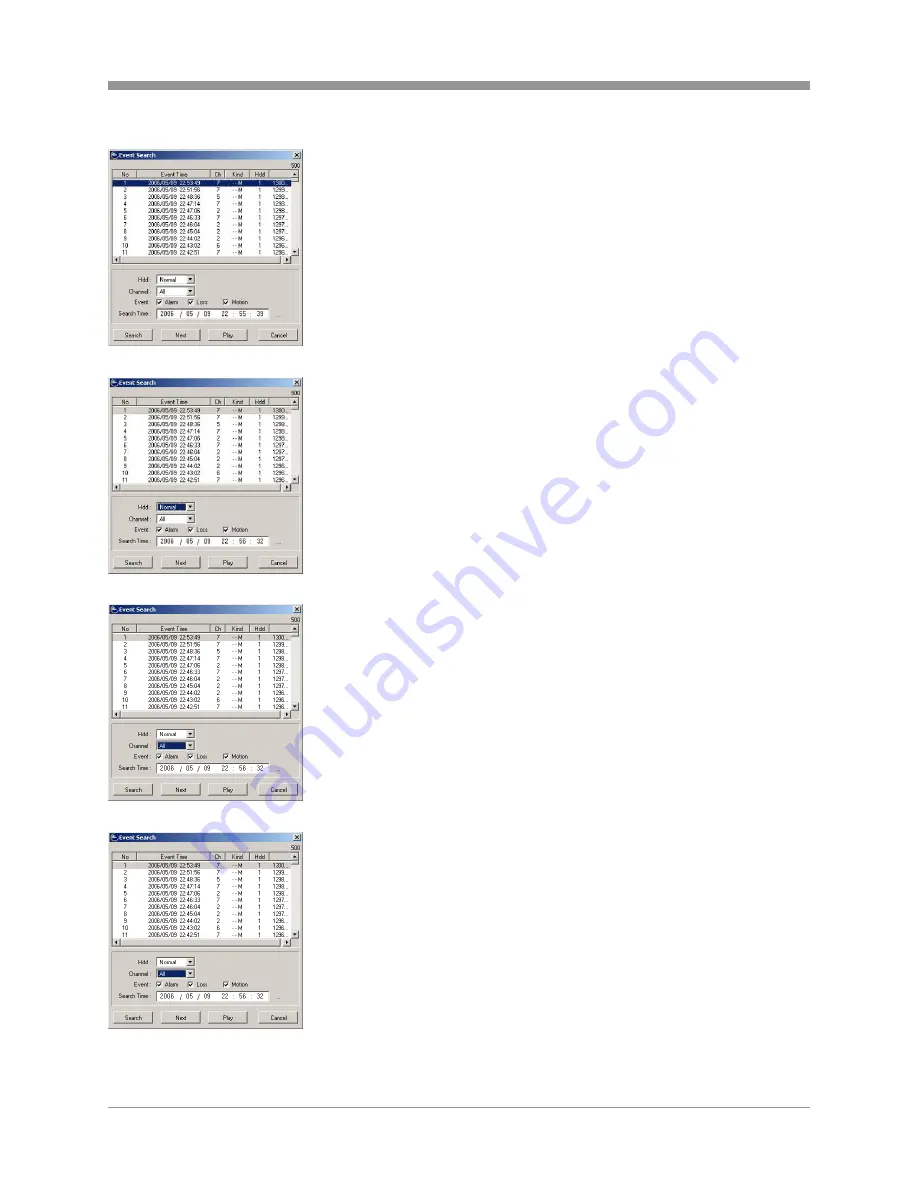
Click on EVENT to display the Event Search window.   
 
The first 500 events are listed chronologically, from the 
most recent to the oldest.   
 
Select an event and then click on PLAY to begin remote 
playback.   
 
If the desired event is not listed in the current window, 
then follow the following steps.   


Select the hard disk drive for the remote playback.  If 
unknown, leave the selection to Normal.   


Select the channel for playback.   


Select the event categories.   


Summary of Contents for SAGA "XL" Series

Page 1: ...Retrieves Lost Files Even from Damaged Hard Drives Embedded Linux OS Dynamic IP support DDNS Simultaneous D1 720 x 480 60 120 ips Half D1 720 x 240 120 240 ips and CIF 360 x 240 240 480 ips recording Maximum File Size of 5 5K CIF 10K Half D1 18K D1 Continuous Motion Alarm V Loss Scheduled recording modes Numerous search modes Calendar Search Copy Time Event Block File Bookmark Log Multi site Monit...

Page 2: ...he packaging contains the following contents 1 One SAGA XL series DVR 2 One Power Cable 3 One Remote Controller 4 DVR Viewer Program CD 5 This Instruction Manual 6 Two AAA batteries 7 Rack Mount Ears and screws If any of the contents are missing please contact the Vitek Customer Help Desk immediately ...

Page 3: ...ightning flash with arrowhead symbol within an equilateral triangle is intended to alert the user to the presence of uninsulated dangerous voltage within the product s enclosure that may be of sufficient magnitude to constitute a risk of electric shock to persons The exclamation point within an equilateral triangle is intended to alert the user to the presence of important operating and maintenanc...

Page 4: ...nslated into any language in any form by any means without prior written permission of Vitek Industrial Video Products Inc Vitek makes no warranties for damages resulting from corrupted or lost data due to a mistaken operation or malfunction of the Digital Video Recorders the software personal computers peripheral devices or unapproved unsupported devices Trademark Acknowledgements Saga Series Dig...

Page 5: ...rticular installation If this equipment does cause harmful interference to radio or television reception which can be determined by turning the equipment off and on the user is encouraged to try to correct the interference by on or more of the following measures Reorient or relocate the receiving antenna Increase the separation between the equipment and receiver Connect the equipment to an outlet ...

Page 6: ...se note that the Digital Video Recorders are intended for surveillance use and should never be used in a manner that invades other people s privacy or contravenes international or domestic privacy act and its regulations Please be advised that in certain cases the monitoring of individuals private properties or commercial properties may contravene legal rights of such individuals even if the image...

Page 7: ...or unplug the power cord from the power outlet Contact a qualified service personnel authorized by the equipment distributor or a Vitek customer help desk Do not attempt to disassemble or alter any part of the equipment that is not expressly described in this guide Disassembly or alteration may result in high voltage electric shock Internal inspections alterations and repairs should be conducted b...

Page 8: ...power cord Any of these actions may cause an electrical short circuit which may lead to fire or electrical shock Do not handle the device or power cord with wet hands Handling it with wet hands may lead to electrical shock When unplugging the cord ensure that you hold the solid portion of the plug Pulling on the flexible portion of the cord may damage or expose the wire and insulation creating the...

Page 9: ...tween hot and cold temperatures may cause condensation water droplets to form on its external and internal surfaces You can avoid this by placing the equipment in an airtight re sealable plastic bag and letting it adjust to temperature changes slowly before removing it from the bag If Condensation forms inside the Digital Video Recorder Stop using the equipment immediately if you detect condensati...

Page 10: ...SAGA XL SERIES DIGITAL VIDEO RECORDER LAYOUT 17 2 1 FRONT PANEL LAYOUT 17 2 2 REAR PANEL LAYOUT 20 2 3 IR REMOTE CONTROLLER 23 2 4 MOUSE CONTROL 25 III INSTALLATION AND CONNECTIONS 26 3 1 CONNECTIONS LAYOUT 26 3 2 VT HXD10U 27 3 3 EXTERNAL TERMINAL CONNECTION 28 3 3 1 RS 422 RS 485 28 3 3 2 TIME ADJUST 28 3 3 3 RELAY OUTPUT 29 3 3 4 ALARM SENSOR INPUT 29 3 3 5 VGA PIN LAYOUT 30 3 3 6 RS 232C PIN L...

Page 11: ...5 1 1 CD RW DVD RW DVD RW 49 5 1 2 CD R 52 5 1 3 USB FLASH MEMORY 54 5 1 4 EXTERNAL HARD DISK DRIVE 56 5 1 5 COPY STATUS 56 5 1 6 COPY STOP 57 5 2 PAN TILT ZOOM CAMERA CONTROL 58 5 2 1 BASIC PAN TILT ZOOM CONTROL 58 5 2 2 CREATING AND MOVING TO PRESET POINTS 59 5 3 ADVANCED RECORDING 59 5 3 1 ALARM RECORDING 60 5 3 2 VIDEO LOSS RECORDING 60 5 3 3 MOTION RECORDING 61 5 4 ADVANCED PLAYBACK 61 5 4 1 ...

Page 12: ... Mode 95 SCENARIO 1 95 SCENARIO 2 96 SCENARIO 3 96 B Complex Mode 97 6 3 3 IMAGE QUALITY 98 6 3 4 AUDIO RECORD 99 6 3 5 REPEAT RECORD 99 6 3 6 PLAY MODE 100 6 3 7 BACKUP MODE 100 6 3 8 HOLIDAY 101 6 4 EVENT 102 6 4 1 MOTION DETECTION 102 6 4 2 EVENT SCREEN MODE 104 6 4 3 EVENT CHECK 104 6 4 4 EVENT MESSAGE 104 6 4 5 EVENT MESSAGE RESET 105 6 4 6 EVENT BUZZER 105 6 4 7 SENSOR INPUT 105 6 4 8 RELAY ...

Page 13: ...24 6 6 5 1 Send e mail 125 6 6 5 2 SMTP server 125 6 6 5 3 DVR e mail address 125 6 6 5 4 User ID 126 6 6 5 5 Password 126 6 6 5 6 E mail address 1 through 10 127 VII SEARCH 128 VIII COPY 128 IX EXIT 129 9 1 SAVE ONLY 129 9 2 SAVE AND EXIT 129 9 3 EXIT WITHOUT SAVE 130 X CLIENT PROGRAM DVR VIEWER 131 1 SYSTEM REQUIREMENT 131 10 2 INSTALLING THE DVR VIEWER 131 1 SYSTEM REQUIREMENT 131 10 3 DVR VIEW...

Page 14: ...otion Detection 167 10 6 4 3 Sensor Input 168 10 6 4 4 Relay Output 168 10 6 5 SYSTEM 169 10 6 5 1 System 169 10 6 5 2 HDD 169 10 6 5 3 CLOCK 169 10 6 5 3 PASSWORD 170 10 6 6 LINK 170 10 6 6 1 Network 170 10 6 6 2 RS 232C 170 10 6 6 3 RS 485 171 10 6 6 4 PTZ 171 10 6 6 5 E mail 171 10 6 7 DOWNLOAD 172 10 6 7 1 DVR Logo Select 172 10 6 7 2 Firmware Download 172 XI SPECIFICATIONS 174 11 1 VT XL840 1...

Page 15: ...controller and USB 2 0 compliant mouse F COVERT MODE Hide channels in live playback and network transmission 1 2 RECORDING A REAL TIME RECORDING Maximum recording speed of 480PPS in VT XL1680 and 240PPS in VT XL840 B MULTI RESOLUTION MULTI QUALITY MULTI SPEED RECORDING Simultaneous recording in D1 Half D1 and CIF resolution in different recording qualities at different recording speeds C MULTIPLE ...

Page 16: ...R settings remotely from the client software E FLEXIBLE NETWORK CONNECTIONS Static and dynamic IP address supported along with proprietary DDNS support F 2 WAY AUDIO COMMUNICATION Communicate verbally between the DVR and the client software 1 5 BACKUP A DVD RW CD RW Built in DVD RW optical drive enables easy backup to DVD RW or CD RW Data retrieval is made simple with a mini viewer that applicatio...

Page 17: ...nal storage C DATA REDUNDANCY EVENT COPY ONLY The hard drives in the expansion bays can also be configured to be data redundant or event copy only 1 7 SYSTEM A 2 INDEPENDENT WATCHDOGS Reliable hardware and software watchdogs that monitor the system stability at all times B EASY UPDATE Easy update upgrade via USB 2 0 compliant memory stick or through the client program C SIMULTANEOUS MULTIPLE VIDEO...

Page 18: ...SELECT a Selects a specific channel number to be displayed in full screen b Enter the numeric password when prompted 5 SPOT MONITOR ESC a Activates the spot monitor control b Returns to previous menu screen c Exits from various function and menu screens 6 MENU UP DIRECTIONAL BUTTON a Accesses the main menu screen b Tilts up in PTZ mode c Navigates up in the menu screen d Moves the zoom box up in z...

Page 19: ...DD RACK DVD RW A DVD RW drive is installed in the front 5 25 expansions bay A fifth hard drive can be added to the DVR by replacing the optical drive with a removable hard drive rack sold separately 14 VIDEO AUDIO OUTPUT Secondary video and audio output port 15 USB 2 0 The USB 2 0 port can be used to connect to numerous USB 2 0 backup devices including VT XHD10U external HDD add on bays individual...

Page 20: ...Z mode d Increases the digital zoom ratio in zoom mode 22 PIP LOOP PLAYBACK CLEAR DOWN DIRECTIONAL BUTTON a Activates the picture in picture mode b Tilts down in PTZ mode c Navigates left in the menu screen d Moves the zoom box left in zoom mode e Clears the loop playback in playback mode 23 DIGITAL ZOOM RIGHT DIRECTIONAL BUTTON a Enters digital zoom mode b Pans right in PTZ mode c Navigates right...

Page 21: ...to focus mode in PTZ mode 28 JOG SHUTTLE a Controls the playback speed b Advances picture by picture c Controls the zoom in zoom out in PTZ mode 2 2 REAR PANEL LAYOUT VT XL840 VT XL1680 1 5 4 3 2 10 7 8 9 6 11 12 13 17 16 15 14 22 19 20 21 18 1 5 4 3 2 10 7 8 9 6 1112 13 17 16 15 14 22 19 20 21 18 ...

Page 22: ... Input and Output terminal blocks for time synchronization between DVRs 8 RELAY OUT Terminal blocks for relay out 1 through 4 9 ALARM INPUT Alarm input 1 through 16 on VT XL1680 1 through 8 on VT XL840 10 POWER IN AC power socket for 115 230VAC 11 CAMERA LOOP OUTPUT Self terminating BNC connectors for composite video signal loop output 12 SPOT OUTPUT Spot monitor BNC connector for composite video ...

Page 23: ...USB REAR 1 USB REAR 2 The USB 2 0 ports can be used to connect to numerous USB 2 0 backup devices including VT XHD10U external HDD add on bays individual external hard drives external optical drives and USB memory sticks 19 RJ 45 ETHERNET PORT 10 100Base T RJ 45 port for network connection 20 REMOTE Reserved 21 POWER SELECT 115 230 VAC power selector 22 GROUND Ground connector ...

Page 24: ...23 2 3 IR REMOTE CONTROLLER 1 REMOTE CONTROLLER ID Select the remote controller ID 2 IRIS CONTROL 3 ZOOM CONTROL 4 SPOT MONITOR ESC 5 ENTER STATUS HOME 1 4 3 8 10 11 14 13 19 18 22 23 2 5 6 9 12 15 16 17 20 21 25 24 7 ...

Page 25: ... DIGITAL ZOOM RIGHT DIRECTIONAL BUTTON 10 AUTOMATIC SEQUENCE FOCUS OUT DECREASE VALUE 11 FREEZE FOCUS IN INCREASE VALUE 12 SEARCH PRESET 13 COPY AUTOFOCUS 14 PTZ BOOKMARK 15 SLOW 16 PLAY PAUSE 17 FAST 18 LIVE 19 DIRECTION 20 RECORD 21 MULTI DISPLAY 22 TEXT 23 AUDIO SELECT 24 NUMERIC BUTTONS CHANNEL SELECT 25 FUNCTION ...

Page 26: ...n window status display b Double click in the menu screen select item or icon 2 SCROLL WHEEL Scroll up or down to change the value of the selected item 3 RIGHT MOUSE BUTTON a Single click in the main window enter main menu b Double click in the menu screen exit to main screen 1 2 3 ...

Page 27: ...SAGA XL Series 26 III INSTALLATION AND CONNECTIONS 3 1 CONNECTIONS LAYOUT ...

Page 28: ...SAGA XL Series 27 3 2 VT XHD10U ...

Page 29: ... OFF TERM ON 1 TX RS422 Transmit data RS485 Transmit data 2 TX RS422 Transmit data RS485 Receive data 3 GND 4 RX RS422 Receive data RS485 Receive data 5 RX RS422 Receive data RS485 Transmit data 6 GND NO DESCRIPTION FALLING EDGE 1 TIME REFERENCE INPUT TTL 2 TIME REFERENCE OUTPUT To Other Time Adjust Terminals ...

Page 30: ... ERROR No DESCRIPTION 1 EXTERNAL ALARM 1 INPUT 2 EXTERNAL ALARM 2 INPUT 3 EXTERNAL ALARM 3 INPUT 4 EXTERNAL ALARM 4 INPUT G ALARM IN COMMON GND 5 EXTERNAL ALARM 5 INPUT 6 EXTERNAL ALARM 6 INPUT 7 EXTERNAL ALARM 7 INPUT 8 EXTERNAL ALARM 8 INPUT G ALARM IN COMMON GND 9 EXTERNAL ALARM 9 INPUT 10 EXTERNAL ALARM 10 INPUT 11 EXTERNAL ALARM 11 INPUT 12 EXTERNAL ALARM 12 INPUT G ALARM IN COMMON GND 13 EXT...

Page 31: ... Blue Video 75ohm 0 7Vp p 4 12 Reserved 13 HSYNC or CSYNC Horizontal or Composite Sync 14 VSYNC Vertical Sync 15 Reserved No Description No Description 1 DCD Data Carrier Detect 6 DSR Data Set Ready 2 RxD Receive data 7 RTS RS232C RX TX data 3 TxD Transmit data 8 CTS RS232C RX TX data 4 DTR Data Terminal Ready 9 RI Ring Indicator 5 GND Signal Ground ...

Page 32: ...her in percentage or in Gigabytes If the hard drive overwrite is set to on the counter will remain as 0 and the DVR will continue to write on to the hard drive from the beginning The counter will remain 0 as long as the hard drive is full with previously recorded data and will display its original size once the hard drive is formatted In playback mode it displays the direction and the speed of the...

Page 33: ...tion screen 1 FIXED HDD TOTAL SPACE Displays the total amount of installed hard drive space including the hard drive space in the expansion bays 2 FIXED HDD FREE SPACE Displays the available remaining hard drive space including the hard drive space in the expansion bays 3 BACKUP HDD TOTAL SPACE Displays the total amount of backup hard drive space including the hard drive space in the expansion bay...

Page 34: ...rrent hardware version of the DVR 11 DHCP DYNAMIC HOST CONFIGURATION PROTOCOL Displays the status of the DHCP application 12 IP ADDRESS Displays currently assigned IP address 13 SUBNET MASK Displays currently assigned subnet mask 14 GATEWAY Displays currently assigned gateway 15 DNS DOMAIN NAME SERVER Displays currently assigned DNS server information 16 PORT Displays currently assigned network po...

Page 35: ...USB STORAGE Displays the size of the external hard drive or USB Flash Memory 21 USB CD DVD Displays the status of installed CD or DVD optical drive 22 IP SERVER RESPONSE Indicates the connectivity status with the IP server ...

Page 36: ...nd 480 frames per second for VT XL1680 4 3 1 LIVE VIEW MODE SEQUENCE Press the DISPLAY button to toggle between different view modes 4 3 1 1 VT XL1680 16 Channel Mode 13 Channel Mode 10 Channel Mode 9 Channel Mode A 9 Channel Mode B 7 Channel Mode 6 Channel Mode 4 Channel Mode A 4 Channel Mode B 4 Channel Mode D 4 Channel Mode E 4 Channel Mode C ...

Page 37: ... to directly display the channel on the monitor Press 10 then a secondary number for any channel numbers higher than 9 Press Numeric button 1 to display channel 1 8 Channel Mode A 7 Channel Mode 6 Channel Mode 4 Channel Mode A 4 Channel Mode B 4 Channel Mode D 4 Channel Mode E 4 Channel Mode C ...

Page 38: ...e single channel display into the automatic sequence Any of the view modes can be skipped by selecting the dwell time to 0 4 4 FREEZE The freeze function allows the user to freeze the live view mode at any given time There are two modes in which the freeze function is effective single screen full screen mode and multi screen mode 16 Channel Mode 10 Channel Mode 7 Channel Mode 4 Channel Mode A Chan...

Page 39: ... more to unfreeze the screen 4 4 2 MULTI SCREEN VIEW MODE In any multi screen view mode press the FREEZE button and FREEZE will be displayed in the upper left corner of the screen Please note that none of the channels will be frozen immediately Press the numeric buttons for the channels to be frozen In the example to the left channel 2 3 5 7 8 and 15 have been frozen Press the numeric buttons for ...

Page 40: ...e normal size Press the numeric button to select the channel to zoom into Press the ZOOM button to enter the zoom mode The initial zoom ratio is 2X the normal size Use the directional buttons to move the zoom window to the desired location Press the ENTER button to toggle between 2X 4X and 8X zoom ratio Use the directional buttons to move the zoom window to the desired location ...

Page 41: ... the background channel by pressing the desired numeric button Press the PIP button to activate the PIP mode Pressing the numeric buttons will change the PIP window to change the channel to the desired channel Use the directional buttons to place the PIP window to the desired location on the screen ...

Page 42: ...pot monitor output is available for both VT XL840 and VT XL1680 The VT XL840 is capable of displaying up to four cameras in quad mode and the VT XL1680 is capable of displaying the same multi channel view modes as the main monitor During any view modes press the SPOT button for Spot Monitor Mode Press any channel numbers to display the channel in full screen mode on the spot monitor The spot monit...

Page 43: ...or displays the first quad view mode Press the SPOT button to exit from Spot Monitor Mode 4 8 BASIC RECORDING When the REC button is pressed the SAGA series DVR uses Program 6 which is the default record setting There are total of 10 customizable record programs Please note that QUICK SETUP supersedes any other recording settings when activated ...

Page 44: ...E EVENT QUALITY FINE LOW FINE SUPER FINE LOW FINE SUPER FINE LOW FINE SUPER FINE PRE ALARM 5 5 5 5 5 5 5 5 5 5 POST ALARM 10 10 10 10 10 10 10 10 10 10 EVENT A L M A L M A L M A L M A L M A L M A L M A L M A L M A L M For a detailed explanation of each function and feature please refer to 6 3 2 RECORD PROGRAM under section 6 3 RECORD SETUP on page 93 Press the REC button to start recording The cir...

Page 45: ...yback to pause the playback When the playback reaches the end of the recorded data then the playback will pause automatically Press the LIVE button to exit to the live view mode 4 9 2 FAST FORWARD REWIND During the playback or when the playback is paused the video can be fast forwarded or rewound in two different methods ...

Page 46: ... to a pause Turn the shuttle ring counter clockwise to rewind to the desired location The same speed increment and icon concept is applied for the rewind Releasing the shuttle ring will bring the rewind to a pause 4 9 2 2 FAST DIRECTION button The FAST button accelerates the speed of playback in one direction Each pressing of the button accelerates the speed twice the previous speed In other words...

Page 47: ...play in reverse and view recorded data picture by picture If the jog dial is stopped the playback will return to paused playback mode 4 9 4 SLOW The SLOW button slows down the speed of playback Each pressing of the button further slows down the speed twice the previous speed In other words from normal speed the slow down increment is 1 2X 1 4X 1 8X 1 16X 1 32X 1 64X and 1 128X Pressing the DIRECTI...

Page 48: ... of the loop POSITION A When the desired location is found press the B button to mark the end of the loop POSITION B The desired location can be reached by any playback functions such as fast forward slow and etc As soon as the end of the loop is marked then the playback returns to POSITION A When the end the loop is reached the playback returns to POSITION A and the loop playback is repeated ...

Page 49: ...by pressing the PLAY PAUSE button when the desired location has been reached Press the BOOKMARK button to mark the current location 4 9 7 AUDIO PLAYBACK The audio is always recorded in real time regardless of the recording speed To listen into the desired audio channel press the AUDIO SEL button and then channel 1 through 8 By default the audio will playback along with the equivalent video camera ...

Page 50: ... time a backup is made the mini player will be copied along with the content to facilitate viewing of the backup video on any Windows based personal computers 5 1 1 CD RW DVD RW DVD RW The SAGA Series DVR is equipped with a DVD RW CD RW drive for backups RW media was specifically chosen because of its unique ability to be used over and over Data backups can be written to the same RW disk until its...

Page 51: ... formatting FORMATTING will be displayed during the process The process may take up to approximately 20 minutes depending on the format of the backup disk When the process is completed SUCCESS will be displayed Press the ESC button to return to the previous menu Highlight COPY and then press the ENTER button to access the copy submenu ...

Page 52: ... number and then switch them to The beginning and the end of the available files are listed automatically as shown on the left Select the beginning time and the end time of the period to be backed up and then press the ENTER button to start the backup When prompted enter an eight digit numeric password to encrypt the backup This password will be needed to later retrieve the data Data encryption ca...

Page 53: ...OM or DVD ROM of a computer and the small player will load automatically showing all available data for playback 5 1 2 CD R Highlight COPY and then press the ENTER button to access the copy submenu Select the location of the file to be backed up from If the location is unknown leave the HDD ID on NORMAL Select the channels to be backed up By default all channels are selected To exclude a channel h...

Page 54: ...git numeric password to encrypt the backup This password will be needed to later retrieve the data Data encryption can be bypassed by pressing the ESC button The DVR will start creating a buffer for the selected data to be backed up The status of the buffer being created will be displayed in the upper right corner of the screen The backup progress is displayed on the right upper corner of the scre...

Page 55: ...ISK Cruzer Mini all capacities z SANDISK Cruzer Micro all capacities z LEXAR JumpDrive Lightening all capacities z MEMOREX TravelDrive all capacities z I O MAGIC Giga Bank all capacities z PNY all capacities As the compatibility is continuously being tested please check with the Vitek Help Desk before using non listed manufacturers models Insert the flash memory into any available USB 2 0 port The...

Page 56: ... number and then switch them to The beginning and the end of available file are listed automatically as shown on the left Select the beginning time and the end time of the time period to be backed up and then press the ENTER button to start the backup When prompted enter an eight digit numeric password to encrypt the backup This password will be needed to later retrieve the data Data encryption ca...

Page 57: ... or the embedded program FileViewer exe 5 1 4 EXTERNAL HARD DISK DRIVE Follow the same procedure as the USB flash memory in section 5 1 2 5 1 5 COPY STATUS During any backup process a detailed description of the copy process can be viewed Copy status will display the start and end of the data to be backed up and the current time of the data being copied Press the COPY button to enter the COPY subm...

Page 58: ...kup process can be interrupted at any time during the process Press the COPY button to enter the COPY submenu Highlight COPY and then press the ENTER button to access the copy submenu Instead of the normal copy submenu the DVR will display an option to stop the backup process ...

Page 59: ... through the DVR Please refer to PTZ model selection under 6 6 5 PTZ under 6 6 LINK SETUP on page 123 5 2 1 BASIC PAN TILT ZOOM CONTROL Select the desired channel by pressing the numeric button for the full screen view Press the PTZ button to enter the PTZ camera control mode Use the directional buttons for the pan and tilt movement buttons to focus in out or AF button for auto focus and the shutt...

Page 60: ...o 6 3 7 BACKUP MODE under 6 3 RECORD SETUP on page 100 Prior to activating event recording please verify that event options are activated in either the QUICK SETUP menu or the RECORD PROGRAM menu Please note that if QUICK SETUP is not used then certain parameters in the EVENT menu must be activated for the event recording to work properly Moreover please verify that the proper program number is be...

Page 61: ...cording 5 3 2 VIDEO LOSS RECORDING Video loss recording is a form of event recording that is triggered when a channel loses its video input signal Video loss recording is useful to have other channels compensate for the loss of the video signal on a specific channel For example when a video loss occurs on channel 1 then the DVR can start recording on channel 2 3 and 4 Moreover the channel which lo...

Page 62: ...ecording will include the pre and post recording time on the channels that are recording 5 4 ADVANCED PLAYBACK To find and access the recorded data more efficiently the DVR provides various search modes calendar search search copy time search event search block search file search bookmark search and text search 5 4 1 CALENDAR SEARCH Calendar search provides a quick overview of the year month day a...

Page 63: ...t the month or the year and then adjust the value by pressing the and buttons When a date is selected the DVR will then search again for the recorded data in a 24 hour period for the date The hour blocks that contain data will be displayed in green Move the highlight to the desired hour block and then press the ENTER button to start the playback Maneuver through the playback as needed Please see B...

Page 64: ...ion of the video Press the SEARCH button to access the search screen Highlight SEARCH COPY and then press the ENTER button to access the SEARCH COPY screen Select which hard disk drive to retrieve the data from If unknown leave the HDD ID to NORMAL Select the year month date hour minutes and seconds of the beginning of the data to retrieve As the values change the picture in the preview window wil...

Page 65: ...d press ESC to return to SEARCH COPY screen The SEARCH END TIME reflects where the DVR stopped the playback and COPY MEDIA has been highlighted automatically for the backup medium selection Select the desired backup medium by pressing the and button Highlight START COPY and then press the ENTER button to start the backup procedure When prompted enter an eight digit numeric password to encrypt the ...

Page 66: ...will begin and the progress will be displayed in the upper right hand corner of the screen 5 4 3 TIME SEARCH Time search provides an overview of the recorded data from the earliest available recording to the latest available recording Press the SEARCH button to access the search screen Highlight TIME SEARCH and then press the ENTER button to access the TIME SEARCH screen ...

Page 67: ...iew window will change accordingly If any of the channels need to be viewed in full screen mode highlight CHANNEL and then press the or button to view a specific channel Press the ENTER button and the playback will begin Maneuver through the playback as needed Please see BASIC PLAYBACK on page 43 5 4 4 EVENT SEARCH Event search provides an overview of the all event related recordings so that a spe...

Page 68: ... button to access the EVENT SEARCH screen Select which hard disk drive to retrieve the data from If unknown leave the HDD ID on NORMAL if any of the channels need to be viewed in full screen mode highlight CHANNEL and then press the or button to view a specific channel Select the event type by pressing the and button ...

Page 69: ... the playback The example to the left is playing back motion triggered recording Maneuver through the playback as needed Please see BASIC PLAYBACK on page 43 5 4 5 BLOCK SEARCH Block search has the capability to retrieve the recorded data even from hard drives that may have failed during the operation Block search reads the logical block addressing LBA of the hard disk drives where the recorded da...

Page 70: ...e HDD ID on NORMAL Select the year month date hour minutes and seconds of the end of the data to be retrieved Press the ENTER button and the list of data will appear in chronological order from the most recent to the oldest The data is associated with the logical block address of the hard disk drives Select the date and time and then press the ENTER button to start the playback ...

Page 71: ...ta from the media used for backup Insert the CD RW or the DVD RW into the DVD tray or connect the USB flash memory or the external hard disk drive into the USB port Press the SEARCH button to access the search screen Highlight FILE SEARCH and then press the ENTER button to access the FILE SEARCH screen Select which medium to retrieve the data from by using the or button ...

Page 72: ...he playback Maneuver through the playback as needed Please see BASIC PLAYBACK on page 43 5 4 7 BOOKMARK SEARCH Bookmark search looks up any bookmarks that have been added by the user Please see 4 8 6 BOOKMARK under 4 8 BASIC PLAYBACK on page 48 Press the SEARCH button to access the search screen Highlight BOOKMARK SEARCH and then press the ENTER button to access the BOOKMARK SEARCH screen ...

Page 73: ...ess the ENTER button to start the playback Maneuver through the playback as needed Please see BASIC PLAYBACK on page 43 5 4 8 TEXT SEARCH Text search allows searching for Point Of Sales interface entries to bring up the specific time related to a transaction Press the SEARCH button to access the search screen ...

Page 74: ...ct the hard disk drive to retrieve the data from If unknown leave the HDD ID on NORMAL Select the channel in which to search for the text string Select the year month date hour minutes and seconds of the end of the search time Highlight TEXT and then press the ENTER button to enter the text string to search ...

Page 75: ...t an entry and then press the ENTER button to start playback Maneuver through the playback as needed Please see BASIC PLAYBACK on page 43 5 4 9 LOG FILE SEARCH The log file keeps a list of the important events that happened to the DVR The log file can be saved to a USB flash memory as a text file so that it can be viewed and archived to a computer The following are what the DVR keeps in its log fi...

Page 76: ...level z Record start stop Press the SEARCH button to access the search screen Highlight LOG FILE SEARCH and then press the ENTER button to access the LOG FILE list Select the year month date hour minutes and seconds of the end of the log list to retrieve Press the ENTER button and the log list will be listed in chronological order from the most recent to the oldest ...

Page 77: ...ght SAVE LOG and then press the ENTER button to save the log file onto a USB flash memory The USB flash memory must be in the front USB port The log file will be saved as DvrLog log file Double click the left mouse button to open and view the log file ...

Page 78: ...s 77 VI DVR MENU Press the MENU button to access the main menu of the DVR The DVR menu consists of the following categories QUICK SETUP SCREEN SETUP RECORD SETUP SYSTEM SETUP EVENT SETUP LINK SETUP SEARCH EXIT COPY ...

Page 79: ...s pre and post recording time and audio record settings Moreover the activation of quick setup overrides any other recording settings as the quick setup supersedes regular record setup 6 1 1 QUICK SETUP Quick setup enables or disables the use of the quick setup settings The default is OFF 6 1 2 IMAGE SIZE Image size determines the recording picture size Available sizes are z CIF 360 X 240 z Half D...

Page 80: ...ion on VT XL1680 and VT XL840 respectively The following chart shows the maximum recording speed for each resolution Resolution CIF Half D1 D1 VT XL1680 480 240 120 Recording speed per channel 30 15 7 8 VT XL840 240 120 60 Recording speed per channel 30 15 7 8 6 1 4 EVENT Select the event to be used along with the recording The default is MOTION Available options are z Alarm z Video Loss z Motion ...

Page 81: ...ilable options are LOW FINE and SUPERFINE The default is SUPERFINE 6 1 8 AUDIO RECORD Select the audio recording on or off for all eight channels The default is OFF 6 1 9 REMOTE CONTROL ID Select the identification number of the DVR There are a total of 16 available numbers to choose from The following numbers may be used z 11 through 14 z 21 through 24 z 31 through 34 z 41 through 44 z ALL ...

Page 82: ...fines various screen related options Any changes affect the main video as well as the spot monitor output of the DVR 6 2 1 POSITION Highlight POSITION then press the ENTER button to access the screen position submenu Adjust the position of the screen by pressing the or the buttons The CRT represents the main composite video output and the VGA represents the VGA video output for PC monitors ...

Page 83: ...e The default is 3 The first page lists the sequence display duration for the quad display mode A through E six channel display mode and seven channel display mode The second page lists the sequence display duration for the nine channel display mode A and B ten channel display mode 13 channel display mode 16 channel display mode and the option to include single channels Select the inclusion of sin...

Page 84: ...kipping the channels without video input on or off The default is on 6 2 3 DISPLAY Highlight DISPLAY and then press the ENTER button to access the display submenu Select the display option for the remaining space on the hard disk drive The default is on Select the display mode for the remaining free space on the hard disk drive The default is in percentage ...

Page 85: ...y option for the date and the time The default is on Select the date format The default is DD MM YY Select the display option for the channel title The default is on Select the display mode for the channel title The default is in text mode The bitmap mode title can only be edited using the client software ...

Page 86: ...t the display option for the remote controller ID The default is OFF Select the display option for the channel title for on the spot monitor The default is on 6 2 4 TITLE Highlight TITLE and then press the ENTER button to access the title submenu Press the enter button to edit the channel title ...

Page 87: ...Several multi screen viewing modes can be customized using any combination of cameras These viewing modes can be disabled and excluded from the view mode sequence Customizable multi screens include MULTI 4E MULTI 6 MULTI 7 MULTI 9B MULTI 10 AND MULTI 13 Highlight MULTISCREEN and the press the ENTER button to access the multi screen submenu Select a view mode to customize The view mode can be disab...

Page 88: ...o access the covert channel submenu The first page lists the covert mode options for channels 1 through 8 Highlight the desired channel and press the or button to activate the covert mode The default is off for all channels The second page lists the covert mode options for channels 9 through 16 Highlight the desired channel and press the or button to activate the covert mode ...

Page 89: ...AYBACK ONLY z NETWORK ONLY z LIVE AND PLAYBACK z LIVE AND NETWORK z PLAYBACK AND NETWORK z ALL Select the display of covert on or off If activated then the covert channel will display COVERT 6 2 7 SPOT Highlight SPOT and then press the ENTER button to access the spot monitor submenu Select the spot monitor display mode z Manual z Event z Sequenced The default is manual ...

Page 90: ...tput The VT XL1680 offers identical multi channel options as the main video output whereas the VT XL840 offers quad view mode only The default is off The channels without video signals can be skipped Select on or off The default is on 6 2 8 CAMERA Highlight CAMERA and then press the ENTER button to access camera adjustment submenu Select the channel which needs to be adjusted ...

Page 91: ...SAGA XL Series 90 Adjust the brightness The default is 50 Adjust the contrast The default is 50 Adjust the hue The default is 50 Adjust the saturation of the color The default is 50 ...

Page 92: ... and holiday recording schedules 6 3 1 RECORD SETUP Record Setup allows arrangement of any of the ten Record Programs to be employed based on their needs and customization Each day of the week is divided into hourly blocks of 24 hours allowing the DVR run numerous record settings throughout the day and the week Highlight RECORD SETUP and press the ENTER button to access the record setup submenu ...

Page 93: ...Displays the hour blocks with schedule recording Schedule recording forces the DVR to record even when the REC button is off 4 Daily overview Displays the recording program for each hour block of the day Each hour block can be programmed with different recording programs Any of the hour blocks including all block can be further customized by highlighting and pressing the ENTER button 1 2 3 4 ...

Page 94: ... DVR s record settings to be customized allowing specific record parameters to be run such the resolution of the pictures normal and event recording speed event recording modes picture quality compression ratio pre and post record time and the event options alarm video loss and motion Highlight RECORD PROGRAM and then press the ENTER button to access the record program submenu 1 2 3 4 5 6 7 8 9 10...

Page 95: ... recording When manual recording is activated every channel will record as defined by user or preset settings The maximum total recording rate per resolution is 480PPS in CIF 240PPS in Half D1 and 120PPS for D1 for the VT XL1680 and 240PPS in CIF 120PPS for Half D1 and 60PPS in D1 for the VT XL840 The recording rate is further divided in groups of four channels where the maximum recording rate for...

Page 96: ...th event with up to 30 pictures per second regardless of the resolution then divides the remaining record rate among the rest of the channels Please refer to the following sample scenarios for a better understanding of the SINGLE MODE event recording SCENARIO 1 Event Channel Only Mode at D1 resolution The owner of a gas station wants to set up the DVR to record at maximum rate on D1 resolution on ...

Page 97: ...ecording at 30 PPS The changes in Normal Record s PPS will affect the PPS transmitted will affect the PPS transmitted over the network for VT XL840 but would not affect VT XL1680 as it has a separate dedicated network transmission codec In other words if the normal record rate was reduced to 5 PPS on all channels then the VT XL840 would only transmit maximum of 5 PPS per channel over the network T...

Page 98: ...at a predetermined recording speed 2 All Channels The event channel records at a predetermined recording speed and triggers the rest of the channels to record with the remaining record rate divided equally amongst the non event channel 5 RECORD QUALITY Select the record quality for normal recording and event recording Available options are Low Fine and Superfine 6 PRE POST EVENT RECORD TIME Select...

Page 99: ...ent recording When an event is triggered each channel or all channels will record as defined Please see 4 EVENT RECORD SETTING on page 94 6 3 3 IMAGE QUALITY Image quality predicts how much time the DVR will record based on the record settings Highlight IMAGE QUALITY and then press the ENTER button to access the image quality screen Select the image quality by pressing the or button The FILE SIZE ...

Page 100: ... access the audio record submenu Enable or disable the audio recording option for channels 1 through 8 The default is off 6 3 5 REPEAT RECORD Highlight REPEAT RECORD and then press the ENTER button to access the audio record submenu Select the repeat recording option on or off The default is on ...

Page 101: ...er and FIELD mode is recommended for recording rates of 10 pictures per second or lower FRAME mode greatly improves the playback quality of fast moving objects such as PTZ cameras or cars passing by whereas FIELD mode greatly improves the playback picture quality even at one picture per second The default is FRAME 6 3 7 BACKUP MODE Select the recording mode for the backup hard disk drives Availabl...

Page 102: ...DAY Highlight HOLIDAY and then press the ENTER button to access the holiday schedule screen Select the holiday recording option on or off The default is off Define the holidays in MM DD format Adjust the values using the or buttons ...

Page 103: ...etection sensitivity the main screen event response option buzzer option sensor input and relay output options 6 4 1 MOTION DETECTION Highlight MOTION DETECTION and then press the ENTER button to access the motion detection submenu Select the channel to customize motion related options by pressing the or buttons ...

Page 104: ...ue cursor around using the directional buttons and then press the ENTER button to disable each grid Press the ESC button to return to motion menu z Green tint motion detection on z No tint motion detection off The default is on for all grids Highlight TEST MOTION and then press the ENTER button to access motion testing screen Any grid that detects motion will flash a purple tint for the period of ...

Page 105: ...EVENT F RTN when an event occurs the view mode is changed to that of the channel with the event and then returns to the previous view mode z EVENT M RTN when an event occurs the view mode is changed to multi channel view mode and then returns to the previous view mode The default mode is SCREEN HOLD 6 4 3 EVENT CHECK Select the EVENT CHECK option on or off If the event check is set to off then non...

Page 106: ...EVENT BUZZER Select the buzzer option on or off The default is off 6 4 7 SENSOR INPUT Highlight SENSOR INPUT and then press the ENTER button to access the sensor input submenu Select the sensor input type or the type of the circuit to be used with each channel Available options are normally closed NC normally open NO and not used The default is NOT USED ...

Page 107: ...light the relay output and then press or buttons to change to the desired output number The second page lists relay output options for channels 9 through 16 The third page lists the relay output time for relay outputs 1 through 3 Select the relay output time from 1 to 30 seconds The default time is 1 second The fourth relay can be customized to be used with the following options z POWER LOSS relay...

Page 108: ... and the key echo Moreover the system settings can be reinitialized saved or retrieved from the USB flash memory as well as updating the DVR firmware 6 5 1 HARD DISK DRIVE Highlight HDD and then press the ENTER button to access the hard disk drive management submenu 6 5 1 1 HDD configuration Highlight the HDD CONFIGURATION and then press the ENTER button to access HDD configuration submenu ...

Page 109: ...tomatically detected just as in the main DVR HDD bays If any hard disk drives are installed then highlight the desired hard disk drive and then select the function by pressing the or button All hard drives in the expansion bays are set to REC by default 6 5 1 2 Rec HDD Initialize The hard disk drives set for normal recording can be initialized at any time by accessing this menu Highlight REC HDD I...

Page 110: ...n to access the initialization screen Select YES and then press the ENTER button to initialize the hard disk drives Initialization is instantaneous Select NO to return to the previous menu screen 6 5 2 CLOCK Highlight CLOCK and then press the ENTER button to access the system clock submenu 6 5 2 1 Date Time Highlight DATE TIME and then press the ENTER button to adjust the system date and time ...

Page 111: ...u 6 5 2 2 Time Adjust Highlight TIME ADJUST and then press the ENTER button to access time adjust submenu Select automatic time adjustment through internet time server on or off The default is off Highlight SELECT TIME SERVER and then press the ENTER button to add an internet time server Enter the IP address of the time server Some of the most of common time servers are z 207 46 232 189 time windo...

Page 112: ...The default is off Define the daylight savings time starting month week day and time Define the daylight savings time ending month week day and time 6 5 3 VIDEO STANDARD Select the video standard by pressing the or buttons Available standards are NTSC PAL and AUTO When set to AUTO the DVR automatically detects the video signal and display the main video output accordingly The default is AUTO ...

Page 113: ... remote controller then each DVR can be addressed differently so that all of them can be controlled using one remote controller Highlight REMOTE CONTROL ID and then press the or button to define the remote controller ID for the DVR Available options are z 11 through 14 z 21 through 24 z 31 through 34 z 41 through 44 z ALL 6 5 6 KEY ECHO Key echo is the audible tone heard when pressing and key High...

Page 114: ...Main Menu button z Status button z PTZ control button z Power off switch The password is in effect for one minute after it s been entered to gain access to any of the functions For example once the password is entered to gain the main menu screen it will not have to be re entered to gain access to any other screens that require passwords 6 5 7 2 Set Password Highlight SET PASSWORD and then press t...

Page 115: ...hen press the ENTER button to access user authority screen Highlight and modify each user s level of authority by pressing the or buttons 6 5 7 4 DVR Menu Setup DVR s menu settings and preferences can be saved or retrieved from the USB flash memory as well as resetting all settings back to factory default 6 5 7 4 1 Menu Initialize Highlight MENU INITIALIZE and then press the ENTER button to reset ...

Page 116: ...flash memory The USB flash memory with the DVR menu file must be inserted into the front USB port The DVR will attempt to read from the USB flash memory When a menu file is found it will load to the DVR and when successful it will display LOAD MENU SUCCESSFUL 6 5 7 4 3 Save menu to file Highlight SAVE MENU TO FILE and then press the ENTER button to save the menu settings onto a USB flash memory Th...

Page 117: ...est feature updates fixes and improvements via the USB flash memory Highlight FIRMWARE UPGRADE and then press the ENTER button to access the firmware upgrade screen Select YES and then press the ENTER button to begin the firmware upgrade The USB flash memory with the upgrade file must be inserted into the front USB port The DVR will start reading the available upgrade file ...

Page 118: ... will start the upgrade process The upgrade progress will be shown in percentages The whole process should take approximately two minutes Do not remove the USB flash memory from the USB port during the upgrade When the upgrade is finished the DVR will display COMPLETED RESTART DVR Power off and power on the DVR to apply the upgrade ...

Page 119: ...rollers PTZ cameras and e mails 6 6 1 NETWORK Highlight NETWORK and then press the ENTER button to access the network setup submenu Select DHCP option on or off DHCP Dynamic Host Configuration Protocol is another word for Dynamic IP If enabled the DVR will obtain an IP address automatically from a router or from the Internet Service Provider ...

Page 120: ...so be provided along with the IP address and the subnet mask Define the DNS Domain Name Server If the internet time server and or the SMTP e mail server are to be setup using alphabet rather than numbers then the DNS must be defined in order for the DVR to locate the servers The DNS is usually provided from the Internet Service Provider Define the port that the DVR will communicate through Availab...

Page 121: ...setup and used in conjunction with the DVR Select the live network transmission image size that is independent to that of the record settings VT XL1680 only Available options are CIF 360 x 240 and Half D1 720 x 240 The default is Half D1 720 x 240 6 6 2 RS 232C The RS 232C port can be used with a variety of add on devices such as the Point of Sales POS boxes and third party controllers if they nee...

Page 122: ...ect the data bit Available options are 6 to 8 The default bit is 8 Select the parity bit Available options are ODD EVEN and NONE The default is NONE Select the stop bit Available options are 1 and 2 The default is 1 6 6 3 RS 422 RS 485 Highlight RS422 485 and then press the ENTER button to access the RS 422 RS 485 submenu ...

Page 123: ...hen controlling PTZ cameras from the DVR The default ID is 1 Select the protocol output mode Available options are RS 422 and RS 485 The default is RS 422 Select the communication speed Available speeds are from 1200 to 115200 The default speed is 9600 Select the data bit Available options are 6 to 8 The default bit is 8 Select the parity bit Available options are ODD EVEN and NONE The default is ...

Page 124: ...ety of protocols The following is the list of supported manufacturers and their models Manufacturer Model Samsung Techwin SPD Samsung Techwin SRX 100B Canon VC C4R Smile Cam SD 290 Samsung Electronics SCC 643 Pelco Pelco D Pelco Pelco P Dongyang Unitech DSC 230S Panasonic WV CS854A Daiwa DMP23 LG Electronics LPT A100L Bosch TC8560 TC700 Vitek EZ Xpress Dome JVC TK C655 C676 Sunkwang SK D106 Highli...

Page 125: ...ample if the PTZ camera is set to address 2 then the ID should be set to 2 6 6 5 E MAIL The DVR is capable of sending e mails when an event occurs to up to ten different e mail addresses Highlight E MAIL and then press the ENTER button to access the e mail submenu The first page consists of e mail notification option e mail server setup DVR s e mail address DVR s user name and password to access t...

Page 126: ...r Highlight SMTP SERVER and then press the ENTER button to define an e mail server Enter the e mail server s address For example mail domainname com Press the ESC button to return to previous menu 6 6 5 3 DVR e mail address Highlight DVR E MAIL ADDRESS and then press the ENTER button to define the DVR s e mail address ...

Page 127: ...the ESC button to return to previous menu 6 6 5 4 User ID Highlight USER ID and then press the ENTER button to define the user ID for the DVR s e mail account Enter the user name to log into the DVR s e mail account Press the ESC button to return to previous menu 6 6 5 5 Password Highlight PASSWORD and then press the ENTER button to define the password for the DVR s e mail address ...

Page 128: ...s the ESC button to return to previous menu 6 6 5 6 E mail address 1 through 10 Highlight a desired e mail address to send the notifications to and then press the ENTER button to define the e mail address Enter the e mail address Press the ESC button to return to the previous menu ...

Page 129: ...SAGA XL Series 128 VII SEARCH Please see 5 4 ADVANCED PLAYBACK under section V ADVANCED OPERATION on page 61 VIII COPY Please see 5 1 BACKUP under section V ADVANCED OPERATION on page 49 ...

Page 130: ...essed several times until the EXIT screen is shown 9 1 SAVE ONLY SAVE ONLY will be automatically highlighted when the ESC button is pressed Press the ENTER button to save the settings and to return to any other menus for further modifications 9 2 SAVE AND EXIT Highlight and press the ENTER button to save any changes and exit to the live screen view mode ...

Page 131: ...SAGA XL Series 130 9 3 EXIT WITHOUT SAVE Highlight and press the ENTER button to disregard any changes and exit to the live screen view mode ...

Page 132: ... following is the minimum and recommended PC specification Minimum Recommended OS Windows 2000 Windows XP CPU Pentium III 1 GHz Pentium IV 2 8 GHz RAM 128MB 512MB Video Card 16MB 128MB Free Space 50MB 2GB Resolution 800x600x16 1024x768x32 DirectX DirectX 7 0 DirectX 9 0c Network Ethernet 10 100B TX Ethernet 10 100B TX Port Port 5400 5499 TCP Port 5400 5499 TCP 10 2 INSTALLING THE DVR VIEWER Insert...

Page 133: ...ed in its default folder of C Program Files DVR DVR Viewer If the folder needs to be changed click on BROWSE button and then select a different folder The setup program will run through its series of installation process Click on FINISH to complete the installation ...

Page 134: ...r the administrator s password Select and enter a password of up to 20 alphanumeric characters Click on OK to start the program The DVR Viewer has two display modes When the program is run for the first time it will be shown in the attached mode See 9 The DVR Viewer then can be switched into detached mode to view up to 16 DVR windows simultaneously 1 16 1 2 3 4 5 6 7 8 9 10 11 12 13 14 15 17 18 19...

Page 135: ...ariety of connection options a DVR List The DVRs that have been added are listed in this box b Connection Type Select the connection type to the DVR c DVR Name Enter the DVR name d IP Address and Port Enter the IP address and the port number for the DVR if known a b c d e f g h i j k l m n ...

Page 136: ... or RS 485 protocols are used to connect to the DVR h Password Enter the password to access the DVR remotely The password level entered will grant the access privileges assigned by the administrator i Description Add comments or notes to the DVR in this box j Add Once all the information for the DVR has been entered click on ADD to add to the DVR list k Change After changing the DVR information cl...

Page 137: ...le DVRs to be added to the DVR list Click on DVR SEARCH to open the DVR Search window Click on SEARCH and available DVRs will be listed Highlight a desired DVR to add to the DVR List and then click on ADD TO LIST DVR List Added Message will appear with a successful addition to the DVR list Click on CANCEL to exit from DVR Search ...

Page 138: ...hard disk drive and then click on OK Recorded channels will be shown in the main channel display window The content of the hard drive can be further searched and played back using any one of the search features or using the playback buttons to playback in slow fast or paused mode 4 FILE SEARCH Backed up files and files that have been downloaded can be searched and played back Click on FILE SEARCH ...

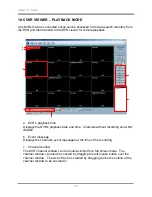
Page 139: ...ayed back by double clicking on it Once the playback starts it can be slowed paused and fast forwarded using the playback buttons The playback list can be viewed and selected again from the TIME search button once the playback starts 5 ARRANGE WINDOW Arrange window button works only in detached window mode See 9 When viewing multiple DVRs clicking on ARRANGE WINDOW sort and display all DVR connect...

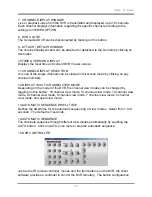
Page 140: ...e administrative options for the DVR Viewer such as display options and the IP address of the Dynamic IP Server and user management to create user name and passwords for additional users to access the DVR Viewer 6 1 Viewer Option 5 9 DVRS 10 16 DVRS a b c d e f ...

Page 141: ...ses are z Primary Server 211 174 251 155 z Secondary Server 211 174 251 160 c Warning Sound Toggle event notification warning sound on or off The default is on d Play Mode Field vs Frame mode e Watermark Check Checks for the authenticity of the data during live stream or playback stream f File Split Mode Customize the channel order during playback using File Search 6 2 User Management Click on USE...

Page 142: ...ntered for the password Press CHANGE to save the modification To add additional users click on ADD Enter the user name description for the user password and access privileges and then click on SAVE to add the new user The user setting can be modified by highlighting the user and clicking on CHANGE once the changes are made ...

Page 143: ... any channel numbers 12 DISPLAY MULTI CHANNEL VIEW MODE Depending on the model of the DVR the channel view modes can be changed by toggling on this button 16 channel view mode 13 channel view mode 10 channel view mode 9 channel view mode 8 channel view mode 7 channel view mode 6 channel view mode and quad view mode 13 AUTOMATIC SEQUENCE DWELL TIME Defines the dwell time for the automatic sequencin...

Page 144: ...buttons Autofocus Move the PTZ camera using the directional buttons Toggle Autofocus on or off by clicking on AF c Set preset points Move the PTZ camera to the desired location and then click on any of the 16 buttons to set a preset position d Move to preset points Click on any of the 16 buttons to move the PTZ camera to predefined preset position e Zoom control Zoom in and out by clicking on the ...

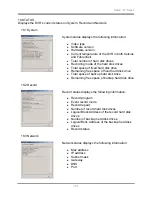
Page 145: ...rive z Remaining free space of fixed hard disk drive z Total space of backup hard disk drive z Remaining free space of backup hard disk drive 18 2 Record Record status displays the following information z Record program z Event record mode z Record repeat z Number of record hard disk drives z Logical Block Address of the record hard disk drives z Number of backup hard disk drives z Logical Bock Ad...

Page 146: ... the paper size Available paper sizes are A3 A4 A5 B4 B5 Legal and Letter c Print Send the picture to the printer d Printer Select a printer to send the picture e Save as The picture can be saved as a JPEG or Bitmap format f Memo Add the memo for the picture to be printed g Font Select the font for the memo h Date print Select the date print option on or off i Preview window The picture to be prin...

Page 147: ...known leave the selection on NORMAL c Copy time Define the interval of the file to be downloaded Available time interval is 1 through 60 minutes As the value is adjusted the COPY END value will be automatically adjusted d Copy start Enter the starting time of the data to be downloaded e Copy end Enter the end time of the data to be downloaded f Password Encrypt the downloaded copy with a password ...

Page 148: ...o listen into a specific channel 23 TIME SEARCH Search for a specific time for remote playback using a time line Please see 10 5 1 TIME SEARCH under 10 5 DVR VIEWER PLAYBACK MODE on page 154 24 CALENDAR SEARCH Search for a time for remote playback using a calendar based search window Please see 10 5 2 CALENDAR SEARCH under 10 5 DVR VIEWER PLAYBACK MODE on page 155 25 EVENT SEARCH Search for events...

Page 149: ...ncel Exit from the log search window 29 RECORD PLAYBACK BUTTONS The remote playback can be controlled just as on the DVR The remote playback can be played in normal slow and fast modes in both forward and reverse direction The DVR Viewer can also record the remote transmission onto the computer s hard disk drive a Record Click on the RECORD button to start recording on to the computer When recordi...

Page 150: ... speed of 2x 4x 8x 16x 32x 64x and 128x 30 CHANNEL STATUS Displays the status of the channels z Grey non recording mode z Yellow manual recording mode z Red event recording mode z Green schedule recording playback mode 31 LIVE When the DVR Viewer is connected to the DVR it starts with the live view mode and this button will be pressed and highlighted Click on LIVE to toggle back to live view mode ...

Page 151: ... playback direction 35 RELAY 4 Manually trigger relay 4 on the DVR The relay 4 option must be set to user option 36 AVAILABLE SPACE ON COMPUTER When connected to a DVR this section will display available recording space on the computer 37 ACTIVE DVR FILE HDD Displays a list of connective DVRs playback from FILE SEARCH and HDD SEARCH ...

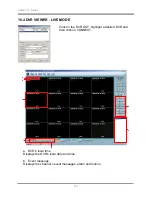
Page 152: ...IEWER LIVE MODE Click on the DVR LIST highlight a desired DVR and then click on CONNECT a DVR s local time Displays the DVR s local date and time b Event message Displays the channel s event messages alarm and motion f g a c b d e ...

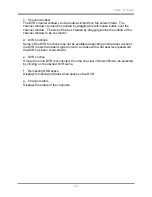
Page 153: ...dow to be zoomed in d DVR functions Some of the DVR functions may not be available depending on what user account the DVR Viewer has been signed on with and also with what user level password the DVR has been connected to e DVRs online If more than one DVR is connected then the live view of the DVRs can be selected by clicking on the desired DVR name f Remaining HDD space Displays remaining hard d...

Page 154: ...playback date and time Channels without recording show NO IMAGE b Event message Displays the channel s event messages at the time of the recording c Channel window The DVR channel window can be double clicked for a full screen mode The channel window can also be zoomed by dragging the left mouse button over the channel window The size of the box created by dragging will be the outline of the chann...

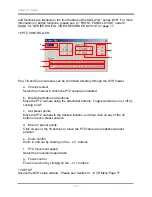
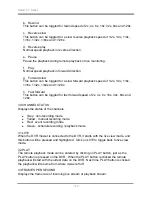
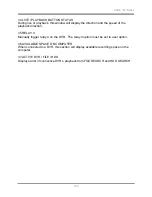
Page 155: ...of different DVRs can be selected as well as the playback mode by clicking on the desired DVR name f Remaining HDD space Displays remaining hard disk drive space on the DVR g Channel status Displays the status of the live channels 10 5 1 TIME SEARCH Click on TIME to display the Time Search window The start and the end of the recorded data will be displayed Select the hard disk drive for the remote...

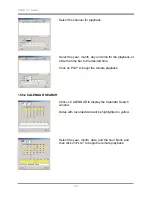
Page 156: ...de the time bar to the desired time Click on PLAY to begin the remote playback 10 5 2 CALENDAR SEARCH Click on CALENDAR to display the Calendar Search window Dates with recorded data will be highlighted in yellow Select the year month date and the hour block and then click on PLAY to begin the remote playback ...

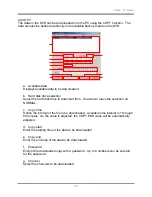
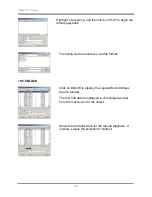
Page 157: ... the most recent to the oldest Select an event and then click on PLAY to begin remote playback If the desired event is not listed in the current window then follow the following steps Select the hard disk drive for the remote playback If unknown leave the selection to Normal Select the channel for playback Select the event categories ...

Page 158: ...k The list can be advanced to the next 500 lists by clicking on NEXT Highlight the desired event and then click on PLAY to begin the remote playback 10 5 4 TEXT Click on TEXT to display Text Search window Select the hard disk drive for the remote playback If unknown leave the selection to Normal ...

Page 159: ... to search Leave blank for a wild card all items search Select the year month day and time for the end of the search time Click on SEARCH to list data that match the text string If the text string search was left blank then it will display all items Click on NEXT for the next 500 listing ...

Page 160: ...isting can be saved as a List file format 10 5 5 BLOCK Click on BLOCK to display the Logical Block Address Search window The first 500 data is displayed in chronological order from the most recent to the oldest Select the hard disk drive for the remote playback If unknown leave the selection to Normal ...

Page 161: ... month day and time for the end of the data If the desired date and time is not found then click on NEXT to display the next 500 Logical Block Addresses Highlight a desired block time and then click on PLAY to begin the remote playback ...

Page 162: ...ngs are identical to that of the DVR menu For more information please see V DVR MENU on page 77 Click on SETUP and the password prompt will be displayed Enter the administrator s password and then click on OK to display the DVR setup menu 1 QUICK SETUP 2 SCREEN SETUP 3 RECORD SETUP 4 EVENT SETUP 1 2 3 4 5 6 7 8 9 10 11 12 ...

Page 163: ...E TO DVR Upload changed settings to DVR 12 CLOSE Close DVR Setup menu 10 6 1 QUICK SETUP a Quick Setup on off b Image Size 360 x 240 720 x 240 720 x 480 c Record Frame 16 through 480 depending on image size d Event off all alarm v loss motion alarm loss alarm motion loss motion e Pre Record Time 0 through 5 seconds f Pose Record Time 0 through 60 seconds g Image Quality low fine superfine h Audio ...

Page 164: ...nnel dwell time b Auto Split select the multi channel dwell time c Video Loss Skip check uncheck d Add Auto Single check uncheck 10 6 2 3 Display a HDD Free Space on off b HDD Free Space Mode percent gigabyte c Record Status on off d Clock Display on off e Date Time Mode YY MM DD MM DD YY DD MM YY f Title Display on off g Title Mode text bitmap h Border Color white black i Remote Control ID on off...

Page 165: ...ers for channel titles b Clear Clear the bitmap drawing c Move Move the bitmap drawing in the grids d Font Select the font for bitmap conversion e Download Download the bitmap to the DVR f Make Bitmap Enter the title to be converted into bitmap g Bitmap Grid The title can be drawn here a d b c f e g ...

Page 166: ... 7 9B 10 and 13 channel view modes 10 6 2 6 Covert a Channels 1 through 16 on off b Select live play network LV PB LV NW PB NW all c Title Display on off 10 6 2 6 Spot a Spot Mode manual event sequence b Spot Sequence Time 1 to 60 seconds c Add Spot Multi on off d Video Loss Skip on off ...

Page 167: ...ard a Record Program 0 to 9 b Record Type single complex event channel only all channels c Image Size select the recording image size d Normal Record select the recording rate for manual recording e Event Record Single select the recording rate for single event recording f Event Record Complex select the recording rate for complex event recording g Quality Normal select the image quality for manua...

Page 168: ...heck on off b Event Screen Mode screen hold event full event multi event full return event multi return c Event Message on off d Event Message Reset 1 to 30 seconds e Event Buzzer on off 10 6 4 2 Motion Detection a Sensitivity select the motion detection sensitivity b Area Setup click on AREA SETUP to display the motion grid window ...

Page 169: ...area Use the buttons at the bottom of the screen to set or clear motion detection all area of the screen 10 6 4 3 Sensor Input Select the circuit type for the sensor input 10 6 4 4 Relay Output a Channel 1 through 16 select the relay output for the events b Relay 1 through 3 output time 1 to 30 seconds c Relay 4 mode select not used HDD error power user ...

Page 170: ...through 44 d Key Echo on off 10 6 5 2 HDD Select the recording mode for the HDD 10 6 5 3 CLOCK a Date Time the date and time is displayed here cannot be modified b Internet Time Server on off c Select Time Server enter the time server s IP address d Select Time Zone select the DVR s local time zone e Day Light Savings Time on off f Start Time select the month week day and time g End Time select th...

Page 171: ...ss c Subnet Mask enter the subnet mask d Gateway enter the gateway e DNS enter the DNS address f Port define port number g Dynamic IP Server enter the Dynamic IP Server address h Backup IP Server enter backup IP Server address i Network Live Image Size VT XL1680 only select network transmission size 10 6 6 2 RS 232C a Baud Rate select the communication speed b Data Bit select the data bit c Parity...

Page 172: ...6 4 PTZ a Model select the PTZ camera model b Speed select the communication speed c ID select the PTZ camera address 10 6 6 5 E mail a Send e mail on off b SMTP Server enter the SMTP server address c DVR e mail Address enter the DVR s e mail address d User ID enter the DVR s user name for the e mail account e Password enter the DVR s password for the e mail account f E mail addresses 1 through 10...

Page 173: ...remember that once the upgrade process begins the connection must not be severed or interrupted 10 6 7 1 DVR Logo Select Reserved 10 6 7 2 Firmware Download Click on FIRMWARE DOWNLOAD and the DVR firmware open window will open Locate the upgrade file and then click on OPEN to begin the upgrade process ...

Page 174: ...ing onto the DVR Once the download is complete the DVR will begin flashing the new firmware Once the upgrade is finished and successful the DVR viewer will display DVR Upgraded Successfully Restart the DVR and the new firmware will be in effect ...

Page 175: ... X 480 Half D1 720 X 240 CIF 360 X 240 Recording Resolution PAL D1 720 X 576 Half D1 720 X 288 CIF 360 X 288 NTSC Max 60 PPS D1 Max 120 PPS HD1 Max 240 PPS CIF Recording Speed PAL Max 50 PPS D1 Max 100 PPS HD1 Max 200 PPS CIF Recording Quality Low Fine Superfine Maximum Average File Size CIF 5 5K HD1 11K D1 18K Recording Modes Continuous Motion Alarm V Loss Schedule Search Modes Calendar Search Co...

Page 176: ...m Operating System Modified Embedded Linux Simultaneous Functions Sextuplex Record Playback Mirror Backup Network Transmission and Live Monitoring Control Devices Front buttons IR Remote Controller Mouse Remote Client Software and Keyboard Multiple DVR Support Control up to 255 DVRs via Keyboard Controller 16 with IR Remote Controller Matrix Cascade support Up to 255 DVRs File Compatibility Compat...

Page 177: ...4 NTSC D1 720 X 480 Half D1 720 X 240 CIF 360 X 240 Recording Resolution PAL D1 720 X 576 Half D1 720 X 288 CIF 360 X 288 NTSC Max 120 PPS D1 Max 240 PPS HD1 Max 480 PPS CIF Recording Speed PAL Max 100 PPS D1 Max 200 PPS HD1 Max 400 PPS CIF Recording Quality Low Fine Superfine Maximum File Size CIF 5 5K HD1 11K D1 18K Recording Modes Continuous Motion Alarm V Loss Schedule Search Modes Calendar Se...

Page 178: ...em Operating System Modified Embedded Linux Simultaneous Functions Sextuplex Record Playback Mirror Backup Network Transmission and Live Monitoring Control Devices Front buttons IR Remote Controller Mouse Remote Client Software and Keyboard Multiple DVR Support Control up to 255 DVRs via Keyboard Controller 16 with IR Remote Controller Matrix Cascade support Up to 255 DVRs File Compatibility Compa...

Page 179: ...er If you still have questions or problems operating the DVR correctly then please contact VITEK INDUSTRIAL VIDEO PRODUCTS INC 28492 Constellation Road Valencia CA 91355 Toll Free Domestic 888 VITEK 70 International 661 294 8043 FAX 661 294 8044 E mail Sales vitekcctv com Support vitecctv com Customerservice vitekcctv com ...

Page 180: ...a Paz GMT 04 00 Santiago GMT 03 30 Newfoundland GMT 03 00 Brasilia GMT 03 00 Buenos Aries Georgetown GMT 03 00 Greenland GMT 02 00 Mid Atlantic GMT 01 00 Azores GMT 01 00 Cape Verde Island GMT Casablanca Monrovia GMT Greenwich Mean Time Dublin Edinburgh Lisbon London GMT 01 00 Amsterdam Berlin Bern Rome Stoholm Vienna GMT 01 00 Belgrade Bratislava Budapest Ljubljana Prague GMT 01 00 Brussels Copen...

Page 181: ...MT 07 00 Bangkok Hanoi Jakarta GMT 07 00 Krasnoyarsk GMT 08 00 Beijing Chongqing Hong Kong Urumqi GMT 08 00 Irkutsk Ulaan Bataar GMT 08 00 Kuala Lumpur Singapore GMT 08 00 Perth GMT 08 00 Taipei GMT 09 00 Osaka Sapporo Tokyo GMT 09 00 Seoul GMT 09 00 Yakutsk GMT 09 30 Adelaide GMT 09 30 Darwin GMT 10 00 Brisbane GMT 10 00 Canberra Melbourne Sydney GMT 10 00 Guam Port Moresby GMT 10 00 Hobart GMT 1...

Page 182: ...in Name 119 135 DOMAIN NAME SERVER 33 DOWN DIRECTIONAL BUTTON 19 DOWNLOAD 172 DVD RW 15 18 49 70 DVR 1 15 16 17 18 21 22 31 32 33 43 49 54 58 60 61 62 64 74 75 77 78 79 80 81 94 95 97 98 106 107 108 111 112 114 115 116 117 118 119 120 122 123 124 125 126 127 131 133 134 135 136 137 138 139 140 142 143 144 146 147 148 149 150 151 152 153 154 161 162 164 169 170 171 172 173 DVR e mail address 125 DV...

Page 183: ...MOTION RECORDING 61 MOUSE 25 Multiscreen 165 MULTISCREEN 86 N Network 170 NETWORK 118 NORMAL RECORD 94 normally closed circuit 60 normally open circuit 60 NUMERIC BUTTONS 17 24 P PAN TILT ZOOM 58 PAN TILT ZOOM CAMERA CONTROL 58 Password 126 PASSWORD 65 113 126 170 Password Check 170 PAUSE 18 PICTURE BY PICTURE 46 PIP 19 24 40 41 PLAY15 18 24 43 44 46 48 62 64 70 71 72 74 88 128 138 142 147 148 149...

Page 184: ...ng 45 SINGLE MODE 95 SLOW 18 24 46 SMTP server 125 Spot 165 SPOT 17 21 23 88 89 SPOT INPUT 21 SPOT MONITOR 17 23 SPOT OUTPUT 21 STATUS 18 19 23 32 144 149 150 STATUS LED 18 SUBNET MASK 33 SUPERFINE 80 S VIDEO OUTPUT 21 SYSTEM 107 SYSTEM REQUIREMENT 131 T TERMINATION 21 TEST MOTION 103 TEXT 157 Time Adjust 110 TIME SEARCH 65 154 TIME SYNCHRONIZATION 21 Title 164 TITLE 85 U UP DIRECTIONAL BUTTON 17 ...

Page 185: ...SAGA XL Series 184 NOTES ...

Page 186: ...SAGA XL Series 185 NOTES ...

Page 187: ...28492 CONSTELLATION ROAD VALENCIA CA 91355 WWW VITEKCCTV COM 888 VITEK 70 ...

Reviews: