background image

5


7. Setting the Microphone   


The microphone of the camera 

(for Windows 2000 / XP /Vista) 

works 

independently from the sound card.   

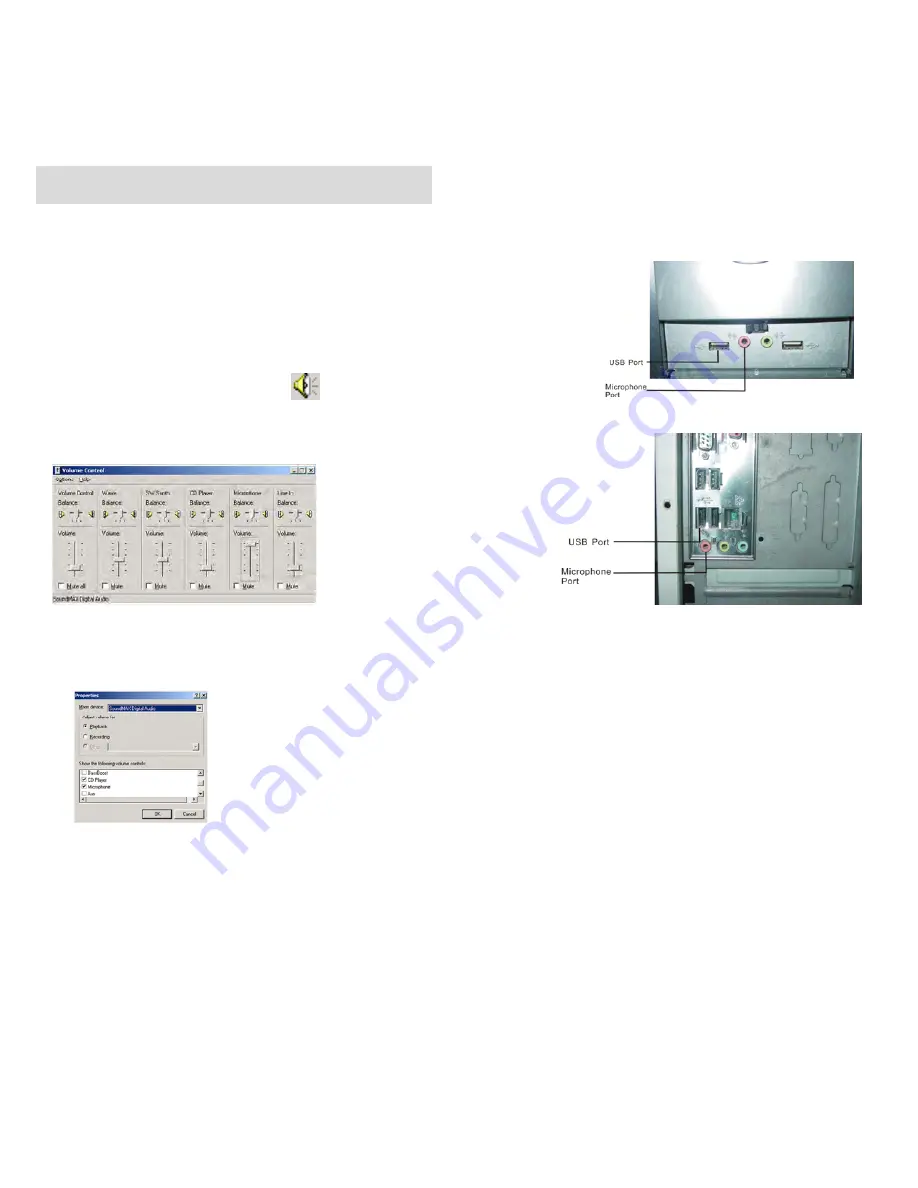
1. Insert the plug of PC camera to a 
    computer sound card at front/rear to the 
    corresponding symbol (normally in pink).   

2. Double click the icon          from the task   

    bar and you will see the menu as below.   

Note: Do not tick on Mute option. 


3. Click properties from the menu Option and you will see the dialog box as 

below; tick on microphone option. 


4. Adjust the microphone on the PC camera close to your mouth, then start   

using.


Summary of Contents for PC30I

Page 1: ...User s Manual...

Page 2: ...Adjusting Camera Lens Position 2 5 Installing Driver and Software 3 6 Checking Connection of Your Camera 4 7 Setting the Microphone 5 8 Uninstalling Driver and Software 6 9 ArcSoft PhotoImpression 5...

Page 3: ...ts Personal computer laptop desktop or IBM compatible with Pentium 1GHz minimum and with an active USB Universal Serial Bus port Windows 2000 XP Vista CD ROM drive color monitor mouse and keyboard For...

Page 4: ...Position 1 Regular Mode You can swivel the camera body up and down to adjust its angle for picture taking or video recording 2 Storage Mode You can swivel the camera body down when you need storing th...

Page 5: ...iver 4 Follow the on screen instructions 5 Restart the computer Installing Software 1 Insert installation CD into the CD ROM drive and the installation CD menu should appear 2 When you see the followi...

Page 6: ...another end to the computer s USB Port For Windows 2000 XP Vista only Double click My Computer icon Windows 2000 or go to Start Button and select My Computer Windows XP Control Panel System Hardware D...

Page 7: ...r sound card at front rear to the corresponding symbol normally in pink 2 Double click the icon from the task bar and you will see the menu as below Note Do not tick on Mute option 3 Click properties...

Page 8: ...ve Programs 3 Select the program to be uninstalled ArcSoft Software Suite 4 Click on Remove and follow the on screen instructions Uninstall Camera s Driver 1 Click Start from the task bar and choose C...

Page 9: ...sers wonderful experience to organizing viewing enhancing editing printing and sharing photos Click Start Program ArcSoft Software Suite PhotoImpression 5 to launch PhotoImpression 5 or double click P...

Page 10: ...Add clip art special effects frames and more 4 Project Make calendars photo books and greeting cards 5 Print Print multiple images per page and multiple pages at one time 6 Send Email photos or uploa...

Page 11: ...esktop and you will see a window as the screenshot above Open a Project Let you browse the project files in the VideoImpression system folder By project we mean to say a file that contains all of the...

Page 12: ...lect the item you desire and the picture and videos you need then you will enter the editing interface as below You can use the six steps in the Function Menu to create video clips and slide shows 1 M...

Page 13: ...ll components to create your final video save it in a variety of ways or email it to friends The Storyboard The backbone of the creation process it s where you assemble your movie The Player Preview a...

Page 14: ...cedure Starting NetMeeting you have to follow the simple set up procedure on the computer screen enter your personal information and adjust the microphone volume Here are the simple steps to receive a...

Page 15: ...20x240 30 fps 160x120 30 fps Focus Range Manual focus 10 cm to infinity Exposure Control Automatic Color Balance Automatic Video Capture Res 640x480 352x288 320x240 176 x144 Still Image Capture Res Up...

Reviews: