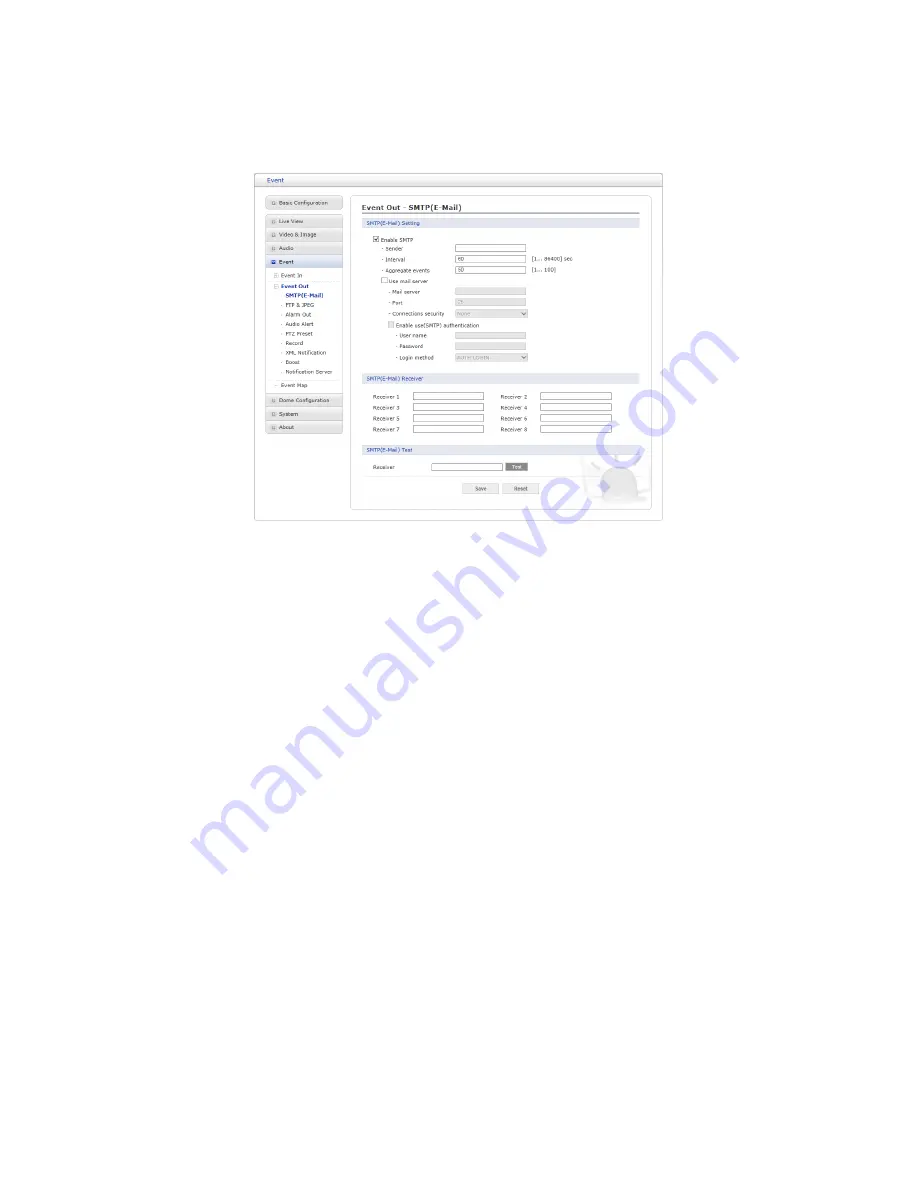
Vista VK2-1080XIRPTZF User Manual Download Page 44

2) Event Out

SMTP(E-Mail)

The network camera can be configured to send event and error email messages via SMTP
(Simple Mail Transfer Protocol).

SMTP (E-Mail) Setting:

Select ”Enable” to activate the SMTP operation.

– Sender:

Enter an email address to be used as the sender for all messages sent

by the network camera.

– Interval:

Represents the time interval of the email notification when events occur

several times.

– Aggregate events:

Shows the maximum number of emails sent within each in-

terval.

– Use Mail Server:

Check the box is you are using a mail server to receive event

notification and image email.

Mail Server:

Enter the host names (or IP addresses) for your mail server.

Port:

Enter the port number for your mail server. enable the sending of noti-

fications and image email messages from the network camera to predefined
addresses via SMTP.

– Enable use(SMTP) authentification:

Check the box if your mail server requires

authentication.

User name/Password:

Enter the User name and Password as provided by

your network administrator or ISP (Internet Service Provider).

Login method:

Choose a log-in method in the drop-down list:

AUTH LOGIN

/ AUTH PLAIN

SMTP (E-Mail) Receiver:

User can assign up to 8 receivers

– Receiver #:

Enter an email address.

44

Summary of Contents for VK2-1080XIRPTZF

Page 1: ...VK2 1080XIRPTZF User Manual 1...

Page 2: ...ipment damage CAUTION Improper use of this equipment can cause equipment damage Note Notes contain important information about a product or procedure This apparatus is manufactured to comply with the...

Page 3: ...where they exit from the apparatus 11 Only use attachments accessories specified by the manufacturer 12 Unplug this apparatus during lightning storms or when unused for long periods of time 13 Refer a...

Page 4: ...from the internet 15 3 3 Setting the admin password over a secure connection 15 3 4 Live View Page 16 3 5 Playback 18 3 6 Network Camera Setup 20 3 6 1 Basic Configuration 20 3 6 2 Live View 24 3 6 3...

Page 5: ...store and retrieve a monitoring image by using a PC All the settings and real time monitoring screens are also provided through an access to the web The network camera is fully featured for security s...

Page 6: ...s and outputs can be connected to devices such as sensors and relays enabling the system to react to alarms and activate lights or open close doors Improved Security The network camera logs all user a...

Page 7: ...e mounting base to wall using the supplied M8 tapping screw and plastic bushing Ceiling using the supplied M6 tapping screw and bushing 3 Wind the both thread of the pipe end with Teflon tape about 20...

Page 8: ...l out cables required to connect to the dome camera from the wall or route cables through a section of 0 75 in 19 mm conduit pipe 4 Remove the access plate from the wall mount bracket 5 Attach the wal...

Page 9: ...surface using the ceiling mount flange 3 Pull out cables required to connect to the dome camera from the ceiling 4 Attach the ceiling mount bracket using screws routing cables through the locking nut...

Page 10: ...functionality 3 RCA BLACK Audio Input 4 RCA GRAY Audio Output 5 5 pin Cable YELLOW Alarm Input 1 WHITE Alarm Input 2 VIOLET Alarm Input 3 BROWN Alarm Input 4 GRAY GND 6 2 pin Cable RED Alarm Out BLACK...

Page 11: ...Insertion User can install and change Micro SD card as shown in the following picture 1 Open the Micro SD card cover 2 Install or change Micro SD card 3 Tightly close the Micro SD card cover to ensure...

Page 12: ...t and or alarm output to the G Ground connector AO Alarm Output The camera can activate external devices such as buzzers or lights Connect the device to the AO Alarm Output and G Ground connectors Con...

Page 13: ...e to the network and power up 2 Start SmartManager utility Start All programs SmartManager SmartManager The main window will display and after a short while any network devices connected to the networ...

Page 14: ...treaming video in Microsoft Internet Explorer set your browser to allow ActiveX controls 3 1 Access from a browser 1 Start a browser Internet Explorer 2 Enter the IP address or host name of the networ...

Page 15: ...d when the network camera is accessed for the setup at the first time Enter your admin name and password set by the administrator NOTE The default administrator user name and password is admin If the...

Page 16: ...o be displayed on Live View page The protocol drop down list allows you to select which combination of pro tocols and methods to use depending on your viewing requirements and on the properties of you...

Page 17: ...eaker button activates deactivates external speaker The Mic button activates deactivates microphone input Use this scale to control the volume of the speakers and microphones NOTE VCA and Face Detecti...

Page 18: ...he SD local storage select it from the list and click the Playback buttons Go to the first go to the beginning of the video clip Fast backward play fast play backward of the video clip Backward play p...

Page 19: ...yed monthly If there is a recorded data for a particular date a blue square on the date will be displayed If you select a particular date in the calendar a yellow square on the date will be displayed...

Page 20: ...era by clicking Setup either in the first connection page or the top second right button of the Live View page Accessing the network camera from a computer for the first time opens the Admin Password...

Page 21: ...the lowest level of access which only allows access to the Live View page Operator An operator can view the Live View page create and modify events and adjust certain other settings Operators have no...

Page 22: ...tic known IP address for a particular MAC address Use the following IP address To use a static IP address for the network camera check the radio button and then make the following settings IP address...

Page 23: ...c for more details about Video Image setup 4 Audio The network camera can transmit audio to other clients using an external microphone and can play audio received from other clients by attaching a spe...

Page 24: ...s determine Date Time format in this page Please refer to System Date Time for more details about Date Time setup 3 6 2 Live View Video Input Mode Video Mode Choose Video Mode you wish to use from the...

Page 25: ...orage applications particularly for high definition television applications for example this is the profile adopted by the Blu ray Disc storage format and the DVB HDTV broadcast service H 264 MP Main...

Page 26: ...should select a frame refresh rate per second If the rate is high the image will become smooth On the other hand if the rate is low the image will not be natural but it can reduce a network load GOP s...

Page 27: ...us is acti vated only after the camera movement stops and lasts for about 5 seconds Focus Limit Minimum distance for Auto Focus operation Object nearer than this limit may not be clearly focused Speed...

Page 28: ...n be streamed to a website User can copy and paste the HTML code generated on the screen to the website page code where user wants to display live video NOTE To use webcasting service the Enable Anony...

Page 29: ...4 Camera Setup In this page user can setup Exposure Control White Balance Control Image Appearance and Day Night control Video Preview User can check the setting via video preview pop up window 29...

Page 30: ...6 Iris Determines Iris mode between automatic and fixed 7 Iris F number Select Iris F number if Iris is in fixed mode 8 Enable backlight compensation Activates BLC function which cannot be used with W...

Page 31: ...Night Control User can setup Day Night operation mode among Automatic Day and Night Mode Automatic Normally displays color image and switches automatically to black white image after the ambient ligh...

Page 32: ...el that deactivates the IR mode If the illumi nation is above the specified level the indicator will turn off 1 20 Fixed IR Bright Specify the brightness of the Fixed IR illuminator 1 5 Moving IR Brig...

Page 33: ...of OSD on actual video via preview pop up window OSD Setting User can determine show or hide OSD for each stream Also user can set the transparency level of OSD by slide bar or type in number OSD titl...

Page 34: ...ding set the desired audio qual ity bit rate The settings affect the available bandwidth and the required audio quality Audio Input Audio from an external line source can be connected to the MONO Jack...

Page 35: ...high it is possible to adjust the output gain for the active speaker attached to the network camera When the settings are complete click Save button to save the settings or click Reset button to clea...

Page 36: ...started Select Enable on boot to activate the On Boot event Enter the Dwell time the event lasts from the point of detection 1 180 seconds When the settings are complete click Save button to save the...

Page 37: ...se an alarm port check the desired Enable alarm port first Type Choose the type of alarm to use from the drop down list NO Normally Open or NC Normally Closed Dwell Time Set the dwell time an event la...

Page 38: ...the event can be triggered via the product s API Application Programming Interface Select Enable manual trigger to activate the manual trigger for up to 4 manual triggers Set the dwell time the trigg...

Page 39: ...ct Enable network loss to activate the Network Loss event Select a dwell time for how long the event will last from the point of detection When the settings are complete click Save button to save the...

Page 40: ...ime Determine how long the event will last from the point of detection Event time Time duration from tampering detection to tampering event trigger Threshold Determines sensitivity level to judge tamp...

Page 41: ...can assign different rules for each preset position Select the preset position to set the VCA rules Object Determines detection sensitivity Sensitivity As the value becomes bigger the detection sensit...

Page 42: ...Base The reference point of the object detection Counter User can choose between Counter and Detector Field Detector Once selected a blue line appears on the video preview window Drag and drop the box...

Page 43: ...ng box for the detected face Select Enable face detector to activate the Face Detector Set threshold for detectio sensitivity When the settings are complete click Save button to save the settings or c...

Page 44: ...ox is you are using a mail server to receive event notification and image email Mail Server Enter the host names or IP addresses for your mail server Port Enter the port number for your mail server en...

Page 45: ...an email address and click the Test button to test that the mail servers are functioning and that the email address is valid When the settings are complete click Save button to save the settings or c...

Page 46: ...amera and the target FTP server Remote directory Specify the path to the directory where the uploaded images will be stored If this directory does not already exist on the FTP server there will be an...

Page 47: ...a date time suffix or a sequence number with or without a maximum value When the settings are complete click Save button to save the settings or click Reset button to clear all of the information you...

Page 48: ...port Enable alarm out If selected the output becomes activated for as long as the event is active Type Select a type of NO Normally Open or NC Normally Closed When the settings are complete click Save...

Page 49: ...utton to locate it Then click the Upload button Up to 3 audio files are available The total file size must be less than 512 KB Audio Alert Test When the setup is complete the audio output can be teste...

Page 50: ...edefined preset posi tion Check the box to enable the service and return to the Home position once the event has ended When the settings are complete click Save button to save the settings or click Re...

Page 51: ...am1 H 264 or MPEG 4 data Stream2 MJPEG data Stream3 H 264 or MPEG 4 data Pre event Enter pre event time value for the storage device pre recording Post event Enter post event time value for the storag...

Page 52: ...ed NFS like many other protocols builds on the Open Network Computing Remote Procedure Call ONC RPC system The CIFS screen displays as below Address Enter IP address for NAS device Remote Directory En...

Page 53: ...able the service XML Notification Setting Notification server URL The network address to the server and the script that will handle the request Notification server port The port number of the notifica...

Page 54: ...ox to enable the service Boost Setting You can set the condition in Normal and Boost mode Boot Stream Select a video stream for each condition in the drop down list Frame rate Select a frame refresh r...

Page 55: ...select message transmission type among HTTP HTTPS TCP and UTP URL The network address to the server and the script that will handle the request For example http 192 168 12 244 cgi bin upload cgi Port...

Page 56: ...a up to a max 15 events can be registered Click the Add button to make a new event map a popup window displays as below To change an existing event select that event and click the Modify button this s...

Page 57: ...an event has occurred the camera will boost the Frame rate and Bit rate from the normal condition to this boosted level for the duration of the event Check the box to enable the Function PTZ preset Se...

Page 58: ...o Focus is always active Manual Auto Focus is inactive Preset Setup Activate the PTZ Control Panel Preset Delete Delete selected Preset number Follow steps below to store the Preset positions 1 Click...

Page 59: ...Up to 12 characters Alphanumeric characters and space Repeat Select number of repetition from Continuous to 90 The default is Con tinuous Sequence Select either forward or backward sequence in the To...

Page 60: ...r Position Setup list select the desired Tour Position and click the Delete Position button Set Position Click the Set Position button then show the stored Presets or Home on drop down list Follow ste...

Page 61: ...pan tile and zoom using Control box The movement history is automatically recorded 2 Click Done button after you completed the camera movement program 3 Repeat step 1 for each desired Pattern number...

Page 62: ...med Preset or Tour for function Function None Preset Tour Function No Select Preset or Tour number for Home Function Waiting Time 10 600 Seconds Function Use Off On When the settings are complete clic...

Page 63: ...the pan and tilt speed of a camera Motor Setting Proportional P T Select On or Off When the settings are complete click Save button to save the settings or click Reset button to clear all of the infor...

Page 64: ...o vertically Auto When the camera reaches the floor directly above the moving object it will stop At that time release instantly and pull it down again to run the auto flip function When you use the p...

Page 65: ...in Check If you find the dome in the wrong position during operation execute this origin check by clicking Origin Check button and the dome camera will return to the right position after the origin ch...

Page 66: ...the Arrow and Zoom button in PTZ Control Panel click Set cell of Set column at any inactive row to create privacy zone 2 You can change the Title up to 12 alphanumeric characters 3 In order to hide o...

Page 67: ...ation after installation Device Name Configuration Enter the device name Location Configuration Enter the location information You can enter up to four locations When the settings are complete click S...

Page 68: ...e box to enable anonymous viewer login to the network camera without a user account When using the user account users have to log in at every access User List Setting This section shows how to registe...

Page 69: ...TP by default HTTP HTTPS HTTP HTTPS Upload Certificate To use HTTPS for communication with the network camera an official certificate issued by a CA Certificate Authority must be uploaded from your PC...

Page 70: ...ses All other IP addresses not in this list will then be allowed or denied access accordingly that is if the addresses in the list are allowed then all others are denied access and vice versa Also see...

Page 71: ...tup Protocol type Port number LZO compression usage and Renegotiation time as well as download Server certifi cate file Choose Protocol type between UDP and TCP UDP is preferred Type in Port number yo...

Page 72: ...ing Default Renegotiation time is 3600 seconds and 0 means no verification Upload CA certificate issued by Server 3 Select authentication method between User authentication and Machine authen tication...

Page 73: ...mputer Synchronize with NTP Server The network camera will obtain the time from an NTP server every 60 minutes Set manually Allows you to manually set the time and date Date Time Format Specify the fo...

Page 74: ...static IP address for the network camera check the radio button and then make the following settings IP address Specify a unique IP address for your network camera Subnet mask Specify the mask for th...

Page 75: ...ice information in the client software or SmartManager This is the camera name that will show up in the Site List in ViconNet Services HTTP port Enter a port to receive a service through the HTTP Defa...

Page 76: ...an address of the DDNS server Username Enter an ID to access to the DDNS server Password Enter a password to be used for accessing the DDNS server Confirm Enter the password again to confirm it Maxim...

Page 77: ...multicast operation Multicast destination IP Enter an IP between 224 0 0 0 and 239 255 255 255 RTP port Enter a value between 1024 and 65532 RTP TTL Enter a value between 1 and 255 If a network status...

Page 78: ...ust be installed on your workstation if running Windows XP To do this open the Control Panel from the Start Menu and select Add Remove Programs Select Add Remove Windows Components and open the Networ...

Page 79: ...ue is used to mark the traffics IP header When the marked traffic reaches a network router or switch the DSCP value in the IP header tells the router or switch which type of treatment to apply to this...

Page 80: ...d by a network related program or equipment without a limitation on the network bandwidth When the settings are complete click Save button to save the settings or click Reset button to clear all of th...

Page 81: ...he router in the field provided NOTES If you attempt to manually enter a port that is already in use an alert message will be displayed When the port is selected automatically it is displayed in this...

Page 82: ...and Domain Name System DNS or configure each computer s network settings manually which may be difficult and time consuming Zeroconf is built on three core technologies Assignment of numeric network...

Page 83: ...name in the Friendly name field NOTE Also known as zero configuration networking Bonjour enables devices to automat ically discover each other on a network without having to enter IP addresses or con...

Page 84: ...uage The language choices are English Korean French Russian and Chinese When the settings are complete click Save button to save the settings or click Reset button to clear all of the information you...

Page 85: ...will return all of the network camera s settings to the factory default values including the IP address Update Upgrade your camera by importing an upgrade file and pressing the Upgrade button During t...

Page 86: ...the Server Report button to get the important information about the servers status this should always be included when requesting support Parameter List Click the Parameter List button to see the unit...

Page 87: ...he Network Check button to get the information about the cameras network setting and traffic You can see the pop up window below Hardware Check Click the Hardware Check button to diagnose the cameras...

Page 88: ...will be provided as a popup window so that users can open and read it without needing to log in It will offer a description of the setting and Help page so that users can manipulate the network camera...

Page 89: ...ng the Reset button 1 Switch off the network camera by disconnecting the power adapter 2 Open the Micro SD card cover 3 Press and hold the Reset button SW1 on the board with your finger while reconnec...

Page 90: ...ages If images are very complex try limiting the number of clients accessing the camera Images only shown in black white Check the Video Image setting Blurred images Refocus the camera Poor image qua...

Page 91: ...tive maintenance allows detection and correction of minor that faults before they be come serious and cause equipment failure Every three month perform the following maintenance 1 Inspect all connecti...

Page 92: ...PEG Still Image DIS Yes Privacy Mask 12 Event Notification E mail FTP HTTP Server Event Notification Audio Alert Audio Alert Max 3 Pre recorded Voice File Selectable Login Authority Administrator Oper...

Page 93: ...IP66 Pan Range 360o Endless Pan Speed Preset Max 380o sec Tilt Range 100o 10o 90o PTZ Tilt Speed Preset Max 380o sec Function Preset 256 Tour 8 Pattern 8 Home Function Yes Defog Yes Video Tampering Ye...

Page 94: ...some affect both If the load on the CPU reaches its maximum this will also affect the frame rate The following factors are among the most important to consider High image resolutions and or lower comp...

Page 95: ...NORBAIN SD LTD 210 Wharfedale Road IQ Winnersh Wokingham Berkshire RG41 5TP Subject to change without notice Version 1 0 95...

Reviews: