21
7. Mechanical
7.1 Cabinet
Material: Plastic
Finish: Black
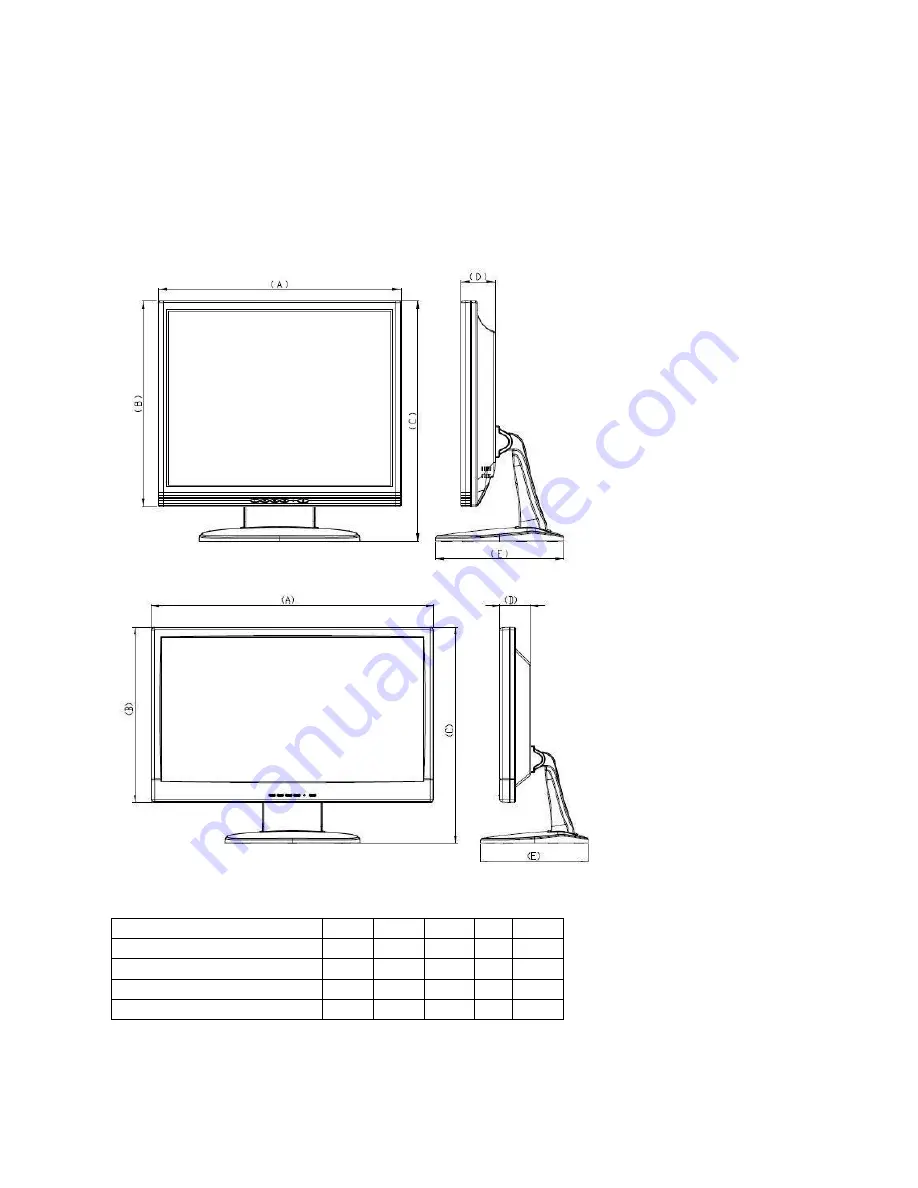
7.2 Dimensions
單位
:mm
Model A
B
C
D
E
VFS-215/HI-LITE15” 340
284
367
54
197
VFS-217/HI-LITE17” 371
325
376
54
197
VFS-219/HI-LITE19” 419
358
423
54
197
VFS-221W/HI-LITE21.5” 513 326
404
58
197


