Vista PVM27DEC Quick Start Manual Download Page 10

10 


Network Time Sync: Select network for synchronizing with time server.  


System Time: Not for synchronizing with network time server, set the device time; otherwise (applying for 

Daylight saving time), select DST. 


Time Zone: Select time zone for the system being installed.  


DST Start/End: For applying Daylight saving time, set the application period. 

3.2


Press 

Save 

button to save set value.   

3.3


Press

 Next

 to end Time/Date setting and move to the next menu 
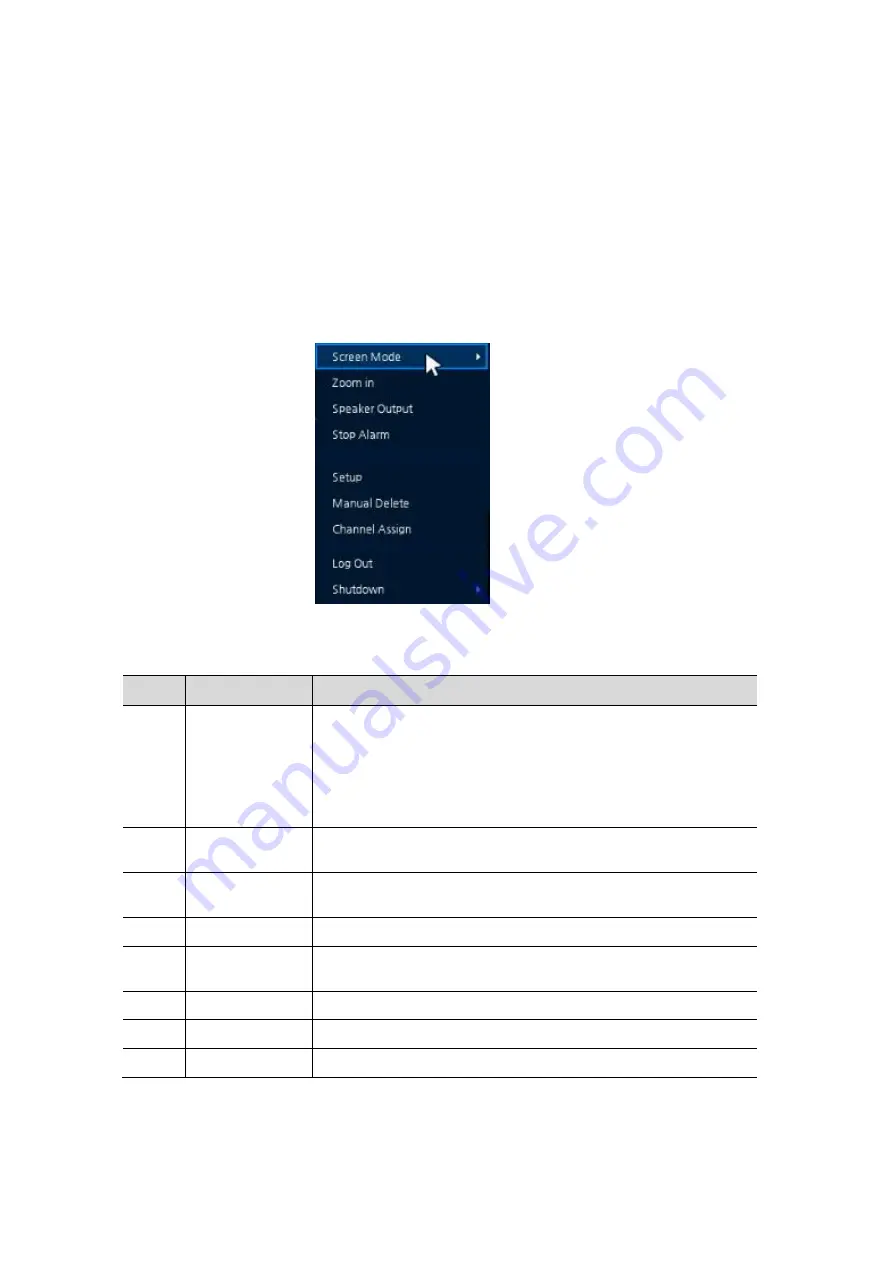
 

4. Quick menu


This chapter explains the Quick menu which is displayed on a right click of the mouse


Table Quick menu Item and Description 

No. 

Item 

Description 

Screen Mode 

Selecting the partition mode of live screen (Full, 2X2, 1+7, 3X3, 2+8, 
4x4, PIP and Save Sequence). 
User can change the channel display order by pressing and holding the 
screen. 
When the order is changed, the Save Sequence menu appears in the 
screen mode and user can select Save to save the sequence. 

Zoom in 

Magnifying selected live screen (Zoom out, 2 times, 4 times, and 8 
times). 

Speaker 

Output/Mute 

Turning on/off a sound speaker. 

Manual Delete 

Delete registered cameras. 

Setup 

Opens the main set up menu. For more information about setting menu, 
see section 

Error! Reference source not found.

 menu

Channel Assign 

Opens a pop-up menu for Channel Assign. 

Log in/Log out 

Log in/Log out. 

Shutdown 

Shuts down or restarts the device (shutdown, restart). 


Summary of Contents for PVM27DEC

Page 1: ...i Quick Start Guide Quick start guide for the PVM27DEC PVM32DEC...

Page 2: ...ting maintaining and troubleshooting this product refer to this document and any other documentation provided If you still have questions please contact Norbain Technical Support and Sales Norbain SD...

Page 3: ...wheeled bin mark symbolizes that within the European Union the product must be collected separately at the product end of life This applies to your product and any peripherals marked with this symbol...

Page 4: ...t that is powered through a polarized plug a plug with one blade wider than the other will fit into the power outlet only one way This is a safety feature If you are unable to insert the plug fully in...

Page 5: ...her hazards 15 SAFETY CHECK Upon completion of any service or repairs to the equipment ask the service technician to perform safety checks to verify that the equipment is in proper operating condition...

Page 6: ...DEC PVM32DEC must be performed by qualified service personnel in accordance with all local and national electrical and mechanical codes Carefully remove the PVM27DEC PVM32DEC and its accessories from...

Page 7: ...7 BASIC INSTALLATION 1 Remove the access cover 2 Connect ethernet cable to RJ45 port PoE IEEE802 3at 30W required 3 Replace access cover...

Page 8: ...VESA 200 x 100 mm Screw hole M6 x 10 mm on the rear Monitor OSD ACCESS Use either the buttons on the side of the PVM27DEC PVM32DEC EXIT Monitor Information Up dome Key Up Down scrolling the cursor to...

Page 9: ...Network setting screen WAN Port Select whether to use static IP or dynamic IP IP Address Subnet Mask Gateway DNS Port and RTSP port server As for dynamic IP enter information in each space 2 2 Press...

Page 10: ...n No Item Description 1 Screen Mode Selecting the partition mode of live screen Full 2X2 1 7 3X3 2 8 4x4 PIP and Save Sequence User can change the channel display order by pressing and holding the scr...

Page 11: ...Reload the list 2 Local Display registered image list 3 AVI Display media file list 4 List Displayed registered device list Drag drop the desired channel Drag the screen and drop it on the list to unr...

Reviews: