background image


10

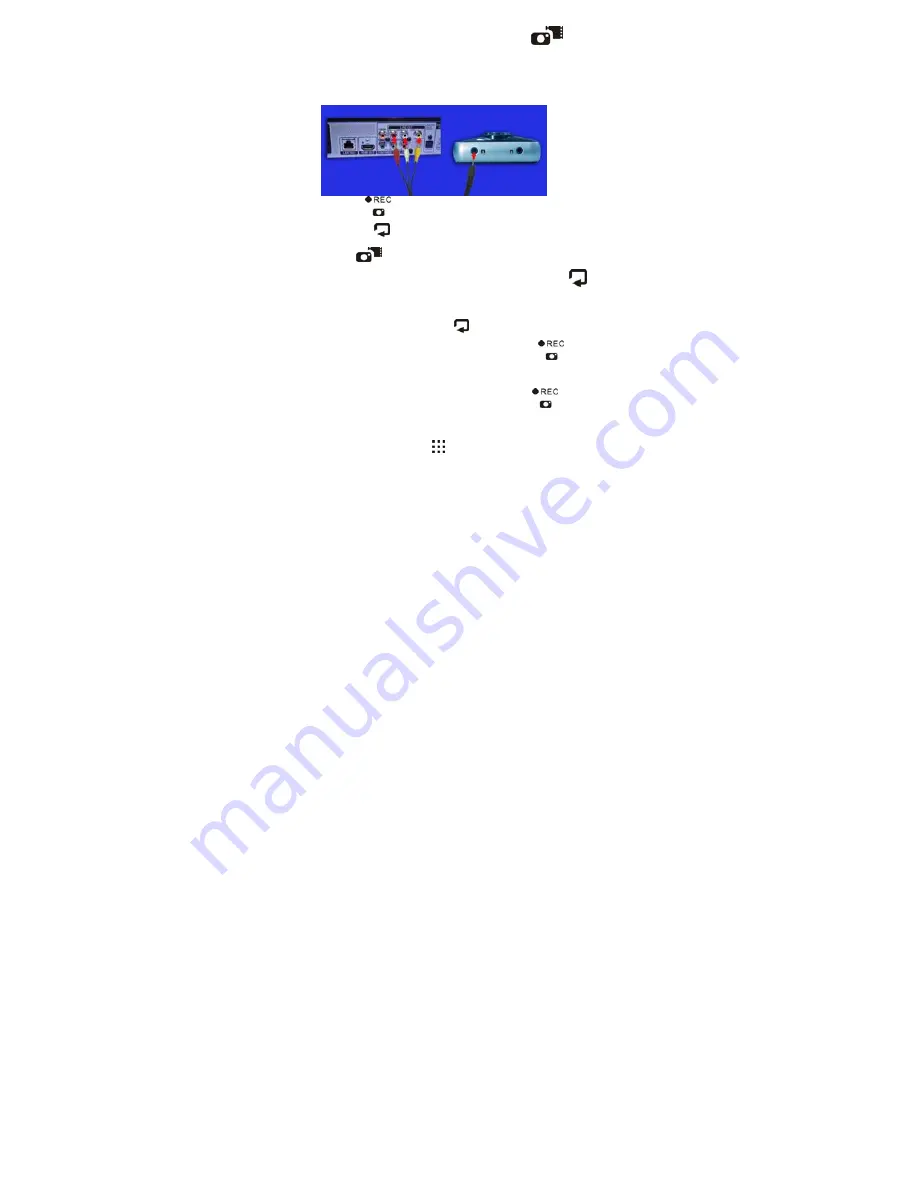
TV IN Mode: after startup, press the Mode Key   

  twice to switch to 

TV IN mode, start the DVD player, and connect the camcorder to the DVD 

player as shown in the following picture.   

1. Press the 

Record Key


  to start recording, and press it again to stop recording.


2. Press the 

Playback Key 

  for mute, and press it again to enable voice.


3. Press the 

Mode Key


  to quit TV IN mode.


Playback mode: after startup, press the Playback Key 

  to enter this 

mode 

1. Under this mode, press the

 Playback Key


  to browse multiple files, press the Left/Right 

Key to select a photo or record file, and press the 

Record Key


  to quit the mode of 

multiple file browsing and return to playback mode. 

2. When the current file is a Video file, press the 

Record Key


  to start playing video, 

and press it again to pause. When playing a video, press the Right/Left Key for fast 

forward/backward, press the 

Menu Key


  to return to playback mode, or press the 

Summary of Contents for DV-580HD

Page 1: ...Digital Video Camcorder DV 580HD User s Manual...

Page 2: ...accept any interference received including interference that may cause undesired operation For customers in Canada This Class B digital apparatus meets all the requirements of the Canadian Interferen...

Page 3: ...8 Starting the Camcorder 8 Recording and Photographing 8 Record Mode 8 Photograph Mode 9 TV IN Mode 10 Playback mode 10 Menu 11 Menu mode 11 Playback menu 14 System Menu Important Functions 16 Record...

Page 4: ...ons as a PC If it has no response during operation please take the following steps 1 Take out the battery 2 Reinstall the battery 3 Restart the device Accessories TV cable HDMI cable Lithium lon batte...

Page 5: ...5 Components...

Page 6: ...function of digital zoom in Record and Photograph Mode skip to the previous option in a menu interface page up under playback mode fast backward while playing a video under playback mode Right Key Pr...

Page 7: ...terface release in the direction indicated in the picture below to withdraw the connector 2 Connect the USB connector of the camcorder to a USB port of a PC 3 Slide the Power Switch to power on the ca...

Page 8: ...cted on it as shown in the picture on the right 2 After startup the LED lamp around the lens will give off blue light and the screen will enter record mode by default Recording and Photographing Recor...

Page 9: ...mode 1 Press the Right Key for the enlargement function of digital zoom press the Left Key for the shrink function of digital zoom 2 Press the Record Key to take photos 3 Press the Menu Key to enter t...

Page 10: ...quit TV IN mode Playback mode after startup press the Playback Key to enter this mode 1 Under this mode press the Playback Key to browse multiple files press the Left Right Key to select a photo or re...

Page 11: ...p to the previous option or press the Right Key to skip to the next option 2 Press the Record Key to switch among different settings of the menu items 3 Press the Menu Key or the Playback key to quit...

Page 12: ...12 2 Press again the Left Key and the blue option bar will disappear as shown below 3 Press the Record Key to skip to the menu of system settings as shown below...

Page 13: ...13 4 Press the Right Key to skip to the first item of the menu of system setting as shown below...

Page 14: ...menu or press the Left Key or Right Key to select DELETE or SLIDE SHOW function 2 The DELETE function includes three options yes delete a single file DELETE ALL delete all files and no do not delete...

Page 15: ...panese language environment Traditional Chinese Traditional Chinese environment Simplified Chinese Simplified Chinese environment 3 The DATE item is for setting the date Press the Record Key to increa...

Page 16: ...after 3 minutes 1 MINS shutdown after 1 minute 8 The LIGHT FREO item has 2 options 50HZ 60HZ 9 The STAMP item is for the setting of the display of date and time in records and photos Select ON to enab...

Page 17: ...WHITE B white balance item includes 5 options 1 AUTO automatic adjustment 2 FLUORESCENT for fluorescent light 3 TUNGSTEN for tungsten lights 4 CLOUDY for cloudy weather 5 SUNNY for under sunlight 4 Th...

Page 18: ...Photograph Mode The photograph menu includes the following items and functions 1 The SIZE item includes three options 3 M 5 M and 8 M 2 The EV item includes 13 options 0 0 3 0 7 1 1 3 1 7 2 2 1 7 1 3...

Page 19: ...item includes 3 options STANDARD SOFT HARD 6 The SHARPNESS item includes 3 options STANDARD SOFT HARD 7 The EFFECT item includes 6 options 1 OFF 2 VIVID 3 MONOCHROME 4 NEGATIVE 5 SEPIA 6 ART 8 The SEL...

Page 20: ...se in the direction indicated in the picture below to withdraw the connector 2 Connect the USB connector of the camcorder to an USB port of a PC 3 Slide the Power Switch to power on the camcorder 4 Do...

Page 21: ...and powerful tools Organize your media easily and create simple projects with editing tools There are endless ways to present and share worry free media file backup restore Click Media Impression 2 Se...

Page 22: ...otos then tags them with different scenes 3 Auto rating automatically detects and rates poor quality and high quality photos Ratings tags compatible with Windows Vista XMP support 4 Search media files...

Page 23: ...1 A quick Photo Viewer to view photos in a window 2 View photos in a slideshow mode or full screen mode with frequently used editing with background music and cool tools themes 3 Light weight Media P...

Page 24: ...a few clicks 2 Face beautify helps beautify the eyes mouth and skin of the face mouth and skin of the face 3 Creativity Text and clip art frames and edges color effects 4 Video Editing trim dynamic li...

Page 25: ...5 Burn slideshow and video as a VCD or DVD 6 Make Movie combine photos music and video with cool themes 25...

Page 26: ...deo to YouTube 4 Order Photo Prints Photo Book Mug Canvas T shirt Puzzle and Mouse Pad right in application 5 Stream photos music and videos to DLNA compatible players such as Sony PS3 TV DPF and mobi...

Page 27: ...Protect 1 Archive media files to CD DVD 2 Back Up Restore from to CD DVD external hard drive and online websites available in early 09 27...

Page 28: ...est Corporation is proud that you have chosen its product and hopes you will enjoy sharing a clearer vision of your memories and special moments captured with your new camera with friends and family f...

Reviews: